• The move to the new server is done. There are some software and database maintenance updates in process. This has us passing the hat around to help out. We appreciate any donations. Seriously, even a dollar helps. The payment page may be found here - https://www.audiokarma.org/support.html

DCM Time Window Overhaul

I am going to send the driver to a speaker repair place I spoke to. He says he can rebuild it. End caps are completed. Time to start putting things back together. I think I am going to mount the c/o on the side of the cabinet below the tweeters. If I mount it on the top the air core inductors are going to be very close to the woofer magnets. Any thoughts??

What about the bottoms? Any problems running longer wiring?

I could mount the c/o's on the bottom, but I think the pvc ports will not allow enough room. Also I would like to be able to get at them easily if need be. I think I will install 4) 8-32 hurricane nuts, 1 at each c/o board corner and use a machine screw to mount them in place. To get at them or remove them, you will just have to unscrew one of the woofer and reach in to get at it. Waiting on some hurricane nuts and wood screws to start the re-assembly.
 
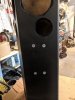
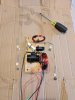
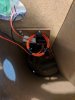
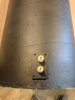
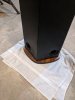
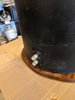
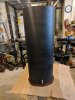
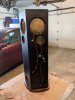
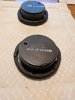
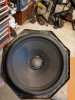
I received the repaired driver yesterday. I sent it to Sound Speaker Repair in Tuscon. Voice coil was open so he had to do a recone/rebuild. Fast turn around time. Dust cover does not match the original, but not much of a choice. I installed the hurricane nuts to mount the c/o board. I drilled holes to mount the drivers with screws. I used some plexiglass I had laying around and fashioned a mounting plate for the binding posts. I spray painted it flat black. I re-attached the bottom of the cabinet with Power Grab and used a finish nailer to complete the re-install. I then used 3 wood screws to attach the bottom end cap. I decided to not use any adhesive, as the screws are holding tight. I used dabs of Power Grab to fill/seal the little nail holes that held the sock in place. I am going to use velcro to attach the sock. Gasket material has been applied to the drivers, so they are ready to mount. Next steps are to put the dampening material back in place, re-attach the top of the cabinet, screw the top end cap in place and mount the drivers. Hopefully finished in the next couple of days. A lot of work and time spent figuring out things step by step. Second TW should go a lot faster. Hurricane Nuts Installed.jpg Crossover Ready to Mount.jpg Crossover  Mounted.jpg New Binding Posts and Mounting Plate.jpg New Binding Posts and Mounting Plate 2.jpg Bottom Re-Attached.jpg Bottom End Cap Screwed in Place.jpg Binding Posts Mounted.jpg Binding Posts Mounted 2.jpg Getting Close.jpg Hurricane Nuts Installed.jpg Crossover Ready to Mount.jpg Crossover  Mounted.jpg New Binding Posts and Mounting Plate.jpg New Binding Posts and Mounting Plate 2.jpg Bottom Re-Attached.jpg Bottom End Cap Screwed in Place.jpg Binding Posts Mounted.jpg Binding Posts Mounted 2.jpg Getting Close.jpg Hurricane Nuts Installed.jpg Crossover Ready to Mount.jpg Crossover  Mounted.jpg New Binding Posts and Mounting Plate.jpg New Binding Posts and Mounting Plate 2.jpg Bottom Re-Attached.jpg Bottom End Cap Screwed in Place.jpg Binding Posts Mounted.jpg Binding Posts Mounted 2.jpg Getting Close.jpg Hurricane Nuts Installed.jpg Crossover Ready to Mount.jpg Crossover  Mounted.jpg New Binding Posts and Mounting Plate.jpg New Binding Posts and Mounting Plate 2.jpg Bottom Re-Attached.jpg Bottom End Cap Screwed in Place.jpg Binding Posts Mounted.jpg Binding Posts Mounted 2.jpg Getting Close.jpg
 
Looking great! Terrific photos of the interiors. You don't see this view often. I also used velcro (hook side) strips. The foam socks will stick pretty well and can be removed easily if needed.
You'll be quite happy with their sound.
Curious to see the reconed woofer.
 
I googled Dreps Cron Maze, nothing...

Nah, you won't. Here is Steve Eberbach, founder of DCM, talking to a Michigan audio club. Go to around 6:00 and you'll get your reference. It helps if you're old, like me, and remember the Smothers Brothers and Pat Paulsen.

 
Last edited:
Very nice job on the restore, gives me nice guide if I ever decide to open mine up. Mine a bit older (serials 650 and 673) but I would guess the same build structure.
 
Well done indeed! I always preferred to the time window sound to the Time frames.

600 and above always seemed a bit sloppy to me. Although I have never heard the 1Ks.

I agree with Glen. Love to see the reconed driver.
 
I owned TF2000's for about a year. Room was not correct for them. I couldn't give them enough amps. The sound was good, but I've always been a small speaker guy. While they were superb examples of that rare speaker, I let them go. Happier with my TW1's (especially considering the low WAF factor of speakers almost 6' tall).
 
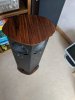
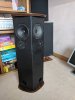
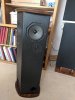
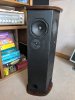
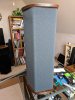
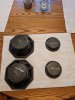
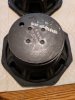
First TW completed. Top of cabinet re-attached and sealed. Top end cap re-attached. Drivers screwed in. New sock attached with velcro. It is charcoal gray instead of black but it will do for now. WIll do the other one in the upcoming weeks and let them burn in.

Top of Cabinet Re- Attached.jpg Top of Cabinet Sealed.jpg Refinished Top Endcap.jpg Back Together.jpg Back Together 3.jpg Back Together 2 - Re-Coned Driver.jpg Re-Coned Driver.jpg Neew Sock.jpg New Sock 2.jpg Old and New.jpg
 
First TW completed. Top of cabinet re-attached and sealed. Top end cap re-attached. Drivers screwed in. New sock attached with velcro. It is charcoal gray instead of black but it will do for now. WIll do the other one in the upcoming weeks and let them burn in.

View attachment 1150563 View attachment 1150564 View attachment 1150566 View attachment 1150567 View attachment 1150568 View attachment 1150569 View attachment 1150570 View attachment 1150574 View attachment 1150577 View attachment 1150578
Did you listen to it and are you happy?
 
Listen to them briefly. Sound good. My experience with rebuilt c/o's in the past is that they need 200-300 hours to burn in and really open up.
 
First TW completed. Top of cabinet re-attached and sealed. Top end cap re-attached. Drivers screwed in. New sock attached with velcro. It is charcoal gray instead of black but it will do for now. WIll do the other one in the upcoming weeks and let them burn in.

View attachment 1150563 View attachment 1150564 View attachment 1150566 View attachment 1150567 View attachment 1150568 View attachment 1150569 View attachment 1150570 View attachment 1150574 View attachment 1150577 View attachment 1150578
The grey sock looks nice!
Regarding crossover "burn in", caps burn in immediately, the moment current passes through them. What's adjusting are your ears! The rebuilt woofer looks very good and your wood cap are in way better condition than mine were when I found my TW's. You're doing a great job, carry on!
Glenn
 
Thanks Glenn. I have to say my Polk RTA 12b's at about the 200 hour mark after the c/o's were rebuilt had an absolutely dramatic change. From the low end to the highs. I even had a friend that had heard the speakers right after they were rebuilt and then come over a week or so after that and the first thing he asked was "what did you do the the speakers?" He was amazed. My other rebuilds have had similar results, but the 12's were the most dramatic. Just my experience FWIW.
 
WoW. That's a great looking 'overhaul'; great job. Those are def classic speakers & worthy of the work you put in them. Thanks for the share.
 
Back
Top Bottom