• The move to the new server is done. There are some software and database maintenance updates in process. This has us passing the hat around to help out. We appreciate any donations. Seriously, even a dollar helps. The payment page may be found here - https://www.audiokarma.org/support.html

Dynakit ST70

Tucker_515

New Member
Hey everyone,

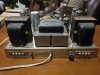
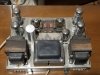
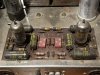
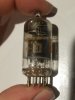
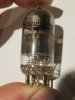
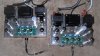
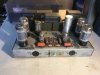
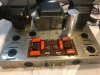
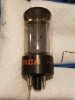
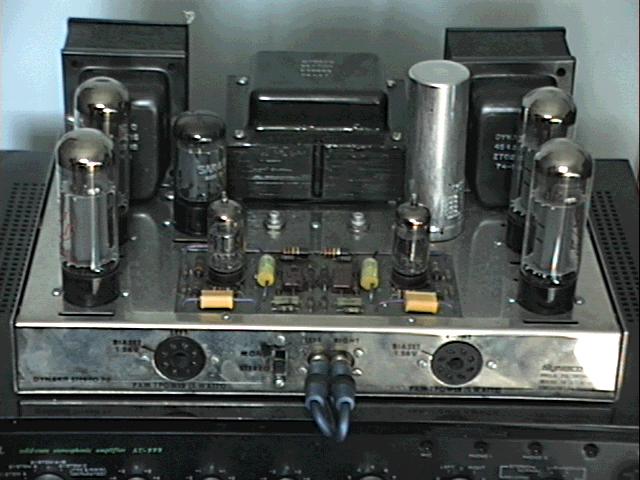
I just purchased a Dynakit ST70 Amp along with a PAS-2 PreAmp, and FM-1 Tuner. I am looking to restore them to original condition and this is the thread tor the ST70. I am looking for tips, tricks, and help to bring it back to life. My intentions are to replace capacitors and keep the original boards. I want to listen to this as it would've sounded brand new. The story I was given, is that 5 years ago it was in working condition, and then stored in a climate controlled storage unit until present. As you can see, it is a little dirty, but nothing crazy. The transformers are a little rusty, but still seemingly in good shape. For tubes, the EL34's are RCA made in England, the 7199's are RCA made in USA, and the GZ34 is made in Japan, I don't have the make yet. The 7199's are pictured, and one has some soot on one side of the glass midway up. I was able to easily get them out, and store wrapped up in a sheet of paper towel, the others seem to be stuck. Can I spray a lubricant on the pins? They are really in there, so I left them for now. That's all I have for tonight, hopefully I get some suggestions about how to get the other tubes out, and then I will take the bottom cover off and post more pictures. Any tips or tricks for getting this thing back to working would be helpful. I just ordered a Variac and have a dim bulb tester as well. I do not have an isolation transformer, oscilloscope, or soldering station as of yet. And obviously I have a multimeter, although it is a commercial duty one that has only auto range, which I find annoying. Any recommendations would be appreciated as well!
 

Attachments

  • 20200520_210647.jpg
    20200520_210647.jpg
    60.4 KB · Views: 208
  • 20200520_205649.jpg
    20200520_205649.jpg
    102 KB · Views: 212
  • 20200520_205708.jpg
    20200520_205708.jpg
    102.3 KB · Views: 210
  • 20200520_205555.jpg
    20200520_205555.jpg
    120.9 KB · Views: 215
  • 20200520_205607.jpg
    20200520_205607.jpg
    130.2 KB · Views: 210
  • 20200520_210708.jpg
    20200520_210708.jpg
    67.3 KB · Views: 204
  • 20200520_210931.jpg
    20200520_210931.jpg
    61.3 KB · Views: 203
Register to hide this ad
Looks very nice! From the top, it seems to be unrestored. Do you have any shots of the underside? I suggest taking a look at my restoration article regarding the ST-70 for tips on how to restore it to stock condition.

The 5AR4 is likely a Matsushita, the same as the Realistic "Lifetime" tube which was installed in my own ST-70 when I got it. I figured that someday, it'd fail and I'd be able to take it into a Radio Shack store and see, for sh*ts and giggles, what would happen when I asked for a replacement. Of course, it turned out that the tube has outlived (almost) the entire RS chain, so that probably isn't happening.......... :dunno: :rolleyes:
-Adam
 
Last edited:
It's best to not remove tubes from their sockets unless you absolutely have to. That being said, removing octal tubes shouldn't require any tools or lubricants. Grip the base, and gently twist or rock as you pull upwards. Having a tight socket is better than a loose one, as loose connections can cause red plating, as I've been experiencing with my own ST-70, or other intermittent issues.
-Adam
 
You can spray 5-56 or similar under the tube sockets. Then leave it for a while.
When loosening the tubes, try a gentle rocking movement first then while rocking pull
carefully. To much pulling and the glass will separate from the socket. If it wont get up,
wait a day or so and try again.

Do get the original build manual, it has everything you need !
AS for capacitor replacements; restrict yourself to a minimum, one at a time. Most of them ( all?) are
probably fine. Most problems occur when all out replacements have gone wrong.
If the amp starts ok, then limit yourself to checking / adjusting bias .
 
And -- If/when you do replace any components on the PC board, be very careful, as the traces can lift very easily from the board. So for example, when removing a component, don't free one end, and then bend the component up to grab it better when removing the other end. The process of bending the component up while one end is still soldered to the board can very likely loosen or even more likely, break the trace it is still connected to. Therefore, when removing a component, carefully remove each lead a little bit at a time in an alternating fashion, so that as you are lifting the component off the board, its leads still retain their original form from when it was installed on the board. Then, clean the traces of all solder at the holes where the component leads attach to before inserting the leads of the new component, and you'll be fine. Resist the temptation to use overly large replacement parts that are larger than the space originally allocated for them.

Good luck with your ST-70!

Dave
 
Thanks for the replies!

I will try and get the tubes out tonight and send more pictures. Before I try and fire it up, I will definitely replace the two dc bias filter caps, because they look easy and are inexpensive. I don't know whether or not I should do the multi can capacitor unit right away. It is a little pricey at 40 bucks, but the previous owner said it had a slight hum, which makes me believe those caps could be a problem. It's not a big deal, as I would want to replace those caps anyways before I would use it.
 
Thanks for the replies!

I will try and get the tubes out tonight and send more pictures. Before I try and fire it up, I will definitely replace the two dc bias filter caps, because they look easy and are inexpensive. I don't know whether or not I should do the multi can capacitor unit right away. It is a little pricey at 40 bucks, but the previous owner said it had a slight hum, which makes me believe those caps could be a problem. It's not a big deal, as I would want to replace those caps anyways before I would use it.
I would say: don't change the caps, turn it on, watch bias during warm up, and listen to some music . Then if it
work and you deem it needed, change he bias caps. Note polarity. Or even better, get a bias kit from
dynakitparts then you will replace the se rectifiera too.
Changing several components "in the blind" is a common way of gettin into trouble.
 
I would say: don't change the caps, turn it on, watch bias during warm up, and listen to some music . Then if it
work and you deem it needed, change he bias caps. Note polarity. Or even better, get a bias kit from
dynakitparts then you will replace the se rectifiera too.
Changing several components "in the blind" is a common way of gettin into trouble.
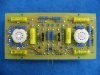
Personally, I feel there's no harm in changing out the molded-paper 'Black Cat' capacitors on the board, as they're fairly simple to replace if you're careful, and are a known trouble point. At the least, the 0.1µF coupling capacitors should be replaced with modern film capacitors, and while you're doing that, you might as well replace the 0.05µF capacitors as well. Using desoldering braid (aka solder wick) reduces stress on the foil traces versus other methods of desoldering.

Also, while the OP is replacing the bias filter capacitors, he might as well replace the selenium rectifier, as they tend to go weak over time. Use a 1N4004 or larger silicon diode, being sure that the striped end of the new diode is connected to the red/black striped wire from the power transformer; one of the lugs of the old selenium rectifier may be used as a tie point, but not both. Alternately, the selenium rectifier can be removed, and a terminal lug strip can be installed in its place to mount the new diode.

With regard to the filter capacitor can, it may not be absolutely necessary to replace it right now, but it's a good idea to do so, as its failure may damage the power transformer, rectifier, or other components. A 120Hz hum in the audio is a good indication of its failure, but they sometimes fail without any warning. A modern replacement can be purchased from Dynakit Parts, among other sources.
-Adam
 
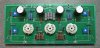
If you do have problems with soldering eyes or traces lifting on the old board, new replacement boards are available. Some are wired to use easier to find pentode driver tubes. The circuit is the same, just modified for the different tube due to pinout.
 
Congrats on the new amp!

I just finished restoring my 2nd Dyna ST-70. I added the VTA PCB mods to both, which I highly recommend. You may not be looking to sink much money into it, but when done the VTA mod makes it perform at the level of much more expensive amps....really a great sounding amplifier. A new fully assembled VTA ST-70 runs about $1300, which is a bargain for its performance level.

The blank VTA PCB is about $35.....a PCB with parts is $85, fully assemble is $125. Their instructions and support is top rate. Bob Latino hosts a Dynaco forum that has loads of info, and he quickly answers most questions personally, which I found very reassuring along the way. You'll find several of the folks here helpful too. Nothing overly difficult about it if you can solder. When you do tear into, take some pics before, during, and after to use as a reference.

I'm now enjoying those amps more than ever, and have quickly forgotten about my initial reservations about putting money into them. Good luck to you.

000_3479.JPG VTA6.jpg s-l1600.jpg 000_3686.JPG000_3745.JPG
 
Last edited:
Congratulations! It's in great shape. I'm hoping to come across a ST-70 during the summer months. Those 500v pencil caps come in handy for a can replacement. Enjoy, I'm green with envy....
 
If you do have problems with soldering eyes or traces lifting on the old board, new replacement boards are available. Some are wired to use easier to find pentode driver tubes. The circuit is the same, just modified for the different tube due to pinout.
This is what I did with mine, the OEM Laurent driver circuit is actually quite good. I used the 6GH8 board from Vintage Electron.
s-l1600.jpg
Long, but worth reading;
https://audiokarma.org/forums/index.php?threads/dynaco-st-70-base-line-testing.578485/
 
Last edited:
That's really good to know. It's cool to have a reasonable backup if something goes wrong, which, hopefully it will not! I will be pulling the bottom cover and posting pictures, hopefully tonight!
 
These are great amps for restoration; they are well supported and documented, and parts are easy to find.
I restored my Dynakit ST-70 last year, and it appeared to be completely original, other than a couple Orange Drop caps for each channel on the board and some ugly RCA jacks on the front. It even has a Dynaco branded 5AR4, Tung-Sol 7199's, and Philips / Siemens 6CA7 outputs (all US made). A couple output tubes were really hard to get out, and one was stuck. I don't know if this is recommended, but I stuck the widest, flattest screwdriver I had between the tube base and socket as far as I could. I then lifted up on the screwdriver handle, repeated on the other side of the socket, and the tube came out easily. I used really small brushes and liquid Deoxit to clean the contacts on all the sockets and tubes to ensure good contact.
Here it is when I got it home from Goodwill:
Bare 1.jpeg

I bought a kit that contained various caps, resistors, and diodes (to replace the selenium rectifier) for the underside components. I splurged on a hardware kit that consisted of all new screws, washers, nuts, etc since the ones on my amp were all fairly rusty. I replaced the multi cap, which costs a bit more than re-stuffing it. For my first amp refurb, I wanted to keep it all as straightforward as possible. I replaced the other two caps on the board with Orange Drops.
Here are the results:
Bottom.JPG Top.JPG
IMG_0281.jpg
I'm very happy with how it turned out and use it almost daily in my main setup. I read the suggestion to use some lesser tubes in the amp while working on it so as to not damage the better originals. I bought a set of JJ EL34's and 5AR4 for this purpose. I left the 7199's in, as there's not a cheap sub for these. This was good advice, as I short-cycled the amp (powered off and then back on quickly) and blew the 5AR4 and fuse. I probably spent around $200 on refurbing this amp, and almost half of that was the temporary tubes, which is fine with me, as I now have spares. If you need it, I can send you a list of the parts I used to make it easy.
 
Last edited:
Vintage Electron is an interesting place that doesn't get a lot of attention. I see them, in a way, as the closest connection today to the original Dynaco company. When Dynaco went out of business some time in the early 1980s IIRC, a company called Stereo Cost Cutters purchased Dynaco's remaining inventory and subsequently offered original amps, preamps, parts and kits for a while. They changed their name a couple of times to Sound Values and then Sound Valves. When they eventually went out of business, I believe Vintage Electron bought what they had left of the original Dynaco parts inventory. Last time I looked, you could still see some in their eBay store, but the PC boards are new production.
That's good to know. I see complete boards listed that differ only by using 6GH8A instead of the original 7199's. This would be a good option if one wanted a simple drop in replacement for an original, unrestored board and didn't already have 7199's.
 
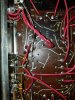
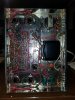
Alright guys, I have pictures!

Regarding the tubes being stuck, I am totally an idiot! I thought all of the tubes were full glass, like the 7199s, so I held the base and pulled the glass. Luckily I didn't pull hard and hurt anything. When I grabbed the base, all of the tubes came up beautifully and smooth, with just the right amount of resistance. I stored them wrapped in paper towel and put in a padded box, I don't know if there is a preferred way to store them or not.

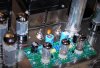
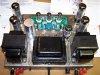
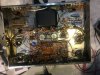
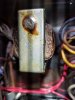
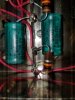
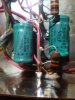
Anyways, the inside of this thing is beautiful. Super clean, besides the choke, that thing looks nasty. Is it okay to look like that? I will test it out before I use it. Also, the bias filter caps have maybe been replaced? The factory ones were 50V I believe? These are Micromite Electrolytic 50 uf 75 V.

The fuse is the correct 3 amp Busman.

Also, the 5Z34 is an RCA, but made in Japan unlike the others.

@David_NC, when you get a chance, please send me your parts list, that would be super helpful!

If you guys want any more pictures of anything, please let me know!
 

Attachments

  • 20200521_200555.jpg
    20200521_200555.jpg
    95.7 KB · Views: 78
  • 20200521_200614.jpg
    20200521_200614.jpg
    142.3 KB · Views: 79
  • 20200521_200546.jpg
    20200521_200546.jpg
    103.6 KB · Views: 77
  • 20200521_200059.jpg
    20200521_200059.jpg
    66.3 KB · Views: 78
  • 20200521_200402.jpg
    20200521_200402.jpg
    134.1 KB · Views: 77
  • 20200521_200431.jpg
    20200521_200431.jpg
    94.6 KB · Views: 77
  • 20200521_200445.jpg
    20200521_200445.jpg
    92 KB · Views: 76
  • 20200521_200620.jpg
    20200521_200620.jpg
    162.2 KB · Views: 76
  • 20200521_200040.jpg
    20200521_200040.jpg
    69.3 KB · Views: 77
Looks very nice! I believe I used 47µF 160V electrolytics to replace the bias filter capacitors in my ST-70, as it's what I had lying around. Actually, pretty much everything I used to restore my ST-70 were parts I had lying around; note the very much un-matched capacitors on the driver board:
st70_3.jpg


The waxy buildup on the choke may be due to the filter capacitor can being on its way out. When I got my pair of Dynaco Mark IIIs, the choke in one of the amps had obviously dripped some of its wax, and the amp gave off an odd smell when turned on. After replacing the filter capacitor cans in both Mark IIIs, the choke worked fine, but it still smelled after the amp warmed up. I replaced the choke with a modern replacement from Dynakit Parts, but I'm pretty sure it would've continued to work OK with the old one. At least the amp doesn't stink anymore.
-Adam
 
Again i repeat my recommendations to avoid and changes or replacements until you have a working amp
Many amps has costed their owners a lot of money caused by reckless part replacements that has
gone wrong.

Repairs is another thing, if the amp fails to work then repair is needed, but repair does not mean to
change parts randomly until it seems to work, repair is ( in my world) the process of isolating the
failing component by deduction and measurement, combined with knowledge of the circuit and
reducing the probable causes to one.

When the amp is working, time comes to preventive maintenance, where components with limited life
is checked and or replaced. The first that comes to my mind here is the EL34, then the B+can-cap.
https://www.dynakitparts.com/shop/multi-section-capacitor-1-2-3-4-5/

The bias circuits ( se rectifier + caps) has very few failures, but as Se rectifiers are extinct many
people chooses to replace. Then i suggest you get a complete kit from dynakitparts.com :
https://www.dynakitparts.com/shop/st-70-bias-circuit-kit/

The 7199 tube might after many years develop hum due to leakage between filament and cathode. Nothing
to do here, replacements are needed. You can obtain "new" but they are usually pricey. Or you can
use alternative tubes ( 6U8, 6Bl8 ECF80, ECF82 ) and adapters that mounts between tube and socket
to adapt for the different pinouts. Or, but a complete new board that already is ready for the alternative
tubes :
https://www.dynakitparts.com/shop/pc-3b-st-70-mf-resistors/

Most important, always have speakers or a proper load resistor connected. Always check bias as per the
manual after each work, also periodically ( ones a month initially, annually when everything works fine)

And do watch out for the lethal voltages. A discharging resistor with leads and clamps is a lifesaving
toll, clipping on ground and the can-cap each time the amp is opened might save your life. 4.7k 5w is a suggestion.
 
Having done one of these last fall I would recommend buying a few tools if you don’t already have them: a multimeter, capacitor meter and variac. All three can be had on Amazon for around $100. With these you can check the health of the original parts and rebuild these amps properly and efficiently.

The quad cap is likely bad but you won’t really know without checking it.

Definitely download the assembly manual.

These are really nice amplifiers and I am very content with mine.
 
By this point, the newest can capacitor in an original ST-70 is at least 40 years old, and given that the average lifespan of an electrolytic capacitor is 10-20 years, they're all sure to be living on borrowed time by now. Also, not all capacitor checkers have the ability to test them at full rated voltage, which can affect how they test. At this point, it's better to be safe rather than sorry, especially since a failure of one or more sections could take out valuable components up to and including the power transformer.

With regard to the rest of the capacitors, the molded-paper capacitors are a known failure point, and should be replaced with modern film capacitors of the same or similar values. Modern film capacitors are far more reliable, and are fairly cheap unless you go for the fancy types, which I don't see as necessary. Mica and ceramic capacitors are fairly reliable, and should be left alone unless there is a reason to suspect them.
-Adam
 
Back
Top Bottom