• The move to the new server is done. There are some software and database maintenance updates in process. This has us passing the hat around to help out. We appreciate any donations. Seriously, even a dollar helps. The payment page may be found here - https://www.audiokarma.org/support.html

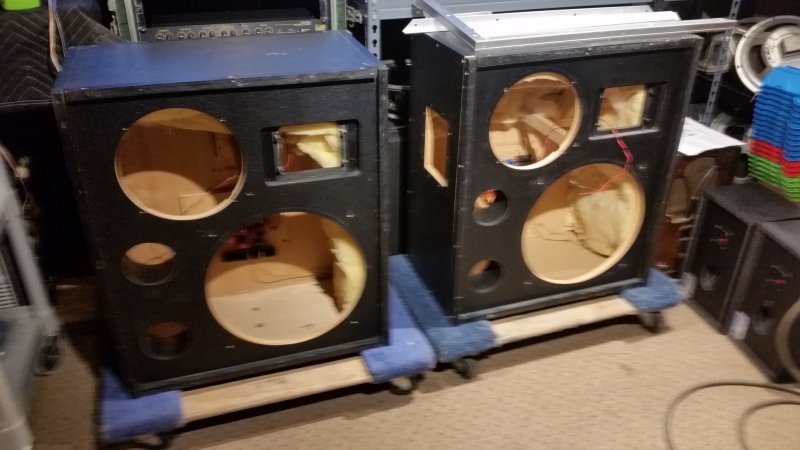
EV S15-3 Re-build and Step Down Frequency questions.

I had a pair of the S15-3s when I did some DJ work. Bought them in 1980 and carried them everywhere I moved until about 1987. I used them in the living room too. That VMR mid is special as is their mid horn in the Sentry IIIs. I loved them. Nice project. I'm following along.
 
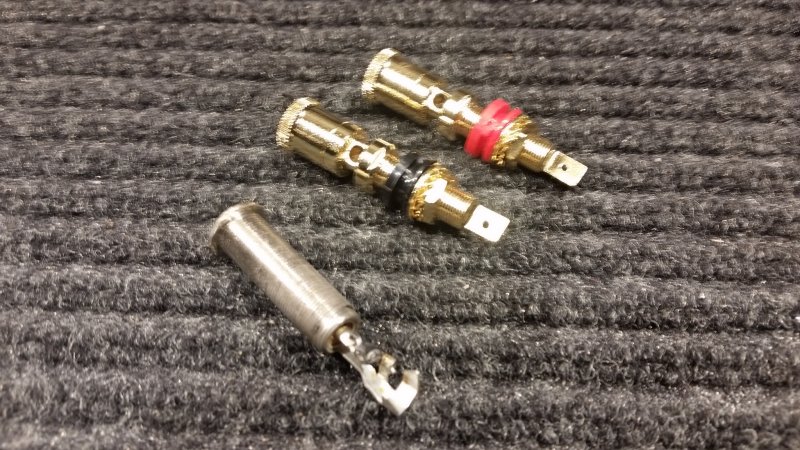
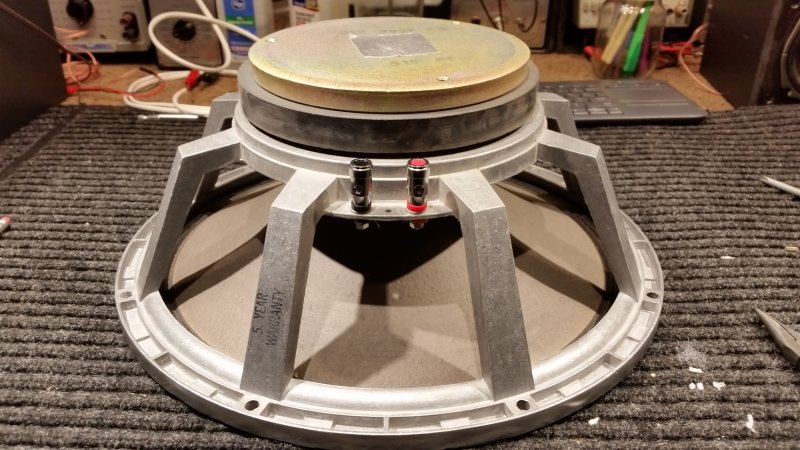
These are the BIG binding posts I am replacing the stock wimpy 1/4 phone jacks with.
Look at how thin and flimsy that 1/4" jack is, It's a good thing the speaker was only rated at 150W. What's even more crazy is the speaker allows for dasy chaining multiple cabinets together. What could go wrong, But hey those were the days before speakon connectors.;)

The new binding posts will give both a much better electrical connection but will also provide a better mechanical connection as well, Besides if I am going to go through all this work to fix-up these speakers I can't leave a crappy 1/4" jack on there:)


As I like to say "Small Improvements Along The Way Lead To A Big Finish At The End Of The Day"
 
Last edited:
These are the BIG binding posts I am replacing the stock wimpy 1/4 phone jacks with.
Look at how thin and flimsy that 1/4" jack is, It's a good thing the speaker was only rated at 150W. What's even more crazy is the speaker allows for dasy chaining multiple cabinets together. What could go wrong, But hey those were the days before speakon connectors.;)

The new binding posts will give both a much better electrical connection but will also provide a better mechanical connection as well, Besides if I am going to go through all this work to fix-up these speakers I can't leave a crappy 1/4" jack on there:)


As I like to say "Small Improvements Along The Way Lead To A Big Finish At The End Of The Day"
Great project, I'm following with a keen intrest. I too am fairly new to the Electro-Voice experience and am just simply amazed with the sound. Todays, speakers don't have anything over on these designs that go back to the 50's ! I find it amusing that guys from my dad's error were duped into gitting rid of their low power tube stereos in the late 60's, for the "state of the art" solid state high power receivers with inefficient speakers. If you ask me the only improvements where their profits.
 
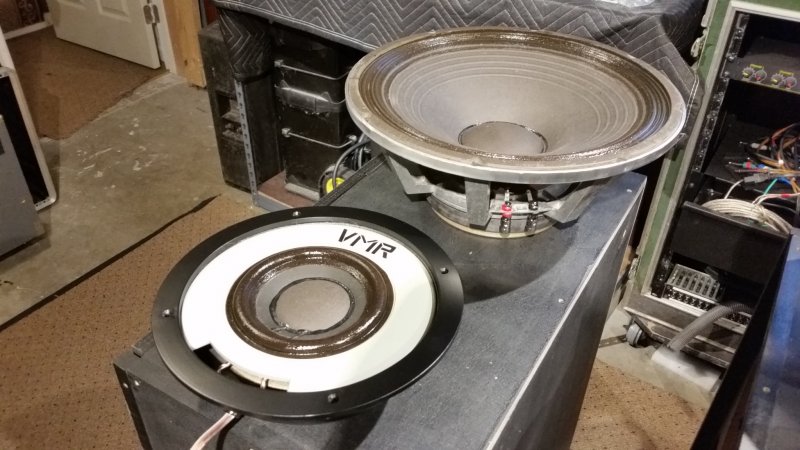
Today I decided to work on the VMR mid-ranges. My VMR's work perfect but do need the cone edges re-doped.
So one of the things that I wanted to do was upgrade the wire going to the VMR. The stock wire is just 24awg witch is generally fine but remember each small improvement adds up.

WARNING:So first I will say I don't recommend messing with your VMR as it is easy to damage. Some VMR's drivers won't come out of the metal housing so easy or may even be glued together. The plastic face can break easy and then you are screwed.
In my case I have 2 spare VMR's so I do have back up if something were to go wrong.

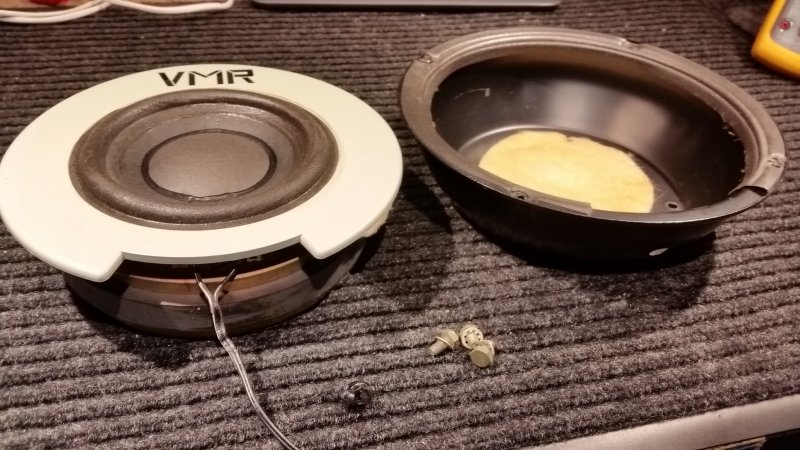
First I remove the strain relief holding the wire to the VMR with pliers, then remove the bolts on the back of the VMR. I use 2 small blocks of wood to lay the VMR facedown without damaging the cone.
Then I carefully lift the housing up and away from the driver, not easy because of the housing is steel and wants to stay on that magnet. If yours is glued I would say stop and just leave it alone.
I clipped off the old wire noting the polarity of the speaker.
I soldered new 14awg wire to the drivers terminals.
Then enlarged the hole for the strain relief and replaced the strain relief with larger one to allow for the bigger wire.
Then feed the new wire back through the housing and re-assemble.

There are 2 pieces of fiberglass insulation inside the VMR, one is a 1" X 1" X 8" strip wrapped around the gap between the faceplate and magnet structure.
The other is 4" in diameter by 1/2" thick.
I will be replacing the Fiberglass with Poly-Fill.
There is also a rubber seal between faceplate and housing. I will replace and use new butyl rubber.

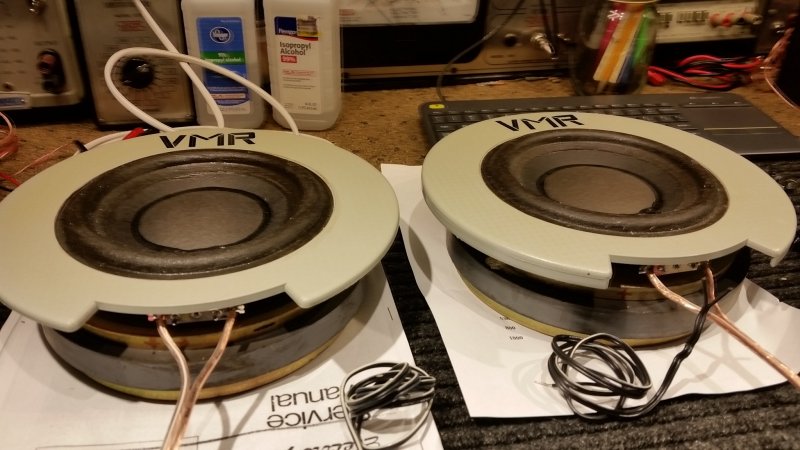
Here are before and after pictures of the work done.
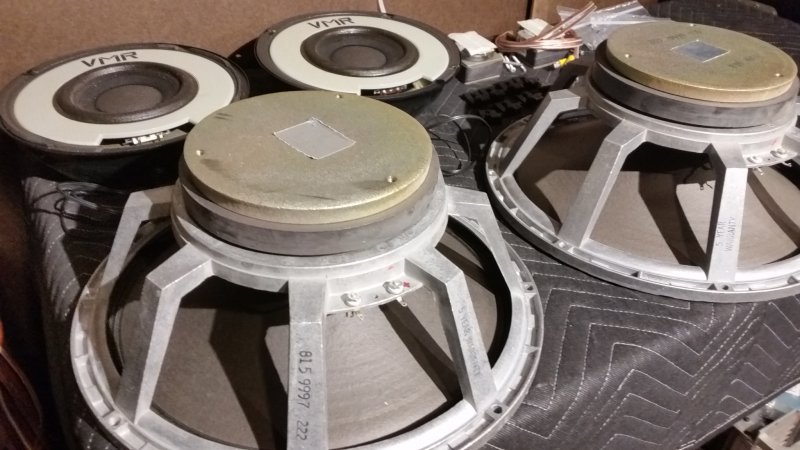
BTW look at the size of those magnets they are bigger than the speaker cone! EV was not playing around when they created the VMR.
 
Last edited:
Great project, I'm following with a keen intrest. I too am fairly new to the Electro-Voice experience and am just simply amazed with the sound. Todays, speakers don't have anything over on these designs that go back to the 50's ! I find it amusing that guys from my dad's error were duped into gitting rid of their low power tube stereos in the late 60's, for the "state of the art" solid state high power receivers with inefficient speakers. If you ask me the only improvements where their profits.
Yes for many decades EV, JBL & Altec were kings of the hill and were responsible for some of the greatest advancements is loudspeaker technology.
During the late 70's through the 80's EV was a real trend-setter.
"Just because something is old doesn't mean its bad."
 
Nice project. Is this a musical instrument cabinet?
I have a EV 12S in a cabinet with two round front ports I use for guitar.
View attachment 1407380

The EV 12S you have & 12L are considered by many to be one of the greatest guitar speakers ever. The standard for Power handling and great tone.
Yours looks like a EV TL606 cabinet.

My project is a general purpose 3 way full range stage speaker.
 
Last edited:
The Crossover Network Rebuild.

So I spent some time over the past few weeks try to decide what components I was going to use to rebuild the crossover. Was I going to use some fancy exotic caps or not but in the end I decided that it is just not worth that level of investment in these speakers as the improvement would not justify the cost.

However I was NOT going to put some cheap unknown quality capacitors off eBay in these speakers.
What I decided on was the Dayton Audio 5% Metalized Polypropylene Audio Grade Crossover Capacitors from Parts Express. These are very good quality capacitors, these are not cheep caps the cost was $195, but that's not nearly as much as an Auracap, Mundorf or some other exotic caps would have cost;)

The stock tubular capacitors in the EV S15-3 are just basic low cost caps. In fact they have a wide 15% tolerance and are only rated for 70V! fine for PA work but not so much for serious listening.
The new caps are 5% so right off a 10% increase in accuracy, That's a huge improvement, however when I measured the new caps they measure better than their stated 5% they are closer to 2% and these are also rated for 250V! a 180V increase from stock!!!

So no matter what there is going to be a BIG improvement in Imaging, Openness, Clarity and musical articulation.
And remember when I measured the old caps some of the values were far off and some of them had very high ESR acting more like a resistor instead of a capacitor so clearly these speakers sounded very tired and these new caps are really going to bring these speakers alive better than new.

There is no need to Re-Invent the wheel here the original crossover design was/is great and is one of the things that gives these speakers a little of their magic. So I stuck to the original Capacitance values and design.
I Upgraded the wires from 24awg to bigger 14awg.
Added also new heavy duty binding posts to replace the stock 1/4 phone speaker jacks.

I will decide later if I will remove the tweeter protection device once I can verify if it has any effect on tweeter fidelity.
I don't really need it anyway as I will never be playing them at that loud of a level to blow them but if it does not have any negative effect of the sound of the tweeter it's nice to know it there just in case.

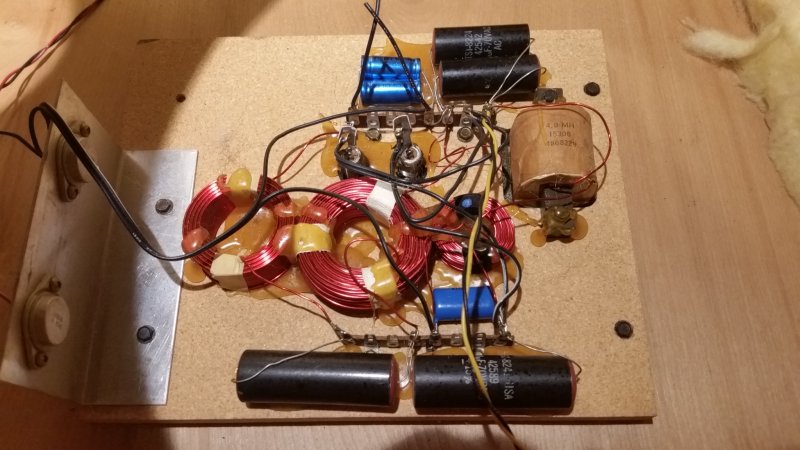
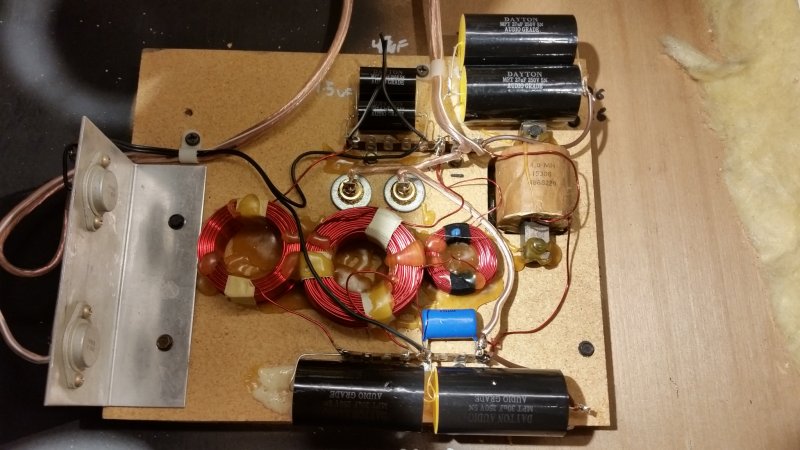
Here is the before and after.
You can see the new caps are much larger and almost don't fit on the board.

 
Last edited:
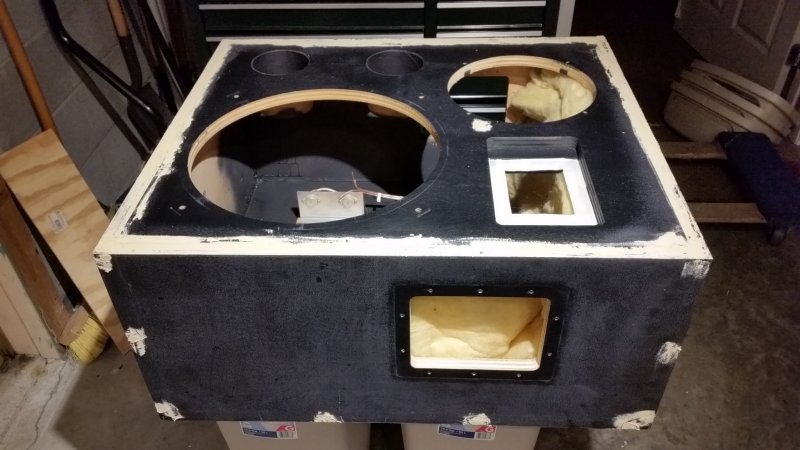
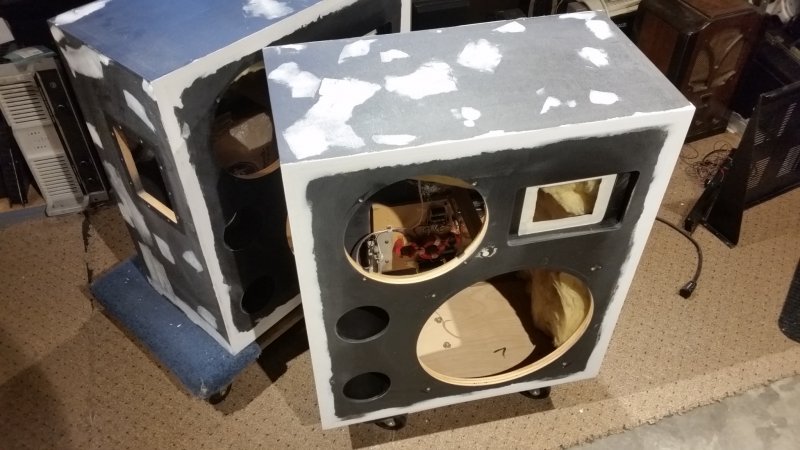
The cabinet work is coming along nicely I am spending extra preparation time on the cabinet. I want to make sure I fill and smooth every inch of the box so when I put on the coating it will look as good as possible.
I'm also working on a few personal cosmetic touches of my own more on that later.

I am just waiting for the materials to arrive and also the weather to get better so I can work outside.

 
Last edited:
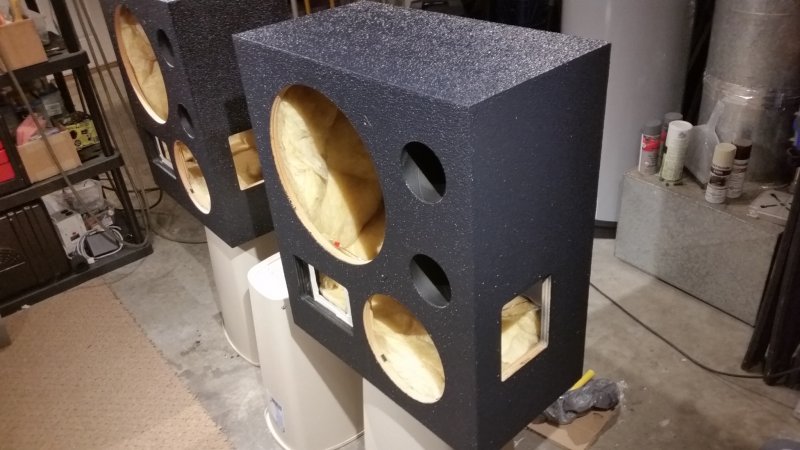
After many days of filling and sanding to achieve very smooth box.
Here is a picture of the first coat of Duratex while it's still drying.
So far it looks very nice using the stock foam rollers.

Well a few more days of drying and then it will be time to put the finishing touches on the speakers.
 
After many days of filling and sanding to achieve very smooth box.
Here is a picture of the first coat of Duratex while it's still drying.
So far it looks very nice using the stock foam rollers.

Well a few more days of drying and then it will be time to put the finishing touches on the speakers.
Looking great! An enjoyable read and good documentation.
Glenn
 
Thank you for sharing this. I inherited (2) sb15-3 speakers as well. After randomly coming across this on google I decided to take them out of storage and start playing around. This led to buying a new receiver as the one I had was actually left at the house we bought. My new receiver is an Onkyo TX-NR585. It was an open box, no remote, no acc., etc. for less than $200 at best buy. Figured why not. I took the speakers apart and cleaned them up. I bought banana plugs and binding posts from amazon so I am going to start there. Eventually I will replace the caps in the crossover. I had a really nice digital soldering station but I let someone use it and its gone so I am waiting for my new one to get here.

Do you have any updates on how it turned out? This is the only post on the internet for this model rebuild.
 
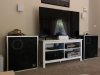
I’m so jazzed to see this thread!! I took a pair of these after my father’s passing but grew up with them as our main listening speakers in the house after he left an early 80’s band. Anything Beatles played on them still brings me back to us in our Budd Lake house living room on a Sunday morning with a fire going.

In 2015 I had the x-overs professionally done and buttoned up all grille vibrations while there. They have a heavy peak in the early khz’s as they’re keyboard speakers, along with a steep drop off in low end and high end. Due to this I have them equalized to get just about flat. They also need some volume before they meet their prime. 25% with 40wpc normally opens up wide.

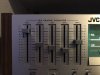
Left natural, they’re fatiguing. EQ’d flat they’re nuts with Rock, Jazz, and Classical. Aerosmith’s live Dream On recording images behind you on bass hits and totally plays with your head. The Last Resort by the Eagles throws instruments everywhere. They’re fussy with amplification, and it took me a while to find a solid state JVC that worked perfectly. A slew of 8 other units of various brands just didn’t make them sing. A Kyocera CD player runs as source. That combo WILL **** on a bad recording. They’ll make it sound horrible, but a good one will wash over you.

Please let me know any improvements you find possible on them beyond previously mentioned! As you can tell they’re very special to me and I’m happy to see I’m not alone as they’re almost never for sale sans beat to hell from road use. I only knew of one other using them for home before today, even though they took my heavily upgraded Klipsch Forte 1’s to the woodshed sound wise. The ST350 tweeters and VMR mids are highly sought after and showed up in EV’s studio monitors of the time. Truly impressive drivers.

Best of Luck!
 

Attachments

  • image.jpg
    image.jpg
    66.6 KB · Views: 49
  • A721AA4F-5BD6-430B-AA59-24EC142FB227.jpeg
    A721AA4F-5BD6-430B-AA59-24EC142FB227.jpeg
    65.2 KB · Views: 57
  • AE1A1511-C33C-442D-86BB-887B12F43068.jpeg
    AE1A1511-C33C-442D-86BB-887B12F43068.jpeg
    139.4 KB · Views: 54
Back
Top Bottom