• The move to the new server is done. There are some software and database maintenance updates in process. This has us passing the hat around to help out. We appreciate any donations. Seriously, even a dollar helps. The payment page may be found here - https://www.audiokarma.org/support.html

Fisher 480a questions

Nice Milling Job!
As long as you have access, you might want to replace your input RCA plugs. Back then, they were located closer to each other. Now, modern RCA plugs are too fat to comfortably fit next to each other in those jacks. I had modern spaced jacks that I used on my amp when I rebuilt it.
I also noticed that your amp uses four ceramic .047uf coupling caps. Change C5 and C8 to 600v Paper in Oil types (like Westcap) and C6 and C9 to 400v (minimum voltage) MKP's (like Solen) and your amp will sound better.
I tried all PIO's originally and thought the sound was too dull, all MKP's and it was too strident, but when I mixed them it was more balanced. Don't go crazy on those caps, your limiting factor will be space. Russian caps probably won't fit only because the leads are so thick.
You're doing excellent work and I like your work.
 
I find it interesting that your 480A is a little different than my 480A (2 of them). None of mine have those ceramic coupling caps, neither do my 481A's. I also have a 460A, again no ceramics. I wonder if Fisher changed components or if your chassis was worked on before you got it.
My 480A/481A did not have any wires to midranges or tweeters, all speaker connections were the same. My 460A had capacitors on those two RCA speaker output jacks, presumably a crossover of sorts. I removed them and went for straight out speaker connectors like yours.

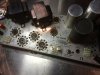
I used a dental pick to re-tension the tube sockets, but they are inherently loose. What springs did Dave recommend? Are they like a ring that goes over the top of the tube with springs down to the chassis or do they go into the actual socket holes? I hate how loose those tubes are.
 
Don't think so.

I find it interesting that your 480A is a little different than my 480A (2 of them). None of mine have those ceramic coupling caps, neither do my 481A's. I also have a 460A, again no ceramics. I wonder if Fisher changed components or if your chassis was worked on before you got it.
My 480A/481A did not have any wires to midranges or tweeters, all speaker connections were the same. My 460A had capacitors on those two RCA speaker output jacks, presumably a crossover of sorts. I removed them and went for straight out speaker connectors like yours.

I used a dental pick to re-tension the tube sockets, but they are inherently loose. What springs did Dave recommend? Are they like a ring that goes over the top of the tube with springs down to the chassis or do they go into the actual socket holes? I hate how loose those tubes are.

I'm pretty sure that this amp was never worked on prior to this. The cable that goes to the record changer was fished through a small hole under the tuner, it was so small I had to cut off the 4 pin molex connector that went to the record player to get the amp in any position to work on. That cable was never cut. Unless the person removed the pins from the connector and fished it out, but the pins do not show any wear or scratches..
I will post the link to the tensioners.

Also, there is a difference in the Molex connector that goes to the tuner. Look at mine then yours. You have 4 rows and mine has 3.
 
Last edited:
you may be right

I find it interesting that your 480A is a little different than my 480A (2 of them). None of mine have those ceramic coupling caps, neither do my 481A's. I also have a 460A, again no ceramics. I wonder if Fisher changed components or if your chassis was worked on before you got it.
My 480A/481A did not have any wires to midranges or tweeters, all speaker connections were the same. My 460A had capacitors on those two RCA speaker output jacks, presumably a crossover of sorts. I removed them and went for straight out speaker connectors like yours.

I used a dental pick to re-tension the tube sockets, but they are inherently loose. What springs did Dave recommend? Are they like a ring that goes over the top of the tube with springs down to the chassis or do they go into the actual socket holes? I hate how loose those tubes are.

Rich,

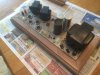
since you brought it up, i looked at the parts list. I don't see those ceramic caps called out on the E-48 console, so it DOES look like someone changed them. see photos.

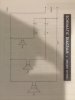
Also, i added a schematic that shows the other speakers i was talking about. i am wondering if this is going to be an issue? should i tie in the outputs that they had sent to the tweeter to the main terminals?

thanks,
Tom
 

Attachments

  • IMG_0781.jpg
    IMG_0781.jpg
    56.3 KB · Views: 14
  • IMG_0780.jpg
    IMG_0780.jpg
    36.6 KB · Views: 16
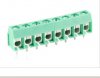
Nice job on the panel. As my 481A is still in the console and I don't have any intentions of gutting it anytime soon, it probably won't work with 8 connections unless I used something like those european barrier strips like this. Get two 4 wire pc mount strips, and epoxy the strip(s) to a board, after drilling wire holes in the bottom for the tabs. Solder underneath and connect the speakers to the top.

attachment.php


As I very rarely use Banana plugs on consoles this should work well.
 

Attachments

  • ScreenHunter_118 May. 14 08.58.jpg
    ScreenHunter_118 May. 14 08.58.jpg
    12.2 KB · Views: 44
Tom,
Those RCA speaker outputs are irrelevant. I left mine connected just in case I had a cheapo speaker with an RCA plug. They're labeled, which minimizes the chance that someone might someday plug a cd player into them.

I thought about re-wiring them into input jacks, add potentiometers for input sensitivity but never bothered because I upgraded before I got around to it.
Those RCA speaker out plugs are actually in a great spot if you ever wanted to mount test points to monitor currents as Dave suggested. Once the plugs are gone, you can nibble the hole out to fit a modern multi-pin Molex connector. If you got a panel mounted female connector with eight terminals, you could check each tube individually with your DMM, or fashion a mating male plug with four sets of banana plugs to check with your DMM. If you have four DMM's you could check the currents of all four tubes simultaneously.
But that's a slippery slope, because once you do that, you're going to want to split the bias control into left/right and add two DC balance controls, one for each channel.
Having said that-My SA100 is set up with individual bias and DC balance controls. I think it sounds better when everything is evenly balanced.
 
Speaker Jacks

Actually those RCA speaker jacks were only for the FISHER WS-1 speakers. The WS-1 is a 4x7 mid and hi range speaker used outboard of the console to fill out the sound from it. They really enhance the mid's and bring out the hi's that the console's woofer overrides.

http://www.audiokarma.org/forums/showthread.php?t=479002

Yes, i hooked them up too, but in hindsight, i should have just removed them because I'm going to trim this out with a nice piece of Black Walnut wood that i have once i am done and i'll just have to mill out a spot for those jacks..

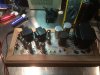
Anyway, I did as you suggested and changed out the input RCA jacks. I milled another panel today for them and nipped away a little bit of the hole to separate them. see pics. I tried the thickest RCA cables I had and it fits nicely :)

I REALLY wish my resistors showed up!! I miss the days of Rad Shack when you could just pick up a component for instant gratification. On their way from Mouser.. I didn't see the caps you were referring to though Rich? I did order some film ones though.
 

Attachments

  • IMG_0793.jpg
    IMG_0793.jpg
    79.9 KB · Views: 34
  • IMG_0795.jpg
    IMG_0795.jpg
    65.4 KB · Views: 34
Yes.

Nice looking inputs. When you get the tube retainer springs I believe you'll have to drill out the rivets holding the existing sockets. If you ever considered changing the sockets to high end sockets, now would be the time. Note though that not all sockets are oriented the same way relative to the screws.
These are nice caps:
http://www.ebay.com/itm/4x-Vintage-...pt=Vintage_Electronics_R2&hash=item338ea49131

I was thinking the same thing after I placed the order.. I might as well, I'm going this far. I really wish there was an antique swap radio swap meet this weekend!
 
Those sockets are no good for your amp because they are bottom mount whereas your amp's sockets are top mount.
These guys have a nice selection. Check it out and you'll see that not all of the sockets orient the tubes in the same direction relative to the mounting screws. That detail may seem unimportant to you now, but tubes don't emit heat and electrons as a perfect sphere around the glass envelope. There is directionality (that's why when you look at an amp straight on it seems like some tube are brighter than others). You don't want to change that directionality when you change sockets. So keep in mind that not all sockets are oriented the same way if you decide to change sockets.

Check out these guys
http://www.tubesandmore.com/products/tube_accessories

Take your time, don't rush and continue to do good work. I was going to work on my SA300B today but just wasn't "feelin' it". It'll get done. It's not like I have to make a living doing this. It's a hobby and is supposed to be fun.

Love your work though- you're going to want to work on another amp sooner than you think.
 
Thanks

Those sockets are no good for your amp because they are bottom mount whereas your amp's sockets are top mount.
These guys have a nice selection. Check it out and you'll see that not all of the sockets orient the tubes in the same direction relative to the mounting screws. That detail may seem unimportant to you now, but tubes don't emit heat and electrons as a perfect sphere around the glass envelope. There is directionality (that's why when you look at an amp straight on it seems like some tube are brighter than others). You don't want to change that directionality when you change sockets. So keep in mind that not all sockets are oriented the same way if you decide to change sockets.

Check out these guys
http://www.tubesandmore.com/products/tube_accessories

Take your time, don't rush and continue to do good work. I was going to work on my SA300B today but just wasn't "feelin' it". It'll get done. It's not like I have to make a living doing this. It's a hobby and is supposed to be fun.

Love your work though- you're going to want to work on another amp sooner than you think.

Thanks Rich. The tube tensioners I ordered (from the same site you mentioned here) have the holes for the rivets already. I think I will need to get sockets that don't have any holes to mount them and that fit into the 3/4" hole on tensioners. I think I'm going to wait to order them until I receive the tensioners so I can make sure.
I am really enjoying this project, and your right, I'm already thinking about other projects! I've always liked the old Fisher products, just could never afford them when I was a kid. I actually have some bids on some stuff now :)

I know I've thanked you a bunch of times, but seriously, I couldn't have done this without your help, and I really do appreciate it! And thanks for your patience with a tube nube.

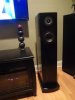
I can't wait to hear this amp through my home made speakers. I made some very efficient towers out of Bamboo Flooring that was on clearance at Lowes. I used Acend Accoustics Seirra-1 drivers and crossovers left over from a friends upgrade. I'm looking forward to hearing something that I have actually built myself.
 
speakers

hers some pics of the speakers I'm going to be driving with this amp.
 

Attachments

  • DSC04416.jpg
    DSC04416.jpg
    58.7 KB · Views: 22
  • DSC04408.jpg
    DSC04408.jpg
    45.5 KB · Views: 23
  • DSC04328.jpg
    DSC04328.jpg
    58.2 KB · Views: 23
  • DSC04322.jpg
    DSC04322.jpg
    58.7 KB · Views: 23
TOM. RE: Tensioners. The tensioners will require removal and replacement of the rivets with either new rivets or 4-40x1/2" machine screws with nuts. The tensioner includes a base that fits over the socket base. Just stack the tensioner base with the screw holes over the socket holes and insert the screw. I really like them on my TA-600 so part of the overhaul on my 481A, 30A, 510, and 610 chassis' are going to include the tensioners. Especially the 510 and 610 chassis' as the tubes are mounted horizontally.

Here's a pic of the tensioners as I installed them on my TA-600. Note that I used 4-40x1/2 screws and nuts. Once tighened, I put a drop of Locktite Red on the threads underneath.
Link: http://www.audiokarma.org/forums/showthread.php?t=573073

Pictures;

attachment.php


attachment.php


The Silver on the transformers is HVAC Duct sealing aluminum tape. Used here to reflect radiated heat from the tubes away from the transformers.

If you are going to install new sockets, get the TOP MOUNT socket as noted above by HeyRaz. The holes will line up with the tensioners and no drilling required (other than that needed to remove the old rivets).


Larry
 
Thanks Larry. Thats what I needed to know. I'm going to go ahead and order them then.

Those are some big OTs which amp is that? I saw a site that sold covers for them (can't remember which site it was) I would think the silver tape would work better though.

-Tom
 
progress

i received my tensioners today, now I will be waiting on sockets..

without any parts to continue working on the amp i decided to cut the Walnut after work today. i still need to stain and seal it. Im thinking of using a dark stain, special walnut. I'm not going to attach the trim until i get this 100% functional though.

here it is dry fitted.
 

Attachments

  • IMG_0802.jpg
    IMG_0802.jpg
    101.4 KB · Views: 27
  • IMG_0801.jpg
    IMG_0801.jpg
    94.9 KB · Views: 27
  • IMG_0803.jpg
    IMG_0803.jpg
    97.2 KB · Views: 26
fisher receiver/amp

i always wanted one of those Dave, i have to keep me eye out for these at the Flea Markets..

well, still no resistors :( so i built my dim bulb, poor mans variac that you guys recommended in another post.
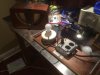
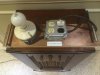
I am guessing a 100 W bulb for this Amp? Would that be too small? Its says 170 watts on the chassis. Not sure if I can even find a 200 watt incandesant bulb these days..

-Tom
 

Attachments

  • IMG_0810.jpg
    IMG_0810.jpg
    67.9 KB · Views: 22
  • IMG_0808.jpg
    IMG_0808.jpg
    70.8 KB · Views: 21
  • IMG_0804.jpg
    IMG_0804.jpg
    80.3 KB · Views: 23
Back
Top Bottom