• The move to the new server is done. There are some software and database maintenance updates in process. This has us passing the hat around to help out. We appreciate any donations. Seriously, even a dollar helps. The payment page may be found here - https://www.audiokarma.org/support.html

Ground up on a 1060!

I almost forgot...I replaced the foam on the top. I have never seen a piece with the foam intact. So I am assuming it was foam type about 1/16 to an 1/8 high. So thats what I did. It compresses well so I shouldn't have an issue with the cover.
 
what equipment do you use for sandblasting the metal parts?

I use a basic sears media hopper. I go outside behind the garage wearing safety goggles, and a leather welding glove on my left hand(for holding pieces), close my mouth really tight(sand ends up everywhere), and blast away:D.
 
Wow, this is quite the restoration. You, sir, have an amazing attention to detail. I'll be watching this thread as more updates are posted. :yes:
 
seeing this makes me want to do that to my 2275 or 2385, but I can't :cry:

My wallet won't let me and my soldering skills are about as good as water & oil mixing, heheh!

Great Job there!
 
Last edited:
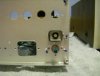
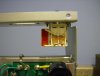
Here are some more progress pics. Nothing much, kinda slow rolling. It is a lot of tedious work cleaning pots, and switches. I had to completely disassemble the power switch. Cleaned the contacts, painted the case, applied some lube, and reassembled. Works like it was brand new! Also painted the light shade. Both the switch, and shade were very rusty. Hopefully I will have the rest of the front completed by Sunday. Stay tuned...
 

Attachments

  • HPIM1769.jpg
    HPIM1769.jpg
    65.7 KB · Views: 307
  • HPIM1767.jpg
    HPIM1767.jpg
    43.6 KB · Views: 270
  • HPIM1768.jpg
    HPIM1768.jpg
    56.7 KB · Views: 301
Very cool! Nice work on the details like the stamps and the dots of threadlocker. Will definitely be back to check the progress.
 
Update Update

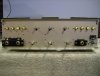
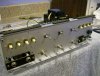
:yes:Here are some more pics. Front end is done. Still have some soldering to do. I am going to work on the back next.
 
There are pictures somewhere out there

:scratch2:Wonder where they went? I'll try it again.....
 

Attachments

  • HPIM1778.jpg
    HPIM1778.jpg
    94.7 KB · Views: 273
  • HPIM1779.jpg
    HPIM1779.jpg
    105 KB · Views: 255
  • HPIM1780.jpg
    HPIM1780.jpg
    107.5 KB · Views: 309
  • HPIM1781.jpg
    HPIM1781.jpg
    83 KB · Views: 256
Just wanted to say thanks for the positive responses :thmbsp:! I am starting to get that look from the boss:nono:. She thinks I might be spending to much time in the radio room:thmbsp:. I will finish:D!
 
That is magnificent detail work! I don't think I have seen that sort of restoration done on anything short of a 67' Shelby Cobra GT350. Hope it winds up sounding as good as it is looking. I have enjoyed my 1060 for a long time. May she rest in peace. Keep the pix coming and maybe some high res ones once it's completed.
 
So I have been working on the back cover.... There is rust all over it:thumbsdn:. I tried to do some touch up with some sanding, and an air brush. It looks ok, but not original:no:. My plan is to scan it, clean up the scratches, and make a silk screen or some kind of template so that I can totaly repaint it:scratch2:. This may take me a while... If this works I could expand, and do other pieces. I could buy a doner off the bay, But I am trying to restore not destroy, and I am not lucky enough to find a perfect back only:no: I wonder what happened to the original painting equipment, faceplates, parts, and supplies that were used to create a Marantz:scratch2:?
 
If you find a connection on the silk screening, man you would be opening some doors for future resto's.

Here's another thought, not sure if it would work, but a scan of the back and take it to a vinyl graphics/sign shop. They might be able to reproduce it as one big "sticker" or at least the lettering to apply to the newly painted back. Just thinking out loud.

Fantastic work, you should be really proud of it. I can't wait to see the completed project. YD
 
Back
Top Bottom