• The move to the new server is done. There are some software and database maintenance updates in process. This has us passing the hat around to help out. We appreciate any donations. Seriously, even a dollar helps. The payment page may be found here - https://www.audiokarma.org/support.html

Help to rebuild Canton CT-90 Crossover (I mean, almost the entire boxes)

Ok, have been some advances in the cabinet restoration.

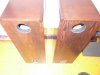
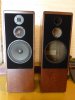
Today my carpenter friend toke me by surprise, he knock on my door calling me to see the new aspect of my cabinets (the workshop is about 2 houses from mine). There are not words to mention this, you have to see and compare with the first pictures of my awful black cabinets. He already cover the front holes, putting a peace of wood on the hole and applying a new oak veneer to this part of the front... not visible marks of the, now forgotten, ugly front hole. In general is like a new sun rising :)

My friend and his family have been Luthiers at least for three generations, his Grand Father started the workshop and now his father, who is 80 y/o, is a recognized acoustic guitar Luthier (still working -stand- on the workshop despite an almost severe osteoarthritis), my friend is an expert restoring pianos. Sadly, this art is not recognized properly here, my friend is now open to restore other wood things like my speakers.

Here are the pics:
View attachment 1102065
View attachment 1102068
View attachment 1102069
View attachment 1102071

The front hole is gone now :)
View attachment 1102075

This was the first hand of wood sealant, still need one more and after that a hand (or two, do not remember) of lacquer. So, more improvements in finishing to come.

Cheers,
Rodolfo.

Beautiful work. No one will ever get me to understand why someone would take a speaker cabinet with beautiful warm wood veneer and cover it with black paint. It just does not compute.

Cheers,
James
 
Hey Roldolfo!

Just when I was about to send a strong email to the guy that I bought the crossovers from (it's been 2 weeks now) look what DHL just handed me...

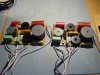
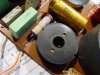
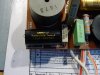
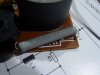
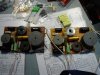
DSC04897.jpg DSC04898.jpg DSC04899.jpg DSC04900.jpg

And he handed me a second package with the 3rd of the tweeters that I've been collecting. So. Look at that and smile my friend. Those are your Karat 40 crossovers and a matched set of 4888 tweeters.

:):):):angel::beerchug::beerchug::banana::banana::banana::beerchug::music::music:

Unless you would rather do it yourself I propose that I go ahead and replace the caps and do the rest of the work to mod the Karat 40 crossovers to CT 90. I can have that done this weekend and have these things carefully packed for shipment Monday. Sound OK?

Cheers,
James
 
My dear friend, what a happy surprise! :banana::beerchug:

Off course I will not deny to you the pleasure to mod this crossovers into te CT90 versions! Go ahead!... I will have my own pleasure putting everything together into the cabinets!

BTW, I do not believe how beautiful they are (the cabinets). They look like the most finest wood musical instrument. Yesterday I was in the workshop and suggested some little details to polish, I will have them finished today. So, wait for some nice pictures tomorrow.

You do not know how happy I am, what a happy feeling to see this pictures, thanks!

At the office right now, will take a proper look once at home.

Cheers,
Rodolfo.
 
Those crossovers and tweeters (I really love the looking of this kind of metallic tweeters, they look awesome) looks pretty nice and seams in a really good condition.

As everything goes, it seams I will have a pair of Canton CT90 sounding and looking "Like New" :)

Today I arrive late at home and did not have the chace to pick the cabinets, hope to do it tomorrow morning.

till them :)

Best,
Rodolfo.
 
I have a couple of questions concerning your cabinets.

The midrange drivers should have their own sub-enclosure. In my Karat 60's (same 3669 mid) it is a heavy cardboard tube about 130mm in diameter (outside) and 200mm deep. The cardboard looks to be at least 5mm thick. This sub-enclosure is essential for the mids to work correctly. Are they both there? I see at least one in your photos so it seems that the answer is yes but I just wanted to be sure.

Also, there should be a wood block glued to the back of the cabinet somewhere behind the woofer hole. It should have 2 threaded brass studs in it for mounting the crossovers. The studs are usually screwed into plastic Inserts that are pressed into the wood. Are they there? If not I'll make some brass studs and send them with the crossovers. Please take a photo or 2 when you pick up the cabinets.

I'll take photos and post them as I work on the crossovers.

Cheers,
James
 
Also Roldofo, please measure about how long the wire is from the old speaker binding posts to the crossover. I'll explain why later. :)

James
 
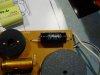
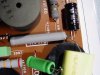
The Karat 40 schematics were the only ones that we asked for that Canton could no longer find. So I didn't know exactly what to expect. It turns out that the tweeter coils on the Karat 40 board is P/N 1168 = 0.25mH. We need an 1181 here with 0.16mH. Luckily I've been collecting an assortment of defective Canton crossovers from ebay the last couple of months. So a CT 800 board donated one coil and a CT 80 crossover donated the other. Both checked good and reasonably close to what they are supposed to be. We're on our way. :)

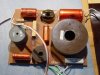
DSC04901.jpg DSC04902.jpg DSC04903.jpg DSC04904.jpg

Cheers,
James
 
The R4 3.3 ohm sand cast wire-wound resistor was actually the correct one but since we have all of these nice 5w MOX resistors on hand I went ahead and changed them. C4 needed to be changed to 3.9µF, I used Jantzen CrosCap MKP for them. So that's the tweeter section finished.

DSC04906.jpg DSC04908.jpg DSC04910.jpg DSC04911.jpg DSC04913.jpg

Cheers,
James
 
Last edited:
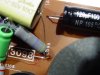
For the woofer R1 needs to be changed to a 1.8 ohm 9w. hifi collective didn't have any of the small Jantzen 10w MOX that I wanted so I had to use Mundorf. They are a bit long but fit with a little help. Then some Jantzen 120µF elcos and the woofer section is finished.
DSC04914.jpg DSC04915.jpg DSC04917.jpg DSC04918.jpg DSC04920.jpg

Cheers,
James
 
I have a couple of questions concerning your cabinets.

The midrange drivers should have their own sub-enclosure. In my Karat 60's (same 3669 mid) it is a heavy cardboard tube about 130mm in diameter (outside) and 200mm deep. The cardboard looks to be at least 5mm thick. This sub-enclosure is essential for the mids to work correctly. Are they both there? I see at least one in your photos so it seems that the answer is yes but I just wanted to be sure.

Also, there should be a wood block glued to the back of the cabinet somewhere behind the woofer hole. It should have 2 threaded brass studs in it for mounting the crossovers. The studs are usually screwed into plastic Inserts that are pressed into the wood. Are they there? If not I'll make some brass studs and send them with the crossovers. Please take a photo or 2 when you pick up the cabinets.

I'll take photos and post them as I work on the crossovers.

Cheers,
James
Yes, the sub-enclosure is there in both cabinets to my fortune.
The wood block to attach the crossovers is there only in one of the cabinets:

Cabinet 1
IMAG0905.jpg
Cabinet 2 (guess this is not the original woodblock)
IMAG0906.jpg

More soon..
Rodolfo.
 
Also Roldofo, please measure about how long the wire is from the old speaker binding posts to the crossover. I'll explain why later. :)

James
This cable is 48 cm long, and appear to be the original cable:
IMAG0913.jpg

James what a great job you did with the crossovers, fortunately you seams to be a very fine Collector :). Thinking this was product of all our investigation and collaboration, plus the help from Canton. Lot of satisfaction seen everything fitting :)

Next, the new good looking cabinets!
Cheers,
Rodolfo.
 
The crossovers are completely finished now. I only have to clean the flux from the back side. I'm running out of time now but I'll finish posting the photos in the morning. Everything turned out nicely.

Until tomorrow,
James
 
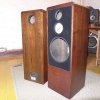
Well, finally I have my cabinets ready. As they look awesome, there is no to many words to say... you have to see it by yourselves :)

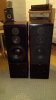
Just to show the importance of the changing and the restoration, I will start with a picture of the speakers as I sadly receive them... but I hope, the horror of the first 3 pictures fade down into the pleasure of to see the new finishing :)
IMAG0766.jpg IMAG0769.jpg IMAG0756.jpg

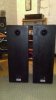
Now the new ones...

P1120374.jpg P1120376.jpg

P1120394.jpg P1120398.jpg

Here I put the drivers in place just to visualize how they will look at the end :)
P1120391.jpg

So far, pretty happy and exited about this, cant wait to have them sounding as they should :)
Thanks to you James and AK too, to make this restoration posible. :beerchug:

Cheers,
Rodolfo.

PD: The photos do not make honor of how they really look in person.
 
Wow Roldofo! Just wow. The cabinets look beautiful. That is some fine work. I love the way that the grain shows. :thumbsup::thumbsup::thumbsup:

James
 
I suppose that to anybody reading it might get confusing concerning the crossovers. We wanted to match the CT 90/3 configuration. The schematic can be found in post #17 of this thread. We didn't get the schematics for the Karat 40/- crossover that I'm using as a basis but we do have the schematics for the Karat 60 series. Not all of the values are the same from the 60/- to the 40/- but the layout is the same.

Cheers,
James
 

Attachments

After working the tweeter section I realized that there is a 0.82 ohm padding resistor on the minus side of the tweeter, R4 in the Karat 60 schematic (shown as 0.47 ohms). That resistor isn't used for the CT 90/3 and had to be removed and jumpered. The resistor lead was 0.8mm so I used a piece of tinned solid core 0.8mm wire to jumper the position.

DSC04922.jpg

Cheers,
James
 
The midrange section needed the most changes. Basicly only the inductors stayed the same.

C2 goes from 47µF to 33µF and R2 goes from 12 ohms to 68 ohms.
C3 needed to be moved and a Zobel put in it's place, C6 and R5, 22µF & 4.7 ohms.
R3 originally had 2 wire-wound sandcast resistors in series, a 1.8 and a 3.9 ohm, giving 5.7 ohms instead of the 4.7 marked on the board. This was changed to a Mundorf 1.2 ohm.
C3 gets changed from 18µF to 15µF and I hooked it onto the + side of R5 and the input side of R3, putting it effectively in parallel with L3. I used a Jantzen MKT film cap for C3.

All of the parts in the entire crossover that I changed were hot-glued into place. Also I used my parts checker to measure everything and make matching L&R pairs, I had enough extras on hand to get some pretty close sets.

DSC04921.jpg DSC04923.jpg DSC04924.jpg DSC04925.jpg

Cheers,
James
 
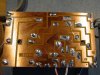
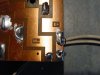
The boards are now all cleaned up. Every solder connection has been re-flowed. And I pre-soldered the pads where the mid and binding posts will be connected.

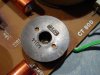
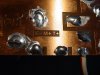
I had to laugh a little when I looked at the etched letters noting where the drivers and posts are soldered. Normally Canton does this in German of course. So normally it's H = Hochtöner (tweeter), M = Mitteltöner (midrange), T = Tieftöner (woofer) and E = Endstufe (amplifier = binding posts).

But no. We have a nice mix of English and German here. English for the drivers, W, M and T. And E for Endstufe. So it's important to note that.

Canton always uses a red stripe for the tweeter pos wire, dark grey stripe for the mid pos wire, black stripe for the woofer pos wire and light green stripe for the binding post wire (remember, E for this connection).

As the crossovers were delivered the midrange and binding post wires had been cut short so I removed the wires. But the tweeter and woofer wires are good and full length so I left them connected.

DSC04933.jpg DSC04935.jpg DSC04937.jpg DSC04938.jpg DSC04939.jpg

Cheers,
James
 
Back
Top Bottom