• The move to the new server is done. There are some software and database maintenance updates in process. This has us passing the hat around to help out. We appreciate any donations. Seriously, even a dollar helps. The payment page may be found here - https://www.audiokarma.org/support.html

Infinity Qb Cabinet Restoration

Thereimade12

Active Member
Hello everyone! Long time no post. If you have the time I beseech the advice of Infinity Gurus everywhere.

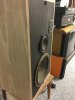
I have been very fortunate to pick up a pair of Infinity Qb's for a reasonable price locally. Even more fortunately the diaphragms of the EMIT Tweeters have already been replaced! A fairly responsible previous owner.

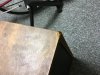
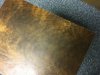
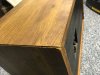
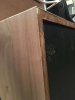
However, understandably everyone's pet peeve about this speaker still applies: Poorly assembled cabinetry.

Remarkably my cabinets are apparently still air-tight - deep tuneful bass that puts my woofer + passive radiator speakers on notice for flabbiness.

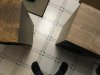
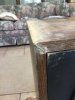
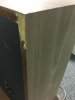
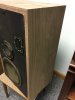
The lack of bracing is still apparent however with the speakers having a slight lack of midbass definition. One corner edge has separated but the seal remains in tact. Lastly the veneer is almost comically hideous, pretty obvious where costs were cut :D

So the questions I pose to you are these: Ignoring the midrange cap everyone suggests (rightly) to replace.
And maybe dynamatting the baskets ho hum
:
  • Should I remove the old veneer before installing a new, real wood veneer? I'm thinking a nice harbeth-esque cherry or a Thorens-esque Walnut to better match my system.
  • Do I Really have to brace it? The forum's collective knowledge is to do so around the woofer cutout, but I was wondering if I could get away with an extra layer of 3/4" ply glued outside along the back panel.
  • What methods using putty or whatever woodworking magic do you recommend to fill in particle board corners? How/will this affect veneer installation?
  • If I do dig into the cabinets for bracing, what are peoples opinions on enclosing the midrange? It seems like an adventurous option that may pose an improvement barring potential Thiel/Small complications.
Sorry about the verbosity, but I want to just work through all the carpentry this weekend. Cheers:beerchug:
 

Attachments

  • IMG_2077.JPG
    IMG_2077.JPG
    125.8 KB · Views: 81
  • IMG_2079.JPG
    IMG_2079.JPG
    117.5 KB · Views: 79
  • IMG_2078.JPG
    IMG_2078.JPG
    110.2 KB · Views: 77
  • IMG_2076.JPG
    IMG_2076.JPG
    87.4 KB · Views: 80
Register to hide this ad
I'd glue up your new veneer over the vinyl.
Some prep is in order so I'd drill some tap holes into bad corners and apply an ample amount of Bondo and once thoroughly cured shape corners true.
Clean the vinyl and lightly sandpaper scuff the surface.
Your local veneer dealer should be able to set you up with the proper materials.

The mid has its own "enclosure".
Bracing is a plus with well placed front to back 1"X2"s
Have Fun.
 
Agree with Tubed. As far as the bracing goes, I would use a 1" hardwood dowel and cut it into three braces, two front to back just above the woofer and one side to side, just below the front to back ones, to form a sort of H shaped bracing structure, then glue everything tight together or, since you are veneering/refinishing, screw into place and then fill in the screws before repainting/veneering. Shouldn't need to add a layer of plywood; it will look weird and probably not give you nearly the benefit of a good brace.
 
Thank you both for the advice! I will definitely add bracing at the woofer/mid weakpoint and maybe a glued brace across the side rather than screwed.

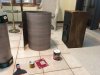
For today I am focusing on the corner and gap repairs, and measuring out my veneer distribution for the speakers. I have two rolls of 2'x96" Walnut Veneer to match my TD-160. Planning on opening one roll at a time as my neophyte overcuts add up over this weekend.

If I may ask for more advice, applying veneer in a wrap around the side cabs would look the most ideal, but cutting the veneer to panels would be much less wasteful and a bit easier to apply. Opinions?

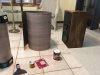
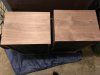
Update: praise your respective makers they both fit on one roll of veneer! Looks like the cut I purchased is about 27 inches wide instead of 24. Just enough wiggle room if I'm careful
 

Attachments

  • IMG_2081.JPG
    IMG_2081.JPG
    79.9 KB · Views: 88
  • image.jpg
    image.jpg
    43.4 KB · Views: 93
Last edited:
Half way there. Veneer is cut and ready for instalation tomorrow. Slow going but the end product is in sight!
 

Attachments

  • image.jpg
    image.jpg
    78.1 KB · Views: 61
My cabinets weren't as bad as yours, but you might get some helpful information from my Qb refurb thread - http://www.audiokarma.org/forums/index.php?threads/another-qb-refurb-job.698716/#post-9393899
I recommend following the advice from the Infinity experts to replace the 12.5uf capacitor in the crossovers and clean the pots - more info on my crossover thread - http://www.audiokarma.org/forums/index.php?threads/infinity-qb-crossover-question.701013/

Also - search for Elnaldo's post on rebuilding a set of Qb's in the Infinity Speaker forum. (http://www.audiokarma.org/forums/index.php?forums/infinity-loudspeakers.129/) His beautiful work will make your head spin.

I'd like to veneer my cabinets someday, but they look "OK" enough that I'm putting that off. Hope your project goes well! Are you planning to document the process with photos, etc.?
 
Good luck with your project. Looking forward to seeing the results. (Maybe that will be inspiration enough for me to attack my lame looking vinyl clad Qb cabinets.) Post plenty of pictures so we can see the results !!
 
Thank you for the links! I have photos now that both are done (besides veneer banding on the baffle), will upload them tonight/now.

Regarding interior modifications I'm still a bit resistant to opening the cabinets. Despite how beat up the finish was, the acoustic seal is still perfectly intact as far as I can tell and I don't want To disrupt this rare equilibrium.

Also limiting this is the fact that my drivers are secured with two different types of screws, hex and Phillips. Is this common on other Qb's?

I'm done with any additional mods for now, Once the contact cement is cured I'm going to get to know them better and reapproach the rest of the deferred maintinence in a few weeks.

These speakers really are little gems. They put every other speaker I own to shame. Maybe I'll take the woofers from my Genesis and build sub cabs/stands for to complement the Qb's. Maybe. That will require more planning!
 

Attachments

  • IMG_2082.JPG
    IMG_2082.JPG
    44.2 KB · Views: 66
  • IMG_2081.JPG
    IMG_2081.JPG
    79.9 KB · Views: 66
  • image.jpg
    image.jpg
    60.4 KB · Views: 65
  • image.jpg
    image.jpg
    30.5 KB · Views: 65
Good luck with your project. Looking forward to seeing the results. (Maybe that will be inspiration enough for me to attack my lame looking vinyl clad Qb cabinets.) Post plenty of pictures so we can see the results !!

Once the glue is cured I'll take some beauty photos! Not sure how I want to finish/stain them yet, suggestions welcome! Or if you know the type of stain used on a walnut thorens hit me up.

The cabinets themselves are substantial, just ugly haha! I figured in my short term future I will not own a better speaker, so why not actually enjoy looking at them too?
 
I figured in my short term future I will not own a better speaker, so why not actually enjoy looking at them too?

I bought my Qb speakers brand new in the mid to late 70s. They served me well for years and years, then got set aside as I cycled through other audio equipment. After a couple decades I threw them back in rotation , not really expecting much. Boy was I surprised. I still love the way they sound. IMO these are no apology speakers and best many that are supposed to be "better".
 
Mid-term update for those interested:

The veneer banding done! All areas that are traditionally veneered in this model are now covered with real walnut.

I have just enough banding to also cover the exposed wood on the rear, so that may come to pass over the next week.
Also up this week is coating the veneer.

I was reccomended to apply a sealing layer after a very light once over with sand paper using Polyeurethane. Other options that give the wood a deep, but not dark glossy finish are welcome!

After that maybe touching up the black baffles, but speaker mods (bracing, midrange cap, etc) would be approached first. I think the bracing is priority one post-wood varnishing/finishing.

Then the real work begins... accompanying subwoofer stands. Mimicking the use of a dual separate chamber woofer design seen in some higher end speakers, namely Troels Graveson and Wilson 4way speakers. The Qb's would serve, unchanged, as the timbre woofer sitting atop a custom Genesis Physics woofers cabinet that helps with lower octave reinforcement.

Design schematics using Genesis Physics woofers coming soon, still graphing isobaric vs ported configurations. Thanks and please feel free to share opinions!
 

Attachments

  • image.jpg
    image.jpg
    31.7 KB · Views: 67
  • image.jpg
    image.jpg
    54 KB · Views: 72
  • image.jpg
    image.jpg
    45.5 KB · Views: 67
Resurrecting an old thread, I just acquired a pair of Qb speakers with the vinyl woodgrain tape for veneer. I want to veneer them in real wood. The OP appeared to apply the wood veneer over the vinyl. Is that generally the way to do it? Or do you remove the vinyl and sand the cabinets first? Or is it a matter of opinion? Some of the vinyl is worn thru at the corners but is otherwise intact. No big gouges or holes. The joints still look pretty tight.

If I can get away with doing it over the vinyl, I may take a shortcut.
 
Back
Top Bottom