• The move to the new server is done. There are some software and database maintenance updates in process. This has us passing the hat around to help out. We appreciate any donations. Seriously, even a dollar helps. The payment page may be found here - https://www.audiokarma.org/support.html

JBL 4425 Restoration

Duffinator

Spin The Black Circle
I've posted a couple of other threads about the 4425's I purchased last summer and I'm finally getting to restoring them. My goal is to use AK member gonzomeeps restoration instructions and get them back to their former glory. The first thing I need to do is rotate the horn mounting plate on the donor cabinet.

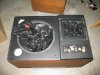
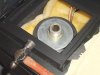
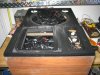
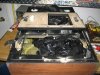
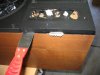
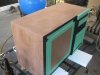
The first question I have is has anyone ever removed one before without destroying the cabinet? Can it be done? The plate is mounted with six screws, 3M double sided mounting tape, and some glue. I used the old damaged cabinet as a test and as you can see from the photo it took part of the cabinet with it. Most likely it was damaged when it was dropped but I want to make sure before I start on the good cabinet. Both good cabinets I have are left sided and I need to rotate the plate so the speakers remain mirror imaged. My plan is to work a thin putty knife from the inside edge where the horn mounts and see if I can pry it up. If anyone has done this or has any suggestions or good ideas on how to remove the plate please let me know. Below are the first photos.

The first photo shows the damaged cabinet before removing the plate.

attachment.php


The second photo shows the damaged cabinet after removing the plate.

attachment.php


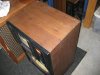
The third photo shows the good cabinet before removing the plate.

attachment.php


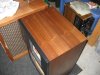
The last photo shows the speakers after refoaming the woofers and before the restoration started.

attachment.php
 

Attachments

  • IMG_4624.jpg
    IMG_4624.jpg
    63.7 KB · Views: 1,074
  • IMG_4625.jpg
    IMG_4625.jpg
    71.7 KB · Views: 1,070
  • IMG_4626.jpg
    IMG_4626.jpg
    81.7 KB · Views: 1,161
Last edited:
Register to hide this ad
I can understand the MDF fragmenting on the damaged side, but why on the other? Is there glue also, or just the 3-M tape?

My suggestion: Go to Home Depot and get a bulk pack of utility knife blades, and start inserting them all around the perimeter as wedges, then tap them in with the edge of a putty knife a bit at a time going round and round.

attachment.php
 

Attachments

  • 2342 Removal.jpg
    2342 Removal.jpg
    28.8 KB · Views: 1,143
Last edited:
Worst case, so long as the cab is not damaged, you'll have to get a new facia fabricated.... :dunno:
 
Success!

Zilch, your idea worked great and I was able to remove the plate with ease. Lucky for me there was no adhesive strips and less glue than the original cabinet. The rest will be easy as removing the plate was my major concern. :thmbsp: I'll post pictures this evening.
 
Zilch, your idea worked great and I was able to remove the plate with ease. Lucky for me there was no adhesive strips and less glue than the original cabinet. The rest will be easy as removing the plate was my major concern. :thmbsp: I'll post pictures this evening.

So glad that it is working out for you. :thmbsp:
 
Removing the horn mounting plate.

attachment.php


Plate off.

attachment.php


Plate temporarily reinstalled and rotated 180 degrees. :thmbsp:

attachment.php
 

Attachments

  • IMG_4635.jpg
    IMG_4635.jpg
    97.4 KB · Views: 996
  • IMG_4634.jpg
    IMG_4634.jpg
    104.9 KB · Views: 1,039
  • IMG_4633.jpg
    IMG_4633.jpg
    73.6 KB · Views: 998
Nice job Duff! I like that method and will give it a try to mirror image my 4425's. Will be waiting to see how your cabinet restoration comes along. Have you and Brian had a chance to compare notes?
 
Hey Bart,

My cabs are coming along nicely.

I used the Watco treatment and need to finish the painting process. Making the grills will be the challenge. Zilchster gave me some JBL grill cloth to finish it off. I hope to be done by the end of the month.


Nice job Duff! I like that method and will give it a try to mirror image my 4425's. Will be waiting to see how your cabinet restoration comes along. Have you and Brian had a chance to compare notes?
 

Attachments

  • IMG_1898.jpg
    IMG_1898.jpg
    67.7 KB · Views: 180
Bryan found the Deft satin lacquer at Lowe's but we've been unable to source the America's Finest ultra flat black locally. We'll most likely just use another brand if we can't find it. I've decided that the front baffles of both cabinets are in good enough condition that I'm not going to paint them. With the exception of the bottom of the horn plate that I removed. What was the top is now the bottom and it's pretty scratched up. I'll most likely sand that edge down and paint it. It won't be visible either way but it's pretty hamered. I hope to have them sanded down and paint the backs this weekend. Then I'll oil the cabinets and clean up the grills. One of the grills is in perfect condition while the second one is a bit dirty. If it doesn't clean up I'll buy some of the JBL blue cloth from the Zilchster.
 
Last edited:
Crap, while I was assembling the speakers I dropped the horn mounting plate and slightly damaged it. I wasn't going to refinish it but now I'll probably have to. The black paint on the rear baffles didn't go on as evenly as I'd like it to. I never seem go get a really good finish from a spray can anyway. Because of that I wasn't going to paint the plate. There is minimal surface area that will be visible but it will have to wait until Friday before I get to it.

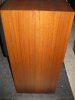
Anyway I finished sanding, filling, and then painted the backs with the flat black and then the satin finish. Then I oiled the cabinets and they came out looking fantastic. I assembled the original speaker and then started on the donor cabinet when I dropped the plate. Here are a couple photos of the cabinets before I started sanding and finished.

B, how are yours coming along?

Donor cabinet:
IMG_4636.jpg

IMG_4649.jpg


Original cabinet:
IMG_4637.jpg

IMG_4648.jpg
 
Last edited:
Looks good so far. To bad about dropping the part, but nothing more filler can't fix.

I'm almost done with one cab and getting ready to start on the other.

I need the grills. Does anyone know where to get them or detailed plans?
 

Attachments

  • IMG_1930.jpg
    IMG_1930.jpg
    83.6 KB · Views: 138
  • IMG_1931.jpg
    IMG_1931.jpg
    77.9 KB · Views: 120
  • IMG_1928.jpg
    IMG_1928.jpg
    97.6 KB · Views: 162
  • IMG_1929.jpg
    IMG_1929.jpg
    88.7 KB · Views: 151
Yours look great. The veneer is pretty thick and I was surprised how many of the deep scratches I was able to sand out.

I'm really hesitant on repainting the horn mount. If anyone has any experience refinishing this piece either on a 4425, 4430, or 4435 please pass along any tips you have.
 
I bought some clear satin enamel to coat the butt-cheeks after I smooth them out. The clear should mask any tiny swirl marks left from the 0000 steel wool, but I could be wrong. Maybe I'll wait to see if anyone else chimes in with a better idea:scratch2:


Yours look great. The veneer is pretty thick and I was surprised how many of the deep scratches I was able to sand out.

I'm really hesitant on repainting the horn mount. If anyone has any experience refinishing this piece either on a 4425, 4430, or 4435 please pass along any tips you have.
 
Back
Top Bottom