• Please note that Audiokarma will be offline briefly for updates early on Monday morning, September 28th.

JBL 4425 Restoration

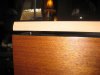
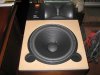
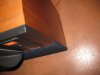
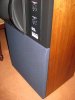
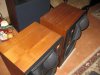
I have nearly finished my resto and will need to fabricate the grills to finish the project. They look so much better now and I love the sound (before/after pics). Thanks for all the help along the way.

 

Attachments

  • IMG_1812.jpg
    IMG_1812.jpg
    93 KB · Views: 136
  • IMG_2206.jpg
    IMG_2206.jpg
    64.7 KB · Views: 138
  • IMG_2208.jpg
    IMG_2208.jpg
    76.6 KB · Views: 146
They are truly beautiful; you should be very proud of your work on these.... :thmbsp:
 
Sorry you missed the Nor Cal DIY meet.

Next spring we'll show 'em what 4425s sound like ...

and how sharp they can look! :thmbsp:
 
Looking good there B!

If they do another meet next Spring I'll bring my ZD 007's if B helps me load them into my van. :yes:
 
Yes, Duffinator found a 6 page doc prepared by another AKer (I think), that detailed the process and was very useful, especially reproducing the black finish on the baffles. I will send it your way but may need your email.

wow amazing work!
where did you learn how to clean them up?
any specific threads i should be looking at?
 
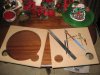
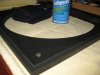
I searched and searched for months looking for a pair of grills to finish off my project with no luck. I finally decided to make my own and this is where it's at so far. The grills are 3/4 MDF from HD and I cut a 12 degree angle on the edge to match the front of the 4425's. I used a hole saw to cut out the port holes and a router for the larger opening. I left 1 inch from the edge on the short side so there strong. The hard part will be drilling the mounting peg holes; if I'm off just a little the grills will be crooked and look like hell. A few more steps and I can cover them with original JBL blue cloth (:thmbsp:)
 

Attachments

  • IMG_2213.jpg
    IMG_2213.jpg
    82.4 KB · Views: 85
  • IMG_2211.jpg
    IMG_2211.jpg
    65 KB · Views: 96
  • IMG_2220.jpg
    IMG_2220.jpg
    85.7 KB · Views: 95
... The hard part will be drilling the mounting peg holes; if I'm off just a little the grills will be crooked and look like hell. A few more steps and I can cover them with original JBL blue cloth (:thmbsp:)

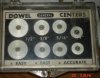
Have a set of Dowel Centers?

And the step of rounding over the inside edges is next?
 

Attachments

  • Dowel Centers.JPG
    Dowel Centers.JPG
    63 KB · Views: 61
Excellent info! Thanks.
You're welcome.

To get both grills to fit either cabinet, you could drill the first cabinet, put the dowel guides in and mark both grill frames. Use the grill frame to mark the second cabinet.
 
What I found was better than redoweling them with the plastic pegs (they break when they age) is using the same diameter neodymium magnets, place one in the hole in the cab and another in a hole on the grill.
 
What I found was better than redoweling them with the plastic pegs (they break when they age) is using the same diameter neodymium magnets, place one in the hole in the cab and another in a hole on the grill.

This has always seemed to be an elegant solution to me. Do you have trouble with vibrations at higer spl levels?
 
This has always seemed to be an elegant solution to me. Do you have trouble with vibrations at higer spl levels?
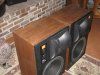
I use magnets for my Speakerlab Sevens (quite a bit more woof than the 4425) and the grills don't go anywhere even at high SPL.
 
This has always seemed to be an elegant solution to me. Do you have trouble with vibrations at higer spl levels?
No problem with that. If anything, you don't want to choose magnets that are too big, they have incredible attractive force. For 4313's (a similar grill size, I'm thinking) I used neodymium discs that measure 8mm x 3 mm, one in each corner. It was just the correct amount of holding power but allowed for easy removal.
 
A final update on the grills. I found some dowel centering pins at the local Woodcraft store. I just slipped them over the dowels, centered the grill and tapped lightly leaving a center punch mark to drill the holes. Next was painting the grills black and covering with the JBL cloth. I think anyone would be hard pressed to tell the difference between mine and original. I'm happy it's over, and now I can enjoy them--after I build stands.
 

Attachments

  • IMG_2272.jpg
    IMG_2272.jpg
    74.2 KB · Views: 109
  • IMG_2266.jpg
    IMG_2266.jpg
    61.5 KB · Views: 107
  • IMG_2267.jpg
    IMG_2267.jpg
    79.3 KB · Views: 125
Back
Top Bottom