• The move to the new server is done. There are some software and database maintenance updates in process. This has us passing the hat around to help out. We appreciate any donations. Seriously, even a dollar helps. The payment page may be found here - https://www.audiokarma.org/support.html

Kenwood Basic C1 Preamplifier Restoration/Upgrade

Personal opinion only. I have both. Both restored. C1 if you want simple and easy to restore. Less expensive and a one of a kind actually usable loudness control. C2 if you want everything but the kitchen sink. Far more versatile. Better in fact very good phono section with multiple settings. Don't expect the balance control to work. Better look. More expensive. Harder to build. Sound is subjective . I use the C2 in my tape loop on a Mod Squad line drive in my main system. The C1 is in my shop but I will always like it best. It is the same one I first bought many years ago when my daughter was little and we danced to James Brown, Greatful Dead, Beatles and Rolling Stones listening to it. You can imagine it ain't going no where no time soon..
 
Thanks for reply.
Is C2 much superior in terms of treble control? Hpm's are much bright speakers, so there's a need to lower the treble's, I wonder if those extra control options on C2 should noticeably help lowering high frequencies compared to C1.
 
And therein lies the problem. I have no idea what other equipment you have or how old. I have no idea if the speakers or the equipment you have possibly need a re cap / adjustment / bias set , even cables can make a difference. Not trying to be a smart @ss but your ears are different than mine. I do not like bright sounding speakers for the most part so I understand you there. Personally I would not have a set of speakers that I knew were bright and try to bring that down with tone controls. I would buy a set that I liked that I did not need tone controls to listen to to start with. The C2 is a fine pre amp but you see I do not use tone controls so it is kinda hard for me to answer that. Fact... If you get a Kenwood Basic C2 Pre amplifier you can always sell it to someone else if you do not like it. From what little I have used the tone controls on mine they do fine.
 
Markoh, I would not be surprised if a modded C1 helped your issue significantly, I don’t know if it is the value changes or the op amp / voltage changes but my system with the Jamo C93 bookshelf speakers was very harsh and fatiguing and after the mods it warmed up and presented much more detail than before - and like vsat88 says- if it doesn’t do the trick you can always sell it for more than you have in it.... have you tried better grade caps and coils in your speaker crossovers? You could start there also....
 
I've never used the tone controls on my C2 but I'm sure they work. I typically keep everything flat but my speakers are different from yours.

I haven't compared the C2 with a C1 and my C2 has been updated per this thread. I'm always budget conscious and I would get ether one if I found one within my budget. Both have tone controls and should be able to tailor your speaker sound.

I think the C2/M2A would be great. I have a M1 and my C2 works well with it. My guess either will work with your M2A. I'd look at the features of each to decide if one is better. Do you need a headphone jack? Or need to select the phono load?

Good luck! If you do get either one, you might like it stock. Kenwood thought it was good enough.
 
Thank you guys for your replies,

I really had many integrated amps (started with Marantz 00', Sony from '90's era , Luxman L190, L230; 3 different Denon PMA models from '80-90's era, Pioneer sx737, Sansui Au x from '90's era, Nikko Na-890, and few others but I sticked down with Kenwood amps and Pioneer Hpm series speakers, as my favourite music is ROCK music! And as you know HPM-100/110 are one of the most suitable speakers for this music style. Currently I have a pair of Kenwood integrated amps, (one of my favourite's- KA-7100) I also like HPM-60/70 and HPM100/110 speakers. I am not telling further of dacs and other equipment I have- Denon DP 37 with DL-110, I also own some CD players, as Sony ES/ ESD series etc.. But that's not the point :)
I was looking something from dual mono design separates, and found many good opinions of Kenwood M2/M2a series+ C1/C2 preamps, that's why I am there.
A week before I purchased M2A amp, and today I've just won an auction for C1, so I can't wait when I can touch to it... I also catch an eye on C2, and I hope soon I'll have both of models so I could compare them and find out which one suits to my system the best :)
 
That's what I'm taking about ! The M2A and the C1 will be kicking with this Pioneer speakers brother.
 
It's nice to see this thread still active. Huge thanks to everyone for valuable contributions!!!

I'm also one of the guys who went for C1/M1 based on Ben's restoration threads. Basically I've found a pair locally for decent price, did a bit of research and found this thread which was the actual trigger. The C1/M1 couple worked pretty fine, I gave it app. 6 months of fair listening and enjoying it as I bought it, planning the mod for winter. The winter is here and I have finally a bit of time for the restoration.

I didn't open the C1 since I bought it simply because it was working fine. After opening yesterday I've spotted that some disaster happened in POWER SUPPLY - 2 section of the board and somebody already applied some workaround. I'm no electrical engineer (more of a self half-taught DIY hobbist) but I've read somewhere that aged 80's glue used for sticking caps can melt when heated and shorten circuits. My assumption is that the old glue mass coming from beneath a C47 shortened the pins of D3 which was already replaced by someone in my unit. But it also seems that the PCB path from D3's negative pin to C47's positive pin got burned as well (still need to do a continuity check there, I've started just yesterday at night and didn't want to beep the house) and that this trace is now bypassed with a piece of black wire to the other side of PCB. Obviously it worked well so I don't mind it being so hacky but I'll maybe try to do this bypass just on the bottom PCB side, from the through-hole negative leg of D3 to the positive leg of C47.

It would be great if anybody with more skills and experience checks the photos and try to confirm or dismantle my assumption. Thanks in advance!

In the meanwhile, I'll continue with the restoration and will keep you posted how things go.


D3 & C47, black wire goes to the other side.
3xNy9SkMtGN22C18mbsbh3v45jGTjA90okEVsXH5iyNucjMUzveZpiRK3iA6IHxI4OMlj1kV9XXRBMs6ZhxOlPSQXMLDuxma2ZlDXpXEaxBccJ3ZwktY57mthhsMQaNm6DTaktaOsexldDudE1ROV8J_PnmRdI3MCjIEGWc_qgHJ2_g8p6wZUseMKRgmkMG8n9tfCinExLY5TWbosf2EdmBuLQym8XFOHWw33P-FypLfLQIid1pbPrjzuM0EUbdrlGMSY_0YgtduezPIIbLhklj4SdoDWWGnYpa9OTU-Rj6yRDsXjoAQV3Og-zUWKYEMFy_QBIvFpO6XO7HoKQLb75V-Z_QDJaOLIVMHwxLv-21XNYnGw9Qs8m22VrKw1qnaYh3-3jxFM5NNHoyYmAnLT93B1m3jquRsfvCRxiR7FPBmaHi_4DQWzSlEukg4i9DC5s_bcZptdjRDGBevlHU6DrVyFxBFLkzLGXEFJ5s9DUBYlBEhra9iHmo1S4i50_44CJQKaoPdQms55G8HtTYzxyo4AYoo2TJ0wSrns5P9hYNBMwuI_bthcvOD8xLFrROTrAcQbak4uSkMnkQTtckBWZx6KQcVgOHnZVk1uI18NKxRx6acGIGywPtleZF27_EqfeO3s90E7kzv2yQB-QwRhohWSDsGpU6zqZBu_2vRMiNFCepVV5sHqVTiZPxD=w1297-h974-no


Bottom side of the PCB.
N3JmnUquuW6jhE_BHKYnxOi_3ZYgdymektuNnFRZApiFqlSZQd_d7gdn3rL7yr7U47I7Hm6PHUwjjmbwu1Rd_gr0tL4OJ-gHx9kfJpIEfIYIQM6P79A_4WQWDliLX41CPygrTlek2aln727v6cf_T-gp6iHx-YNyQMMTZXCmCSZbpGgYfHAHg_kk8h4BHXRICbcVcs2YfzAP6QwXi7mmfsFhkeTyXfqKJLTkEAWK72gpYwekL3nDzc7m4RignQQyNIjOLSgcv4TAFOPzXLaOd4yQfi50aZwFtK9t9PB7Z6wadJDrg7dyGRXvciPOXGCIuEHdc5hgek-pM8ROMVNT77tEy6O11ekOjHULNFnllg_hkdDWFO7yZuUiS_fhZ4VlXZgfjmDGd5MuehoTe49TDmfwnX2elBCHck-6udLc8Fj-nErCWL-coFI7wm-Mi5FS0NqHjMjrHnCPPFI9HnHeUujvvJEZjrUKgycB3fFKU5mX5HpcCI-P1kexNEEdtlmpwigsX5Vn3mNjLQouuJm6SIhTZWrJAkq2RBRJr0oaiNrc4174mZfWP9ud67dBqrcUCyhZKe3YKCB-kOpnK74BNIzPQktB5QpAiNUe-0pjjxlqAL-OvhiGsSfbsNArxm4c4Zb0Y7HzVn8Sy-bxbDEljvh8GabUpdSpw1BWs17sAkxCwLvT7ZlZKuTMBZK8=w1297-h974-no


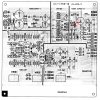
C1 service manual excerpt with the affected trace marked.
kfR4nFJJI06fVybHCCLV_7UdQ-pqMeWNRH7yM5iHet1ogAcy9Qjkd4ligYFlb2mNMaC8iqES4nhG83fNj_HIEc2IARVhHet8_UoepuiOIQw2HYHj6IyaPTA0D2DlUd9AurInIut3lV-YLi4r3tbPYwEANv5jMEeXzDrsWcb9GP27-MPrIAvuXoXfT68tn7NsNbzEyLpjVF0-1Jvv7H_z8sLtXlrEPBO7wseT71bsn85w3w0iDQcyETcBiUV___1JEbWYpz0UpXtj6L3jGTS1xgfCsYVkbTo75VAFDHGDUiTFwQ_FQnx_njMoN1nGYn4rcdAAr9hOs4gl_rX4hFQLmdzfK0jssbZHdpFer5-ck5g4PSpLlbLash9KMiXs7u_XIjEB5sVxY4HKmu35HBNB0zdzFrZ9YBYWY3S7R1FbYhz5C9edK-FiqvUiSnZE-Z-rwfNYWVWPK0B6Oh9eJN82IJSztqnpHI0rErPlUxbprI88Vk0DGpKkivFwy4XfLtmy7xchETXCPbthhLxhcu_dLh7CYLPBpJEnAhNh2iCAndY4GAX2r8nXoK3XHZifvZjDJRlY43MJzld8iyaSjwSNWU4ersrs6-DpXBL6OU8jy7tBujtIHsXxL8ZAomASGSCqewbVbkrq_-xQkcf3gV7Kqr3u_oIzYkJq89RYPp0j2ripE2c9Ix6FT0DNG0jh=s973-no
 
Oops, my bad. I've linked Google photos directly which seemed to be working ... obviously for me only being logged in with my G account.

I don't seem to be allowed to edit my original post (post being too old after a day?) so here's another try with directly uploaded images.

D3 & C47, black wire goes to the other side.
IMG_20210115_180514.jpg

Bottom side of the PCB.
IMG_20210115_184048.jpg

C1 service manual excerpt with the affected trace marked.
c1_pcb_01a.jpg
 
Last edited:
I've finished the restoration in the meanwhile. The trace between D3- and C47+ was indeed damaged. D3- is just floating in the hole because the trace from the other side is detached in that place from the PCB. The wire bypass works perfectly fine so I didn't touch it. I've noticed there are some extra blank soldering spots next to some component pins and in the case of C47+ it was cleverly used for the purpose of the off-board bypass by unknown repairman.

IMG_20210116_163616.jpg

In my case there was no capacitor on the botton side of the PCB. Also C1 and C2 were not present at all so I just skipped these.

It's still early for any solid sound judgement as I expect some burn-in period of the system - yeah, I know some people say it's nonsense and they might be right - even if it's just my ears + brain adjusting to a new sound - but very first sound check definitely shows that everything is cleared up, more crisp and transparent highs - I don't have to push the trebles pot to 2 as before, tighter and less boomy lows with better definition and since I was doing a quick check in the night hours, I can say that the Loudness really works nicely now without muddiyng the lows as it did before the upgrade. Still I don't go over 5 with Loudness in the rare moments when it's used.

C1 is being fed by good ol' Cambridge Audio DACMagic (the first version of it from 2009) which plays mostly FLACs from Gole 1 PC connected to a TV. C1 feeds M1 which will hopefully get restored soon too. Speakers connected to M1 are Klipsch Heresy II's Signature Edition which I've re-capped last summer. Accoustically, our living room sucks (this is where the system is used) but the sound is surprisingly pleasant and joyful.

Thanks again to all and especially to Ben for sharing his experience!
 
Last edited:
If it works and you are happy with it why not. I would have to find another way. Just saying that I could not live with that board jumped out that way and with all that rosin left there. That's just me though.
 
Thanks for your views, I don't do these things so often so any opinion is appretiated. I'll definitely get to board cleaning later, probably along with M1 restoration. Guessing proper alcohol wipe should do the trick.
Do you guys know if it's possible to glue the trace back to the board somehow? If yes, what type of glue is recommended? Some 2 component epoxy for metal?
 
Where the lead comes through the board on the bottom of the board you should be able to wrap some wire, not stranded, insulated .22 g. Or so. Then hop over to the other end of the next in line (follow the trace) part and do the same. Solder at each end. Even better would be (in my opinion) to remove the insulation from the existing trace ( the green coating ) to expose the copper trace then use a piece of wire that follows the trace to form a solder bridge all along that trace between the parts. Same as the first fix, wrapping the wire around the exposed leg of each part then soldered. I hope I am explaining this right... I have not used glue but that should work well too, the epoxy/superglue? There are several ways to "skin a cat".
 
First post, long time lurker and new to electronics restores & upgrades. I've been following this thread for awhile now and have a question that perhaps someone can help me with. I bought a C1 knowing it had the right channel not working, at all. I replaced the output relay thinking that might be it but it was not. Suggestions would be helpful.

I have 2 C1's and a C2. I upgraded the C2 some time ago ala DRM-Dan Mattis cap upgrade. I substituted higher grade Caps for it instead though. The change was amazing. The two C1's will be done differently from one another. I have DRM caps for one and have the Leestereo components for the other. It's possible I may do a mix and match on the one I do with the DRM C1. I've also got a couple Burson V5's I'm contemplating putting into the C2. The current preamp I'm using solely for phono is a Tandberg 3002A that I recapped in its original configuration but I'm looking to making some improvements to it as well. Probably another thread to address that one, no? Thanks in advance.
 
Check the pots/switches and the welds on the output /input RCA phono jacks yet ?
 
Back
Top Bottom