• The move to the new server is done. There are some software and database maintenance updates in process. This has us passing the hat around to help out. We appreciate any donations. Seriously, even a dollar helps. The payment page may be found here - https://www.audiokarma.org/support.html

Kenwood Basic C1 Preamplifier Restoration/Upgrade

Ah, just throw it away and get you one of these....20200813_222942.jpg
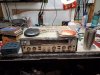
Ha Ha. Just screwing around. Been out in the shop tearing this one down tonight for polishing up and cleaning. All I need now are two correct volume and stereo blend knobs. I love Kenwood/Trio... I think you are on to something there. I am trying to think what all the subsonic filter switch runs thru. Looking at the schematic I see two .33uF caps and that it runs up into the tape section switches. It is unclear to me what may be causing that unless the switches are still not all good and clean. I also see that you wrote "To me, this points to a poor connection at the output jack,". You do mean at the input correct ? If the output jacks had trouble you should still see the same fault.
 
Hello all. I have been working on my own C1 and I have a question regarding the use of a bi-polar Panasonic SU series capacitor in the phono RIAA feedback loop? There are 2200uf 10V caps in that series available. I am not sure if they were six year ago when this project was first posted, or if perhaps this is not a good cap for this application. @Leestereo or others have any input? Thanks!
 
Hello all. I have been working on my own C1 and I have a question regarding the use of a bi-polar Panasonic SU series capacitor in the phono RIAA feedback loop? There are 2200uf 10V caps in that series available...

The 2200uF 10V Panasonic SU bi-polar capacitors are 16mm in diameter and have a lead spacing of 7.5mm. IIRC, the board can accommodate capacitors 12.5mm in diameter with a lead spacing of 5mm in the C5/C6 positions.
 
The 2200uF 10V Panasonic SU bi-polar capacitors are 16mm in diameter and have a lead spacing of 7.5mm. IIRC, the board can accommodate capacitors 12.5mm in diameter with a lead spacing of 5mm in the C5/C6 positions.
I got out my Vernier calipers and measured up the board. The lead spacing is 5mm, the stock capacitors are 13mm in diameter and I measured 14.65 from center to center of the markings on the board. There is also a ton of space around C5 and C6, so I don’t think that fit is going to be an issue. But I’ll order some polarized ones as well just in case. Thanks for the quick reply!
 
Hey guys, I am about to start this resto on my C1, I used Anti Skate's BOM and some updated parts from David (Much thanks to you both!!) I have not done much circuit board work but I was High Rel. certified as an Aircraft Electrician for 30 years and I am planning on posting pics as I go through this so if you guys could look in and check up on me that would be great! - I recently acquired an Adcom 545 ii amp and a set of Jamo C93 ii speakers to set up a secondary sound system in my Hobby Room ( Wood Ship Models) and I’ve had the C1 for years but not in use. I only use one source – a Sony Hap Z1 ES, it has all my CD’s in it and streams an upgraded version of Spotify and tons of online radio stations. I’m not real enthused with this system and I hope the C1 mods will do for me as much as you guys are reporting on yours – my bass is loose and flabby, the mid’s are recessed and unremarkable and the high’s are not clean or crisp. It gets grainy and harsh at louder volumes so I don’t push it much past 9 o’clock… I was really hoping for much more detail and clarity from this system so I hope these mods do it. I have also been having the right channel drop out on startup when it’s cold – gets better when warmed up (I ordered the relay) and the CD/Aux right channel RCA input is intermittent and needs the cable wiggled to the right spot to work so I am using the Tape A input for now. I should have my parts Friday and start over the weekend… Can someone walk me through the selector switches removal and cleanup process? I hear they are finicky and delicate to work with, also any ideas on the intermittent RCA . Any help and critique’s are desired and welcome.
 
Weld away at the in out RCA/Phono plug jacks on the mainboard. Start there with the intermittent problem. Wiggling jacks are no no's especially with that big ole amp ! HA ! Anyhow, re flow the solder on those jacks. They get loose-cracked over the years. Buy the finest possible solder wick to remove all of the solder on the switches. I would be glad to help any way I can on that part for you. Be sure to take your time and photos are king ! They will help a lot if you are a hobbyist like me.There are a heap of good photos here so I know you will take full advantage of them as well. Make sure to drop the voltages in the supply's using the recommended diodes. Those transistors in the EQ Amp/Phono stage are JFETS and are very hard to find and they are matched as well. The C1 is a fun project. Any questions ask away and if I can be of help I will. Keep in mind though, I am not a tech. I have restored 1 C1 and three C2's though. The C1 is a simple unit and yes, it will sound great after the build.
 
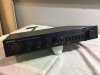
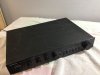
Ok so most of the parts are in, I found a few more on David’s updated list that conflict with Anti Skate’s so I ordered a few more caps so I have them if needed. Thought I would take some before pics so here’s the overall outer condition:9C445A88-3866-4552-B836-72A7EDBF84B9.jpeg9C445A88-3866-4552-B836-72A7EDBF84B9.jpeg8878949A-3372-4736-8A5F-3406BDF7A5BB.jpeg
 
Last edited:
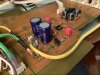
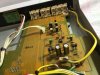
BC456B6A-FFEB-4C3B-B536-FFF208E49C62.jpeg Then I decided to open it up and check the inside and see how it comes apart and lookie what I found: yep, someone has already changed the caps and it’s pretty clean, guess I learned something new today.... the good news is all the values of the new components are original values and the op amps have not been upgraded either so I’m still hoping for a substantial increase in performance and am proceeding as planned. Unless I am wasting my time.... I already bought the new caps - can I expect any improvement in sound quality by replacing all these new caps with the ones in this thread? From the way it was sounding I would not have thought this pre had been refurbished already, guess I should have popped the lid and asked you guys first but I am willing to do the mods anyway given the glowing reviews from you guys on this build. Please Let me know if there is a better way to proceed. I did find a few halo’s on the RCA inputs and one is for sure the right channel CD / Aux input so hoping for a fix there.... more to come I guess....
 

Attachments

  • 788DC609-9FAB-4276-BBDF-5BB5E2C2028A.jpeg
    788DC609-9FAB-4276-BBDF-5BB5E2C2028A.jpeg
    133 KB · Views: 41
Last edited:
If I were you I would hope that cleaning those switches and and soldering/flowing the RCA section makes.it better to your ears. I do not think that changes to the OP amps only will make the huge difference that you are hoping for. As far as my amp, I do not see how anyone could not say it doesn't sound great. I have had all kinds of pre amps and the C1 pretty much holds it's own with any of them besides the straight line drive.
 
I am not going so far as to say that. I would thoroughly clean all the switches and solder/re flow all the RCA inputs/outputs then see. If everything else is working as it should and it has all new capacitors as well as them being installed correctly then the OP amps alone, in my opinion are not going to make the difference between a Ford Pinto and a 69 SS Camaro. No, not on their own..
 
I would go ahead and stick with your original plan. Verify that the capacitors that have been replaced are of the correct value and installed properly.
Re-flow the solder joints at the RCA's as suggested above. Those are always a high stress area prone to cracking.
Replace the rectifier and zener diodes in the power supply. There is an issue with stock power supply voltage running a bit high for the stock opamps.
Changing the zeners will bring the voltage back down to an acceptable level.
I did an opamp swap comparison on a C2 for my neighbor and there was a noticeable difference.


As a side note, the output level of the C1 is 0-5v, which is kinda high for some power amps. When I use it with my Carver M500 I use a pair of 12db attenuators.
 
Yeah I’m going to carry on, it was only $45 and I don’t think they’ll take em back but again, the new caps in there are the original values so it will be interesting to see if the larger values and better caps in some cases make a difference as well as the op amps and new voltages... plus it’s a good board to get my feet wet on, not too crowded and looks like a very doable mod and may lead to other vintage gear acquisitions today was my birthday so I’m gonna get serious tomorrow- look for some more pics and posts soon.... thanks for the input guys!
 
Happy Birthday @Asat and welcome to AK ! You will have fun with it. Bet you like it better after you toil over it yourself !
 
Well I finally finished and I am totally impressed! Blown away at the difference- I don’t know where the culprit lies but the graininess and harshness are gone and the sound is warm and smooth with detail and clarity that is amazing. The bass is tight and punchy... I am most impressed at the completely different voicing in the overall sound - before it was brash and easily fatigued me at anything above background levels. Now I am just enjoying listening and hearing nuances in recordings that I have listened to for a long time. I changed all the caps that were a different value than what the previous refurb did, and the IC’s and Zener’s and rectifiers. All of the previous issues are gone! I am a happy listener, I think the C1 and Adcom 545 make a great pairing.... thanks to everyone on here that helped whether you know it or not and a huge thanks to LeeStereo - your design/engineering for this preamp is remarkable - great thread and great results!! Lou
 
Well I finally finished and I am totally impressed! Blown away at the difference- I don’t know where the culprit lies but the graininess and harshness are gone and the sound is warm and smooth with detail and clarity that is amazing. The bass is tight and punchy... I am most impressed at the completely different voicing in the overall sound - before it was brash and easily fatigued me at anything above background levels. Now I am just enjoying listening and hearing nuances in recordings that I have listened to for a long time. I changed all the caps that were a different value than what the previous refurb did, and the IC’s and Zener’s and rectifiers. All of the previous issues are gone! I am a happy listener, I think the C1 and Adcom 545 make a great pairing.... thanks to everyone on here that helped whether you know it or not and a huge thanks to LeeStereo - your design/engineering for this preamp is remarkable - great thread and great results!! Lou
Awesome ! Glad you went ahead not did it ! Another happy C1 customer.
 
Hi.

Has anyone tried to compare moded C1 to stock C2? Who's the winner?
Which one should I get for pairing with M2a (C1 or C2) to control pioneer hpm-100 as we know many of audiophiles strougle with hpm treble harshnes..
Any suggestions, please?
 
Back
Top Bottom