• Please note that Audiokarma will be offline briefly for updates early on Monday morning, September 28th.

Klipsch Chorus II Restoration

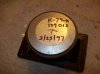
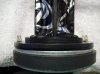
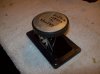
Here are the tweets. I had to cover a Klipsch sticker to apply the Dynamat so I wrote the information contained on the sticker on the back of the magnet using a sharpie.

Not sure how much all this will help. The sound deadening is supposed to help keep the horns from "ringing" at certain frequencies. It wasn't too expensive to do (about $15) so I figure it's worth a shot.
 

Attachments

  • 100_5728.jpg
    100_5728.jpg
    67.2 KB · Views: 53
  • 100_5729.jpg
    100_5729.jpg
    77.4 KB · Views: 58
  • 100_5730.jpg
    100_5730.jpg
    77.2 KB · Views: 48
I sent you a PM about your x-over problem.

Now onto the first crossover.

Remember I said I didn't think anyone had ever been inside the cabs?? Well, I take that back. This crossover totally rigged.

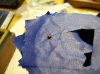
Looks like something bad happened (can't imagine what) but the result is a PCB that has multiple cracks in it and wire leads that have been soldered in place of the original traces. Toss in a chunk of Styrofoam to keep it stabilize too. Rube Goldberg would be proud.

I must hand it to someone who saved a damaged crossover by this bit of ingenuity. I plan on replacing it with a non-damaged PCB when something become available. With all the folks jumping on the Crites Crossover bandwagon, maybe there are some spare boards floating around. I'll have to keep an eye out in BT and that auction site.

If I keep what I have now, I will at least increase the wire size to something a bit larger. I gotta think this is a choke-point for the signal.

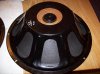
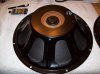
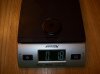
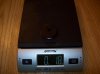
Lastly, here is a pic of the woofer on a postal scale. Coming in at a bit over 20 Lbs~!

"Go Big or Go Home" should be the Klipsch motto.

Next on the list:

Wrap the horns in Dynamat.
Add mass to the passive to lower it's resonant frequency.
Butt-load of cab sanding
Refinishing
 
What a great project! Those are manly for sure! So what'd the wife say?

Let us know when you get to the cabs, I'm sure we can point you in the right direction.

Cheers, Glenn
 
What a great project! Those are manly for sure! So what'd the wife say?

Cheers, Glenn


Quote: "Who are you going to sell those to??"

LOL. Doesn't bode well, huh? She HATES big speakers.

Oddly enough if they are odd shape, she doesn't seem to mind as much.

She really likes the Timeframe 700's and tolerates the DQ-10's.

She doe not like the Snell Type E II's even though they are 1/2 the size of the others.

Women... Go figure??
 
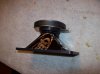
Here are the tweets. I had to cover a Klipsch sticker to apply the Dynamat so I wrote the information contained on the sticker on the back of the magnet using a sharpie.

Not sure how much all this will help. The sound deadening is supposed to help keep the horns from "ringing" at certain frequencies. It wasn't too expensive to do (about $15) so I figure it's worth a shot.
I did that with the tweeters on my KG 4.2s, but I used a generic version of Peel and Seal. It may not help, but it sure won't Hertz. :D

IMG_2109_zpsb1ef5942.jpg
 
I wrapped all the horns with plumbers caulk rope as it was readily available at the hardware store and others had had success with it; not sure if there was a price advantage over other options. It does deaden the squaker when you thump it with your finger.
 
I'm heading out to a small estate auction this am. I know the auctioneer and asked him if he knew of any turntables or old tube stuff and he told me about the auction today being for a former school music director, she may have some interesting stuff. In the auction photos online I don't see anything of note pictured as draw items, but in the background of two pictures I do see the top slide lids of an old console and in another shot I see the front of some largish early sixties style speakers. Also the text verb-age claims there are some turntables. Wish me some AudioKarma luck.

-reverb- both are boxed up.
 
Good luck at the sale Schmidlapper. Hope you bring back something cool!

I am off to Lowe's to find all sorts of odds & ends to keep the project going.
 
It looks in the third photo as though the horn is not screwed tight sandwiching the diaphragm to the motor. Could also just be the angle of the photo too.

Thanks -reverb-. There was a 1964 magnavox Astro Sonic console but all Astro Sonics are solid state. There was a Technics SL-1500 turntable that looked ok. The big old speakers were un marked so no idea what they were, well built May have been something special. If I wanted any of it I doubt I would have had much competition not a big crowd. Though there was this one young girl there with her parents and it was funny she would have fit in on here as she was talking about getting the turntable and her mom said you already have five. She was around 13 and looking at the Magnavox console with me. My wife and I left before the sale started, I hope she got the turntable she wanted.

Well, it's like nine-billion degrees here in Middle Georgia so I am looking to do ANYTHING except sanding in the hot garage.

Hey, those horns need to be wrapped!

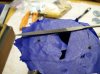
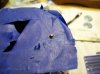
Ordered some Dynamat off that big auction site and began to apply it to the midrange and tweeter horn body's.

This is something my OCD-self really enjoyed! Got into a sort-of Zen state while cutting and applying the various pieces.

I ordered 3 square feet but I think 2 square feet would be enough to cover both mids and both tweets.

Here are the results.
 
It looks in the third photo as though the horn is not screwed tight sandwiching the diaphragm to the motor. Could also just be the angle of the photo too.


Dang Dude... good eye! You are correct, the parts are not fitting together correctly. The more and more I get into these, the more I wish they could talk - there is a story of where they have been and what they have been through!

I checked with a meter and it read 11.6 - I assume that is about correct.

What's going on with the fit is it seems the alignment pins are "mushroomed" on the tops and will not fit down into the receiving holes in the motor. Who knows how THAT happened! I tried to capture it with a picture but my camera is not real good will close-up, small stuff.

What I had to do is mask off the rest of the horn face to protect it and slightly file the splayed edge down to the normal size. Just a couple of passes is all it took and all fits nice now :)

Thanks for pointing this out Schmidlapper. I noticed it when I pulled the horn but it just didn't register that something was not right. Not real experienced with horns and diaphragms.
 

Attachments

  • 100_5749.jpg
    100_5749.jpg
    61.3 KB · Views: 63
  • 100_5748.jpg
    100_5748.jpg
    67.8 KB · Views: 50
  • 100_5747.jpg
    100_5747.jpg
    54.9 KB · Views: 38
  • 100_5746.jpg
    100_5746.jpg
    61.8 KB · Views: 55
  • 100_5743.jpg
    100_5743.jpg
    66.9 KB · Views: 76
Last edited:
11.6 sounds about right to me. Fixing that will align the diaphragm cone in the throat and seal it so the air goes out just the end and sound a lot better. If both the pins were through the diaphragm ring I believe the voice coil should have been aligned around the magnet, just not sandwiched tightly.
 
One small victory today. Finished the Passives. As per Dr. Biggles recommendation, I put another layer of tissue backing and Aileens over the tears in the one passive.

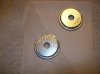
Another tweek I tried is to add a little weight to the passive to lower the resonant frequency a bit. Theory is about 2-3 Oz should do the trick and take the bass a bit lower.

The 1.8 Oz of weight and along with the weight of the epoxy to hold it in place should be about 2 Oz of added weight. You can see it in the picture mounted on the center of the rear of the passive where the VC normally would be.

Passives are done!

Long way to go though.....
 

Attachments

  • 100_5754.jpg
    100_5754.jpg
    73.6 KB · Views: 62
  • 100_5753.jpg
    100_5753.jpg
    64.6 KB · Views: 69
  • 100_5752.jpg
    100_5752.jpg
    46.7 KB · Views: 46
  • 100_5751.jpg
    100_5751.jpg
    47.3 KB · Views: 53
  • 100_5737.jpg
    100_5737.jpg
    64.3 KB · Views: 52
OK, back to the Chorus II's!

First of all, lot's of Karma goes out to Schmidlapper for giving me a pair of crossovers to help-out in the restoration. Thanks Bud, I appreciate it! Very cool of you.

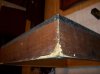
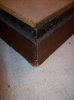
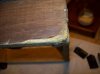
So here we are.... cabinet-time. I need some advice folks. Attached are a few pics of the riser. The other one looks about the same. It's really what you would expect from a large, heavy speaker that has been moved around a few times in it's life.

I have already re-glued all the corners and placed them in a strap-clamp. This is as "tight" as the corners are going to get without major reconstructive work.

My problem is I don't posses the woodworking skills of GD70 or "The Wood Whisperer" (Dr. Biggles) :yes:

I am wondering how these would look if I cleaned everything up and made it straight with epoxy and painted the whole riser black??? That would seem to be something I could accomplish.

Toyed around with the idea of re-veneering the risers too. They are oiled walnut and I do have some walnut veneer. The grain of what I have is very different from the cabs however. Not sure how well it would match - or if anyone would notice the difference... as you can see, I am totally lost here.

The only other option I can see if to have new risers build out of solid wood to replace these.

How much do you figure that would cost? I'm thinking 20 a riser??? I suspect a good cabinets shop would have "scrap" pieces that are large enough to construct these.

To me, it doesn't seem to be an overly complicated task for a person who has the skills and tools; 4, 90 degree miters and a half-round detail across the top.

Arggg... what to do, what to do???

:headscrat
 

Attachments

  • 100_5732.jpg
    100_5732.jpg
    61.3 KB · Views: 64
  • 100_5733.jpg
    100_5733.jpg
    56.7 KB · Views: 49
  • 100_5734.jpg
    100_5734.jpg
    50.1 KB · Views: 46
  • 100_5735.jpg
    100_5735.jpg
    73.6 KB · Views: 47
  • 100_5736.jpg
    100_5736.jpg
    59.9 KB · Views: 59
Last edited:
Holy Cow -
I have a pair of early-mid 1980's Chorus. They do not have the passive bass flapper in the back.
I was thinking of replacing the Elytics on the crossovers...that is a tiny fraction of what you have going on here.:thmbsp:
best
 
Hey mang!

My new title is now officially, Dr. Biggles - Wood Butcher.

Wow, those risers are TRASHED.

Hmm, well. I would sit with the speakers a while and let them tell you what they want to do. if you listen, they will speak.

To sand, fill to make smooth (polyester or epoxy ((easier to use)) and finally paint, would be something you could do pretty darned easily. The products aren't necessarily cheap, but it won't break the bank. Risers aren't generally what people focus on and I think you'd get plenty of mileage out of them. My Wreckedilinears still have the rotten risers on them. Flaky particle board, peeling veneer, they nasty. But you can't see them, I painted them black. Some day I'll build new ones. I bought a length of hardwood, should be an easy little project some day.

A repair like that will get you on the road to listening to them, putting them in to daily rotation. Then, when time and inspiration hits you can make or have made new ones.

Biggles
 
You have two primary issues when repairing the risers, cosmetic and structural. Functionally they need to endure the weight of the speaker while moving them around, some rocking and twisting stress is inevitable. Are all four of the metal button feet on the bottom of the risers present and still in good shape? The majority of stresses are going to be on the four mitered corner joints and the four mounting brackets. These can handle even high milage usage without looking like something gnawed on them or someone took a rasp to the corners. They are lucky you came along and rescued them.
 
Back
Top Bottom