• The move to the new server is done. There are some software and database maintenance updates in process. This has us passing the hat around to help out. We appreciate any donations. Seriously, even a dollar helps. The payment page may be found here - https://www.audiokarma.org/support.html

Klipsch Chorus II Restoration

OK, back to the Chorus II's!

First of all, lot's of Karma goes out to Schmidlapper for practically giving me a pair of crossovers to help-out in the restoration. Thanks Bud, I appreciate it! Very cool of you.

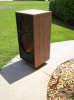
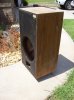
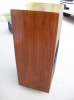
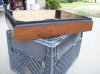
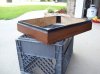
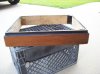
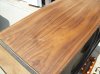
So here we are.... cabinet-time. I need some advice folks. Attached are a few pics of the riser. The other one looks about the same. It's really what you would expect from a large, heavy speaker that has been moved around a few times in it's life.

I have already re-glued all the corners and placed them in a strap-clamp. This is as "tight" as the corners are going to get without major reconstructive work.

My problem is I don't posses the woodworking skills of GD70 or "The Wood Whisperer" (Dr. Biggles) :yes:

I am wondering how these would look if I cleaned everything up and made it straight with epoxy and painted the whole riser black??? That would seem to be something I could accomplish.

Toyed around with the idea of re-veneering the risers too. They are oiled walnut and I do have some walnut veneer. The grain of what I have is very different from the cabs however. Not sure how well it would match - or if anyone would notice the difference... as you can see, I am totally lost here.

The only other option I can see if to have new risers build out of solid wood to replace these.

How much do you figure that would cost? I'm thinking 20 a riser??? I suspect a good cabinets shop would have "scrap" pieces that are large enough to construct these.

To me, it doesn't seem to be an overly complicated task for a person who has the skills and tools; 4, 90 degree miters and a half-round detail across the top.

Arggg... what to do, what to do???

:headscrat

Out of all the things to get a little damage, the risers are pretty much the top on the list. They are there more for that purpose I would guess than speaker performance. What I have done in the past was, glue any loose veneer, then touch up the color with a furniture sharpie that matches the veneer color. It isn't perfect, but it sure makes it look better, and almost so it isn't noticed. Regular brown sharpie's can be used where veneer is missing to help blend. It almost becomes an art form and can make a huge difference.
 
Well it's a rare day in Middle GA. Only 90 degrees and less than 100% humidity! There is even a slight breeze blowing - very unusual around here.

Sounds like sanding weather!

I tried to channel my inner "Dr. Biggles" but unfortunately I did not inherent any additional woodworking skills. I was, however, overcome by a strong desire to eat lots of bacon??

I decided to tackle the worst side first. Couple of deep scratches and gouges in the wood. I would alternate between the iron and a wet t-shirt to raise the grain, then follow that with a pass with 220 grit. After about an hour, I figure I would move to a lower grit to speed things along. That worked great, I was seeing the scratches fade with each pass.

What I didn't realize however was I was getting dangerously close to burning through the veneer. I caught it just in time of it being a disaster, but not before I did putz things-up a bit. Damn! This just isn't something I am good at.

I guess it's better than it was when it had all the scratches... but not by much. I put a little oil on the bottom of the wood just so you could see the area that I dorked-up.

Not very happy with myself right now. Think I'll put the palm sander away for the day.
 

Attachments

  • 100_5788.jpg
    100_5788.jpg
    87.1 KB · Views: 76
  • 100_5791.jpg
    100_5791.jpg
    83.5 KB · Views: 75
What I have done in the past was, glue any loose veneer, then touch up the color with a furniture sharpie that matches the veneer color. It isn't perfect, but it sure makes it look better, and almost so it isn't noticed. Regular brown sharpie's can be used where veneer is missing to help blend. It almost becomes an art form and can make a huge difference.

Good points RS Steve. A little lipstick on the pig so-to-speak.

I figure I will give this a shot. I have done some reconstructive work on risers before - mainly to pull swollen bottoms back into shape. What I use is wood glue to stabilize the area, then I line each outer edge with wax paper. Then I place thick tongue depressors on each side and clamp it to within an inch of it's life. Surprisingly effective. Pulls the area back in and makes it rock hard instead of powdery and flaking.

As you mentioned, a little work with a sharpie here and there can really make stuff blend in much better.

Thanks for your suggestions. I'll add them to my arsenal.
 
Whoa, hang on there Tex. Burning through the veneer already? What's going on? And, I know EXACTLY how you feel. Fudge Sicle time.

I've nearly always started with 150 on the pam sander and so far, no issues. Even on the Altec Valencias and those things had more than paper thin veneer. Enough pressure down to get some dust flying, but not huge vast pressure.

Long even strokes over nearly the entire sides of the enclosure, with the grain. Long, even strokes. Don't give the scratches any special attention. When it's time for the wood bleaching, that moisture will swell any of the veneer that will swell. When it dries, light hand-sanding of 180 and you're done. BAM.

And? The second image looks GREAT, at least from here. Listen up, it'd be a shame to attempt to bring these rigs back to New condition. That's not who they are. They're warriors and have stood the test of time and abuse. So what if there are a few scratches, pock marks and/or dings. Show them some love, then oil. They'll still be there, but your eye will not be drawn to them.

These Chorus know who you are and if you burn through a little veneer at first, they're okay with it. They know without you they'd already be in the trash or languishing in a wet basement. Don't feel bad about it, they're WITH you on this. Flip the enclosure over and try again. Don't give up, hone your skills. It's okay!

xo, Biggles
 
A repair like that will get you on the road to listening to them, putting them in to daily rotation. Then, when time and inspiration hits you can make or have made new ones.

Biggles

Exactly! That's where I am at now. I want to HEAR these! Caps are on the way. Gasket is on the way from Klipsch. everything is falling into place. I am going to pick-up some Danish Oil in just a few minutes. That seems to be a popular choice - more so that Howards Feed & Wax.

I'm thinking we may have sound by next weekend.

Not sure what I am going to do with them however. The wife has told me a dozen times how much she dislikes them and they are just in the garage right now! Not even in the house where she has to see them!

I'm sure once they find a place inside I will hear about it daily. :rant:
 
Holy Cow -
I have a pair of early-mid 1980's Chorus. They do not have the passive bass flapper in the back.
I was thinking of replacing the Elytics on the crossovers...that is a tiny fraction of what you have going on here.:thmbsp:
best

Good luck with you crossover recap. Bob Crites is a good source for quality Klipsch parts if you need anything.

Mine have lived a hard life. They were very much in need to some TLC. I suspect yours have been better cared-for :)
 
When it's time for the wood bleaching, that moisture will swell any of the veneer that will swell. When it dries, light hand-sanding of 180 and you're done. BAM.


Wood bleaching?? I thought sand till smooth and then oil. Is bleaching necessary? If so, how is it done? Is this the step using Barkeepers Friend?

Thanks for the kind words. Still not very happy with myself though - but like you say, learn from it an move on. :thmbsp:
 
Do not sand either by hand or by palm sander to get an even color with the veneer, it's not going to happen. Pay attention to the dust you're getting from the sander. Once you get through the oil finish, stop. Feel with your hand. That's it!

That even color you color cannot be achieved by sanding. The wood has aged. To get that nice, even color with the veneer, you must use Bar Keeper's Friend. A little warm water, just to make a heavy slurry, ultra fine scotch brite pad and maybe 3 minutes going with the grain, all over. Wipe dry with sponge and clean warm water until BKF has been removed. Set in sun to dry.

Sand by hand with 180, just a few strokes. Feel with hand. Wipe with clean sponge with warm water until sponge comes clean. Set dry in sun.

Oil. No feed n wax, it ultimately makes the finish dull.

If you restored 1 pair of speakers like this every month for the next year, you'd still find mistakes you made. I do. Take notes of how you'd think you'd do better next time and move on.

As far as the Wife is concerned, agree with her and carry on. Once you've got the first application of oil on them, she could very well change her mind. Especially once she sees how much love, time and effort you put in to them. It's magical! Sell her on the speakers by action, by proof that they're going to look stunning. She just can't see the final product, we can.

Biggles
 
Out of all the things to get a little damage, the risers are pretty much the top on the list. They are there more for that purpose I would guess than speaker performance. What I have done in the past was, glue any loose veneer, then touch up the color with a furniture sharpie that matches the veneer color. It isn't perfect, but it sure makes it look better, and almost so it isn't noticed. Regular brown sharpie's can be used where veneer is missing to help blend. It almost becomes an art form and can make a huge difference.
Sorry i have to ask

Where can i get furniture sharpies

I tried amazon
 
Sorry i have to ask

Where can i get furniture sharpies

I tried amazon

Little local hardware stores, large hardware stores, mom & pop lumber yards, large lumber yards. They'll be with the oils, stains and similar items.

Biggles
 
Starting to feel a little better about the problems earlier in the day.

Here are a couple of shots of Chorus #1 getting a nice Georgia suntan. It is actually drying after being bleached.

Then, a few shots after the first coat of Danish Oil.

It really doesn't come across well in photos (especially with my crappy camera) but the sheen and depth is pretty amazing. I never thought they would look this good. The 3rd pic is the side I almost burned through the veneer. Still visible, but not terrible.

I have been multitasking on the risers today also. When the heat, mosquitoes or gnats get to be too much outside, I retreat into the house to glue, patch and make those look better.

Question for the room: How many coats of Danish Oil is desirable? Do you do anything between coats i.e. light sand etc?

Thanks for the support all.
 

Attachments

  • 100_5792.jpg
    100_5792.jpg
    107.8 KB · Views: 74
  • 100_5793.jpg
    100_5793.jpg
    97.4 KB · Views: 89
  • 100_5794.jpg
    100_5794.jpg
    65.2 KB · Views: 93
  • 100_5795.jpg
    100_5795.jpg
    57.4 KB · Views: 82
  • 100_5796.jpg
    100_5796.jpg
    85.3 KB · Views: 87
Here are a couple of shots of the 1st riser.

Sanded
Flaking particle board stabilized
New coat of the black accent
Oiled

Perfect? By no means.

Adequate? For now - yeah, I think so.
 

Attachments

  • 100_5799.jpg
    100_5799.jpg
    89.7 KB · Views: 73
  • 100_5798.jpg
    100_5798.jpg
    77.6 KB · Views: 67
  • 100_5797.jpg
    100_5797.jpg
    81.8 KB · Views: 65
Ha! You should be feeling a lot better! Nice shootin' Tex!

In solidarity with your project today, I did the same on the second Sansui enclosure, got first application of oil on. Another application on the first enclosure. Pretty darned cool.

How many applications of oil? That's up to you, would recommend a minimum of 2. First application is wiped off with cloth rag. Second application let it sit until just starting to get tacky, then wipe with ultra fine steel wool. Then wipe clean with cloth rag.

After each application of oil, come back every half hour or so for a while and buff with the cloth rag.

Wait 3 days, then do another application with the steel wool. I would REALLY recommend doing at least 3, up to 5. After the 3 day drying period, inspect. If that's what you want, let it ride. If not, do another application.

Biggles
 
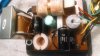
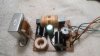
Caps arrived in the mail today. Crossover-time!

Here is (was) the plan:

Replace the 68uf lytic with a new 68 lytic and a .47uf bypass film cap
Replace the 2, 2uf caps with 2, 2uf Solen polypropylene
Replace the 6uf lytic cap with 2, 3uf Solen polypropylene in parallel

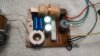
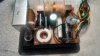
Well, no way my 68 is gonna fit. The slot it is for a radial and I got an axial - thinking that I would stand it on end and run the lead down the side. Well, the lead is too short and the cap is too fat anyways. Decided to punt on this cap and leave the existing ones in place. They were still in spec and next time I order, I'll get a replacement radial. The crossovers are easy to pull and easy to work on - no big deal to revisit these later.

I had to wedge the Solen's in but they did fit. Had to move the 2, 3uf's in parallel but it all looked good and fit.

Here's some pics.
 

Attachments

  • IMG_20140708_172231947.jpg
    IMG_20140708_172231947.jpg
    70.4 KB · Views: 69
  • IMG_20140708_185427814_HDR.jpg
    IMG_20140708_185427814_HDR.jpg
    63.3 KB · Views: 59
  • IMG_20140708_185432315.jpg
    IMG_20140708_185432315.jpg
    60.5 KB · Views: 51
  • IMG_20140708_192147026.jpg
    IMG_20140708_192147026.jpg
    71.3 KB · Views: 51
  • 100_5802.jpg
    100_5802.jpg
    100.8 KB · Views: 79
Last edited:
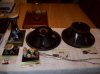
I think I am ready to begin reassembly of the first Chorus. Since I have the day off, that is the plan for tomorrow.

Everything needed out of the table ready for assembly. WooHoo!

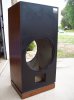
The cab turned out pretty good. It has 3 coats of Danish Oil on it right now but I may go back and do more.

The risers are OK but still have a few rough spots. I may can dial them in a little better with some markers and stain pens.

Also need to hit the sides of the front and touch-up some nicks.

The back and the baffle had a few spots of damage so I figured why not go ahead and repaint them a nice satin black. Three light coats in varying directions and they looks great.

Hoped to be listening by this weekend but that just isn't going to happen. The second one should go much quicker though.

Won't be long....

:music:
 

Attachments

  • 100_5803.jpg
    100_5803.jpg
    76 KB · Views: 59
  • 100_5805.jpg
    100_5805.jpg
    69.3 KB · Views: 74
  • 100_5807.jpg
    100_5807.jpg
    76.3 KB · Views: 59
  • 100_5806.jpg
    100_5806.jpg
    68.6 KB · Views: 71
Nicely done Tex! Risers look very serviceable and will get the job done until you can pull some sanity points to make/have made new ones.

Feels good, huh?

Biggles
 
Nicely done Tex! Risers look very serviceable and will get the job done until you can pull some sanity points to make/have made new ones.

Feels good, huh?

Biggles

Thanks Mang. I am pretty happy with where it is right now.

Going to be a trick to get them over on their backs without damaging something. The woof is 20+ lbs so there is only one realistic way to get it installed - while the cab is on it's back. Maybe I can lay-out a drop-cloth in the den and do it there. :scratch2:

I keep taking the Wifey out to show them to her. "Look how rich this wood came out Honey?" She agrees that they look nice but still says she doesn't like them. I'll keep working on her. I figure if I get them in the house, she isn't going to move them - they weigh more than she does!

It does feel good to see everything coming back together. Thanks for the advice along the way.
 
Surely, easy peasy. I've got 2 old blankets I keep around for just such situations. I've also got a gaggle of flattened cardboard boxes I keep around to set enclosures on, constantly.

Sometimes you make mistakes, sometimes you bang a corner or edge of a freshly restored, veneered finish. I've done it, for sure. This is where you learn how to make nice again all your hard work, no big deal. If everything went perfectly every time, how boring would that be, eh?

Biggles
 
I've been reading each of your updates, thanks for sharing.

My ChorusII were also a little beat up when I purchased, but nothing like yours.

And you have them looking great and I have no doubt they will sound great as well.

Heh, your major roadblock is WAF, sounds like she is pretty well settled. Har.
 
Back
Top Bottom