• The move to the new server is done. There are some software and database maintenance updates in process. This has us passing the hat around to help out. We appreciate any donations. Seriously, even a dollar helps. The payment page may be found here - https://www.audiokarma.org/support.html

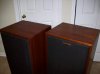
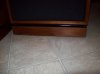
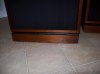
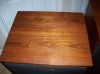
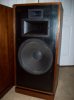
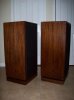
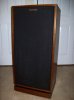
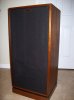
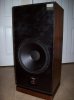
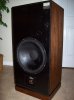
Klipsch Chorus II Restoration

Klipsch has not been as helpful or forthcoming as I had hoped they would be.

The gasket they promised to send has not arrived yet. The mid horn is playing without it and seems fine. I know it needs to be there but it has been missing up till now so I figured what-the-hell.

As to the badges, I was reading some old posts in the Klipsch Korner forum and they said if you write and provide your serial numbers, Klipsch would sell you replacement badges at a very reasonable price. Not sure if you know this but the go for anywhere from $25-$50 each on that big auction site.

So, I emailed Klipsch and provided my serial # information and gave them the back-story of these speakers - how I got them, what I have done etc and asked if they could sell me replacement badges. I got an email back saying they don't have them anymore.

Well, that's OK - I understand you can't keep replacement stock forever. But I figured they would try to work with me - maybe suggesting I use similar badges from another line??? I emailed back to inquire about this and have yet to hear back. We will see.

I have a line on 1 badge already. A friend of mine local deals vintage equipment and he said he has one I can use. Now gotta find 1 more :)
 
Last edited:
Best recap that puppy (and check all your power / bias resistors) ASAP before you have a very expensive magic smoke event.

(seriously, if you toast an output transformer, you'll be crying in your beer)

-D

I am very concerned about that but it is beyond my abilities I think. I have been told the output transformers are the heart and soul of this amp and if they go, replacing them is not easy or cheap.

Any pointers to a rebuild thread that could help me out??

As I understand it, I need to get rid of the selenium rectifier as well.

What about the tubes? I have no way to test - no one I know has a tube tester.

Thanks for the advice!
 
I am very concerned about that but it is beyond my abilities I think. I have been told the output transformers are the heart and soul of this amp and if they go, replacing them is not easy or cheap.

Any pointers to a rebuild thread that could help me out??

As I understand it, I need to get rid of the selenium rectifier as well.

What about the tubes? I have no way to test - no one I know has a tube tester.

Thanks for the advice!

Hey!

Yeah, the Tube Audio thread is where you want to be with that one. I would suggest you find yourself a pair of old mono tube amps to restore first. Something "simple", ya know? That's where I'm at and am still not convinced I will be able to do my Scott.

Biggles
 
I am very concerned about that but it is beyond my abilities I think. I have been told the output transformers are the heart and soul of this amp and if they go, replacing them is not easy or cheap.

Any pointers to a rebuild thread that could help me out??

As I understand it, I need to get rid of the selenium rectifier as well.

What about the tubes? I have no way to test - no one I know has a tube tester.

Thanks for the advice!

Start with the Tube Audio forum and start bribing Dave Gillespie.

<just kidding>

Basically, you want to replace anything that is an electrolytic or paper / wax capacitor with new equivalent values (same capacitance, equal or greater voltage). The most important ones are the power supply capacitors (big silver cans bolted to the top), bias capacitors (you'll need a schematic for this) and coupling caps (between the small signal tubes and the power tubes. You can find the schematic here (http://akdatabase.com/AKview/displayimage.php?album=89&pos=28) and there are a lot of very helpful and friendly folks in the Tube Audio forum.

It sounds as if you are conversant with a soldering iron, given that you recapped your crossovers. The biggest, most important caveat with regard to working on tube gear is that THE VOLTAGE/AMPERAGE CAN KILL YOU. Seriously, you need to make sure those big electrolytic caps are fully drained before working on the amp - use a multimeter set to DC volts to measure between the positive leads and ground to make sure any residual DC is at a safe level (5V or less, although YMMV). If things aren't draining, you can carefully clip a 300K/1W resistor between one of the positive lugs on one of the big can caps and chassis ground for a minute or so and remeasure. Once your voltages are down, solder the 300K resistor in place - that way, as long as you are letting the voltages drain through the resistor to ground for a few minutes after turning your Scott off, you are making things much, much safer.

-D
 
.... there are a lot of very helpful and friendly folks in the Tube Audio forum.

-D


Awesome information Derek. I will print the schematic at work tomorrow (I can do large format printing there) and begin to digest this information.

Cool thing is, although I write software, I work with some top-notch, old-school EE's. We solve obsolescent parts issues for the USAF so stuff like this is right up their alley. Any questions I have, they will be happy to help me along. Between them, folks like you and the AK brain-trust, I should be able to make this guy a bit safer.

Thanks again!

Jay
 
Hey!

Yeah, the Tube Audio thread is where you want to be with that one. I would suggest you find yourself a pair of old mono tube amps to restore first. Something "simple", ya know? That's where I'm at and am still not convinced I will be able to do my Scott.

Biggles

Yeah, That makes sense. I have an old Lafayette Mono amp but there is very little documentation that I have been able to find. Plus, it was not working when I purchased it.

I am going to see an old friend Sunday about the Klipsch badges. I'll ask if he has anything tube-related that he wants to part with. He is more in the Solid-State camp so he may have something that he is not especially attached to (i.e. will sell cheap :) ). As I am sure you read, derekva offered up some sage advice to get the ball rolling.

I am getting excited! Gonna learn something new and hopefully NOT electrocute myself while doing so! Win-Win!
 
Happy Tuesday!

I would suggest heading over to Barter Town and posting a Wanted to Buy ad. See if you can find a working mono tube rig, or something close to working. There are quite a few of us out there that have these projects laying about and are more than willing to help a fellow AK'er out.

I believe I have just 1 more application of oil on the first Sansui enclosure and it'll be ready for re-assemblage!

Biggles
 
Good Friday evening All,

Wondering if I could ask a favor of one of the Chorus II owners? I have secured 1 "klipsch" badge and am due to get the second one Sunday. I know they are centered, so left-right position I can figure out. What I need to know is how far down from the top of the grill are they positioned?

The grill has a bit of a 45 degree miter at the top. I guess the measurement would be best take from that miter edge. Based on the glue marks on my grills, the top of the badge appears to be positioned about 1/2 to 3/4 below the miter. Could someone please verify this?

Thanks!

Sorry for the lag in progress and updates. Everything is finally done and after the badges are applied I will post final beauty shots.
 
I had read on here Somewhere about using an ios app called audio tools (a suite of audio tools) to check the individual phasing of each speaker driver and I finally got around to buying the app to trying it out. It outputs a pulsed sound and you hold the iDevice's mike in close to each driver and it will indicate a plus or minus sign. I found three of the six drivers were out of phase. Both tweeters and one squacker. Switched polarity on those and rechecked all good. Immediately the sound stage of mono white and pink noise which had been a little off center, was dead center. Music sounds a little tighter and I'm happier. Now the only reason I meantion this is that I believe anyone who replaces or compleatly overhauls these horn loaded Klipsch runs the same risk of doing what I did due to the vague markings used on the terminals. I'm not sure if you use or have an iPhone or iPad but that little app sure did something I don't know any other way of doing. Schmidlapper approved.
 
Last edited:
Yes I have tried that app and it works very well. I found out that one of my speakers was completely out of phase, maybe the wiring to the crossover was backwards? But sounds so much better now after I switched the polarity
 
Darn interesting. I admit that I am guessing on one of the marking on the Klipsch horns. Wonder if there is a complimentary Andriod add that does a similar job. Google-Foo time.

Thanks for the intel Schmidlapper. That's a good one to know.
 
I wonder what motor run oil filled capacitors would do for the horns. Juicy for tube application?

Biggles
 
i'd get rid of those electrolytics in the crossover, put in some quality poly caps...

Yes, this was planned but space (or lack thereof) was the issue. This will be addressed at a later date - once most of the heavy-lifting is done.
 
Payoff

As Gloria Swanson said in Sunset Boulevard: "All right, Mr. DeMille, I'm ready for my close-up."

Thanks to all who gave suggestions and encouragement. I had a really good time doing this restoration and I think they turned-out much better than when we started!
 

Attachments

  • 100_5843.jpg
    100_5843.jpg
    52.4 KB · Views: 71
  • 100_5845.jpg
    100_5845.jpg
    43.6 KB · Views: 57
  • 100_5846.jpg
    100_5846.jpg
    56.9 KB · Views: 50
  • 100_5847.jpg
    100_5847.jpg
    64.1 KB · Views: 44
  • 100_5849.jpg
    100_5849.jpg
    65.6 KB · Views: 63
More photos
 

Attachments

  • 100_5858.jpg
    100_5858.jpg
    62.6 KB · Views: 61
  • 100_5857.jpg
    100_5857.jpg
    61.6 KB · Views: 62
  • 100_5855.jpg
    100_5855.jpg
    50.6 KB · Views: 49
  • 100_5852.jpg
    100_5852.jpg
    57.1 KB · Views: 48
  • 100_5850.jpg
    100_5850.jpg
    92.6 KB · Views: 47
And a few more....

:music::music::music::music::music:
 

Attachments

  • 100_5860.jpg
    100_5860.jpg
    51.4 KB · Views: 29
  • 100_5861.jpg
    100_5861.jpg
    57.6 KB · Views: 34
  • 100_5863.jpg
    100_5863.jpg
    55.9 KB · Views: 34
  • 100_5864.jpg
    100_5864.jpg
    58.5 KB · Views: 39
If they were mine, I'd be showing them off as well. IMO, they look great and the remaining marks are just the character of the enclosure.

Dingit, the grain looks quite similar to mine, and mine might be as dark if I hadn't tried (and largely failed) to keep them light colored. Mine are only slightly lighter than yours.

Again, nice work. If you weren't so far away, I'd love to have a look and listen.
 
Back
Top Bottom