• The move to the new server is done. There are some software and database maintenance updates in process. This has us passing the hat around to help out. We appreciate any donations. Seriously, even a dollar helps. The payment page may be found here - https://www.audiokarma.org/support.html

Leestereo's Restoration & Upgrade of a Sansui AU-517

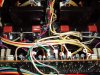
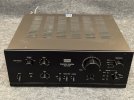
AK member @McDee56's very nice Sansui AU-517 integrated amplifier received a complete restoration and upgrade. Note that due to the shared topology between the AU-517 and the AU-717, this current restoration/upgrade is very similar to the latter's detailed AK thread.

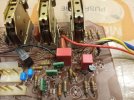
Part 1: Tone Control Circuit Board (F-2673)

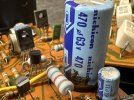
On the Tone Control board, a total of 28 components were replaced: the signal path polarized electrolytic capacitors were upgraded to stacked film types, bipolar types or Audio Grade polarized types (emitter by-pass); polyester film types were upgraded to polypropylene types; signal path ceramics were upgrade to C0G types (small blue caps) and the ceramic power supply decoupling capacitors were increased and upgraded to higher capacity film types.


index.php


index.php
Should I just increase the power supply ceramic coupling capacitors to the highest value that will fit. Is film PP polyproplyne what you used?
 
Hi Leestereo, this is a great job and my admiration for your extensive technical knowledge that allows to improve the performance of these jewels (AU 517). I recently purchased an AU517 for less than $100 with original components. I was surprised with its sound quality and the power it can deliver, but I think the sound quality could be better. Do you have a BOM available and the estimated cost for this restoration? PS: I Bought the components to upgrade my KA 4002, just like you suggested. Thanks a lot and Best regards
 
I can vouch for Leestereo's work because I used some of his suggestions when recapping my 919.
The sound is amazing!
I would not be surprised if my 919 can now compete with some of Luxman integrated amps made today!
Unfortunately no one has done a side by side comparison that I know of.
 
Last edited:
wiring2.jpg


where is this connection go ? my sansui au 517 came with all these cable unplug / unsolder some cable different colour with these picture
 
Hi, very nice work on this beauty !
i plan to overhaul/fix my beloved 517, one voice is dead, I guess the psu board is faulty.
I'd like to upgrade and change all of the electrolitics/fuse resistors/trany/diodes
I'm in france, so sending my unit to you is almost impossible because very pricey...
Do you sell kits ? If not, do you have a bom to share please ?
Thanks !
 
...I'm in france, so sending my unit to you is almost impossible because very pricey...
Do you sell kits ? If not, do you have a bom to share please ?...

@Jonquille: Thank you for the kind words and welcome to AK! Although I no longer supply actual restoration/upgrade kits, I may still be able to assist in the overhaul of your AU-517. Please send me a PM if you want to discuss further.
 
I read AK for several years, there is always good informations from passionated and kind peoples :)

thanks for your answer about the 517
I'm not new into overhauling old electronics :
I started with musical instruments from the 70's, arp odyssey, minimoogs, fender amps, many analog synthesisers, and stupid amount of musical gear including stomp boxes, soundcards, tape echo...

basically, the 517 was working good enough to be my main amp for many years, but the voices were offset a little bit.
So I opened it up, made the offset and DC tune, everything was alright, so I closed it.
Then I made a mistake attaching the speaker cables to it, (damn spring connectors) I guess the right voice cable touched themselves, resulting in a fuse burning in the psu board.
I replaced the burned fuse, but it still burn when I switch on the amp. Didn't go further into looking for what's wrong.

Didn't had time to get into a restoration of this beast, so I've overhauled and recapped an adorable little sansui 117 to replace my 517, that is cheap and fast to restore. It was a couple years ago.

Now, some friend gave me a Yamaha C-50 preamp, and a Kenwood M1A PA, and after a few solder joints and relay replacing, it's working and is my main system : I really like the 3D sound of the C-50.

And now, I'm asking myself if I should restore the 517 or keep the C-50 as main system.
The 117 will go for sale to pay for the components of the 517

 
Last edited:
So I am very new to the Hobby and would like to eventually learn to fix this stuff. But as for now I should probably have this done. Are there any members that do this type of work in SW Florida? Or recommendations of shops thanks in advance
 
Couldn't resist buying a non working AU-517 & associated working TU-717 tuner this week end for a very attractive price. The amp is completely original inside.

Tested on the DBT (60W) which thankfully went almost fully out. No sound and zero bias on either channel. Took out the driver & output transistors and all measured just fine.
In the end it was an easy fix - All four 150ohm fuse resistors on the main amp boards had gone open & one 33uf capacitor with a case of bad pox from the sansui glue !
Didn't have any 150ohm resistors on hand, so temporarily put some 220 ohm ones in. The amp works fine & sounds good. No problem to dial in the correct DC offset & bias settings.

Time for a full recap and also changing out the zeners & VD1212 diodes before.

Referring to this thread and reading carefully Leestereo's detailed restoration thread of the AU-717, I am trying to establish my BOM for the AU-517.
First observation is that the driver circuit boards F-2721 & 2722 appear almost identical on AU-517 & AU-717 using the same value capacitors, so will simply follow Ben's choices of caps here .

However the power supply and protection circuit board use quite different cap values in each amp.

My AU-517 only has 4 main categories of electrolytic cap size on this board :
C5-C8 : 220uf 63V
C9-C16 : 100uf 35V
C19-C22 : 47uf 50V
C23-C24 : 100uf 6.3V

I am not such a specialist at understanding circuitry. The 220uf/63V ones filter the raw DC from the rectifier. Is there any limit to the capacitance rating of their replacements, considering physical size limitations & lead spacings ? I see you have typically increased the capacitance rating x3

2023-04-03_124807.jpg

Also for the other caps C9 through to C24, which ones would be best to stick to the original capacitance, although upping the voltage rating a little ?
The caps in the protection circuit board (C601 to C605) I will just replace with like for like low ESR types.

About the sansui glue, there seem to be 2 diferent colours on mine. Most of it is a light brown, fairly translucent, which doesn't appear to have corroded the legs on the adjacent resistors it's come into contact with. Then there is a dark red brown glue that has definately corroded & damaged some components. Are these two different glues or simply the same glue having interracted differently over time ? Is it a necessity to replace a component if there is no sign or corrosion or value reading ? I am essentially talking about resistors.
 
Good day, Just FYI for everyone. For certain versions of F-2673 board on AU-517 there is a error for TR05 markings -> base and emitter are flipped. just look at my picture for TR05 and compare it with Lee's and you will see what i mean. But it just a silk screen error.
 

Attachments

  • 20231022_123427.jpg
    20231022_123427.jpg
    145.4 KB · Views: 64
Last edited:
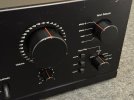
Working my way up the 1977 launched AU-*17 series. This series really was vanguard. And is timeless. And that laser red stripe on the nobs making a surgically striking statement.

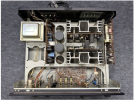
Completed the 117/217/317/417 restorations, and now on to the dual transformer (the first in this series) AU-517. Very close in design to the AU-417 restoration I recently completed but with a second transformer, a second pair of main caps, significant interior shielding and powder coated? black internal sheet metal, brackets and base and all metal nobs. Very well appointed 65 watt machine (same power rating as the AU-417). I am very curious to sit down for an A/B with the AU-417 and AU-517 once completed.

I'll be chipping away at this one as time permits. Tear down today.

Thanks again to @Leestereo for this thread and the guidance, as well as all of the other contributors and folks here. My AU-517 will be receiving the full @Leestereo treatment :).

1.JPG

01.JPG

2.JPG

3.jpg

AU-417 for comparison
Screen Shot 2023-11-03 at 7.40.39 PM.png

4.jpg

Interesting make difference on some of the main amp caps. Same specs. Different makes.
6.jpg

7.JPG

8.JPG

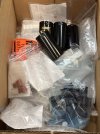
Box of goodies :)
9.JPG
 
Last edited:
This and the AU-717 are almost identical. Once you finish this one, working on the AU-717 will be like deja vu. I'm curious to hear your impressions of how the restored AU-517 compares to the AU-417. I would expect the results to be subtle, and if noticable, only on certain music or setups that can bring out the differences.

I've restored numerous AU-717s, and until recently worked on them while they were wired into the system. The last two I unsoldered enough wires to completely remove the boards. This was especially helpful with the F2663/F2675 power board. I was able to work on the board much more easily. This also applies to the F2723 equalizer and F2669 boards. If you remove the snap rivets and some screws and unsolder the ground wire, the whole assembly comes out. When these boards are removed, it's also easy to clean up the chassis and back panel.

Good luck with the restoration. :lurk:
 
This and the AU-717 are almost identical. Once you finish this one, working on the AU-717 will be like deja vu. I'm curious to hear your impressions of how the restored AU-517 compares to the AU-417. I would expect the results to be subtle, and if noticable, only on certain music or setups that can bring out the differences.

I've restored numerous AU-717s, and until recently worked on them while they were wired into the system. The last two I unsoldered enough wires to completely remove the boards. This was especially helpful with the F2663/F2675 power board. I was able to work on the board much more easily. This also applies to the F2723 equalizer and F2669 boards. If you remove the snap rivets and some screws and unsolder the ground wire, the whole assembly comes out. When these boards are removed, it's also easy to clean up the chassis and back panel.

Good luck with the restoration. :lurk:

Thanks!

Yes I am anxious for that 417/517 comparison too. It will be very interesting to hear what kind of difference a second transformer supply and all of the shielding will make. I’ll run the test through my Zu Audio speakers. They are very revealing and hide nothing.

Good tips on the boards. I left them all in on my AU-417 restoration and it was a bit of a PIA. Having then removed would greatly increase the ease, and fun. I’ll consider that.

I have an AU-717 on the shelf here. With the full @Leestereo spec restoration kit in the box and ready to go. It is next :).
 
Last edited:
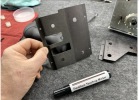
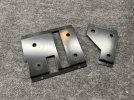
Starting to vacate the rest of the chassis. Pulling all the boards. Few more differences between the AU-417 and the AU-517. First one, the AU-517 uses metal backing plates behind the controls. The AU-417 uses paper. No doubt part of the cost cutting effort to offer a budget 65 watt machine in this series with the AU-417. Also noticed the premium and sealed volume pot on the AU-517 vs the open volume pot on the AU-417. Very good build quality on the AU-517. Jury is still out on the sonic comparison, though.

Another difference, and I have a question here, F-2670 and F-2660 are attached the back of the chassis with plastic rivets that Sansui not so courteously sealed in with epoxy. The AU-417 uses screws to secure these boards.

What is the approach here? Drill out the plastic rivets and replace with screws?

AU-417 screws
IMG_2457.jpg

AU-517 rivets
IMG_2452.jpg

Paper control backing plates AU-417
Screen Shot 2023-11-04 at 3.58.59 PM.png

Metal control backing plates AU-517
IMG_2445.jpg

IMG_2451.JPG
 
Last edited:
Back
Top Bottom