NoWill I have to detach circuit boards to replace the switch?


NoWill I have to detach circuit boards to replace the switch?

You’ve been unbelievably helpful thank you!Two screws behind the front panel will release the switch assembly. You can then drop the switch assembly down through the bottom. Remove the two long screws/nuts that hold the snap switch in place. Then install the new switch. Then just transfer the wires from the old switch to the new switch.

you've been unbelievably lucky!!You’ve been unbelievably helpful thank you!
Two small screws behind the front panel will release the switch assembly. You can then drop the switch assembly down through the bottom. Remove the two long screws/nuts that hold the snap switch in place. Then install the new switch. Then just transfer the wires from the old switch to the new switch.

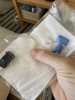
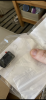
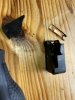
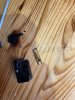
Those are soldered. You'll need to cut and crimp a fast-connect tab on them, or solder them back to the new one. Be careful and listen to Avionic.new switch arrived, so I’m going to take a crack at replacing it tomorrow! So I understand - it seems there’s are two screws holding the existing switch in place marked in yellow in the last photo. But marked in red in my final pic are the wires connecting to the switch. Will these Unclick? It looks like I’ll have to PULL them off?
I don’t want to damage these right?
He’s been really helpful. When you say “fast connect tab” what do those look like?Those are soldered. You'll need to cut and crimp a fast-connect tab on them, or solder them back to the new one. Be careful and listen to Avionic.
https://en.wikipedia.org/wiki/FASTON_terminalHe’s been really helpful. When you say “fast connect tab” what do those look like?
and to de-solder i use my soldering iron and ideally a solder sucker?
Or cut and strip.and to de-solder i use my soldering iron and ideally a solder sucker?
Awesome!Got the new power switch installed! Couldn't have done it without you all. Thanks!