• The move to the new server is done. There are some software and database maintenance updates in process. This has us passing the hat around to help out. We appreciate any donations. Seriously, even a dollar helps. The payment page may be found here - https://www.audiokarma.org/support.html

Looking for tips&trix to make ha heavy layered plywood plinth

T68

Super Member
Hi!
Being a bit lazy and (as my wife likes to point out) bad at finding stuff, I would appreciate your best advice or links regarding making a straightforward heavy layered plinth for an idler driven turntable with all the stuff bolted in the usual way to the top plate. Some of my questions is about stuff like:
- What material to use that wont break the bank
- How to get the boards together. Glue? Screws etc
- Should I keep the springed suspension to the top plate or bolt it fixed to the heavy plinth.
- What kind of feet to use?
- Should I try to add mass by making compartments for for example led?
- What tools do I need
- If I don´t want to veneer, how do I get it to look nice?
- ...and all other things that you more experienced guys can point out. This is my first go at this.

Thanks in advance!
 
Register to hide this ad
I can try to help with some of these questions. Most people want materials when they make their own plinth that are non-resonant and free of voids (air gaps). Plywood is pretty good in this regard, but look for sheets with lots of plies. With something like baltic birch ply you can get about 13 plies in 3/4" thickness, and it tends to be pretty void free. I would recommend avoiding plywoods that only have 5-7 plies in a 3/4" thickness. Another popular material would be MDF, which is pretty dead, and is cheap and flat. If you want to laminate layers together to make a plinth (pretty much required if plinth will be > 1" thick) I would use wood glue, covering both sides of every glue surface. Again, the idea is to avoid ending up with air gaps inside your plinth. Gluing multiple layers together is tricky and requires a great deal of pressure, so if you have the patience it might be better to glue one layer at a time using lots of clamps and weight on top. As you apply pressure the glue makes the two surface slides apart under clamping pressure, and adding multiple layers makes this effect more difficult to control. If you have the capability to shape the plinth after it's completely assembled, you can avoid having to be too precise about aligning the layers during the glue-up.

If you want to avoid using veneer but still have a nice looking result, I would treat your plinth like a plywood guitar body - use some kind of filler on all surfaces, particularly the plywood edge, sand, and spray / clear coat.
 
Thanks for replying guys and please keep it coming!

Haha, yup lazy me... scrolled up a bit on page one and found two excellent build threads linked in the DIY collection thread thats a sticky. :D
 
Lencoheaven is a great resource with tons of build threads. It's a Lenco specific forum but a lot of it translates to other idler drive turntables.

If you are building a heavy plinth, generally you want to get rid of the suspension the TT originally came with, otherwise all that mass really doesn't do much if you decouple the turntable from it anyway. Even when not building a heavy plinth, many old idler TTs had suspensions which in my experience were perfect for amplifying any noise from the motor or rest of the drive system and generally making the sound bloated and imprecise, though sometimes enjoyable.

You don't say what turntable you have, there's tons and tons of tiny details you can experiment with in builds and some of them make a difference, but that's part of the fun, though you can just make a plinth, bolt things down and enjoy. Personally I've experimented a lot with couple Lenco builds and found out mounting the turntable rigidly to the stock plinth, which I then dampened inside and made more rigid with cross braces already got me 90% of the way compared to a heavy plinth, which means great improvement on the stock affair, both subjectively and in measurements, but not quite as good as can be (both subjectively and measured). But good enough to enjoy without worrying about it.
 
As for lazy, You can find ready made plinths for many TTs from ebay, or if you ask around on forums find someone who will build you one. Because frankly, it's not a fun undertaking for a lazy person, it's only fun if you enjoy the learning process and experimentation, otherwise it's just tedious work, especially if you don't have fancy wood working tools already.
 
Regarding lazy, I was mostly referring to not spending time and effort searching for information on the interweb.
I like building and fixing things.
With all this good advice from you guys and hopefully access to a workshop with the right tools this coming fall, I think I can cobble something together.
The plinth will be for a Garrard Zero 100.
 
I can try to help with some of these questions. Most people want materials when they make their own plinth that are non-resonant and free of voids (air gaps). Plywood is pretty good in this regard, but look for sheets with lots of plies. With something like baltic birch ply you can get about 13 plies in 3/4" thickness, and it tends to be pretty void free. I would recommend avoiding plywoods that only have 5-7 plies in a 3/4" thickness. Another popular material would be MDF, which is pretty dead, and is cheap and flat. If you want to laminate layers together to make a plinth (pretty much required if plinth will be > 1" thick) I would use wood glue, covering both sides of every glue surface. Again, the idea is to avoid ending up with air gaps inside your plinth. Gluing multiple layers together is tricky and requires a great deal of pressure, so if you have the patience it might be better to glue one layer at a time using lots of clamps and weight on top. As you apply pressure the glue makes the two surface slides apart under clamping pressure, and adding multiple layers makes this effect more difficult to control. If you have the capability to shape the plinth after it's completely assembled, you can avoid having to be too precise about aligning the layers during the glue-up.

If you want to avoid using veneer but still have a nice looking result, I would treat your plinth like a plywood guitar body - use some kind of filler on all surfaces, particularly the plywood edge, sand, and spray / clear coat.

Contrary to what is often said, MDF is not "dead". You need something like panzerholz for that. However, by layering two 3/4" thick MDF sheets with 3mm Al sheet you can separate the resonances and make a broad band vibration attenuator. Use contact cement - such as DAP weldwood- to join the pieces, or some of 3M's constrained layer damping adhesives, then finish the whole unit with several thin layers of automotive grade acrylic gloss lacquer using the technique described above. The lacquer helps to decouple the resonances even more and provides additional damping. If you want to increase the mass more, which doesn't damp it any more but just decreases the amplitude proportionally, then repeat the process and layer those on top of one another.
I've tried it- I've simulated it- I've measured it- I use it. It works.
 
Contrary to what is often said, MDF is not "dead"

Just to clarify my comment, I was coming from a solid wood perspective, where there is heterogeneity and an innate directionality to the material, and sometimes strong acoustic resonances that may not be desirable in plinth construction. By comparison, MDF is a homogeneous and amorphous material.
 
by layering two 3/4" thick MDF sheets with 3mm Al sheet you can separate the resonances and make a broad band vibration attenuator.

Marc Morin recommended the same configuration to me and I'm going to use it for my SP-10's plinth. I'm curious what you think about bolting the DD motor base and the tonearm to the layer of aluminum. Doing so creates a loop of sorts for the vibration much like that in suspended turntables such as the AR XA/XB, SOTA, Linn etc. Reed shows that loop on their website: https://www.reed.lt/5174/research/wood-vs-the-rest-testing-armtube-material/ in the context of discussing arm tube material but I find the diagram instructional. The aluminum plate in your layering scheme would be the "chassis" in the Reed diagram.

I've tried it- I've simulated it- I've measured it- I use it. It works.

Did the alternate layers of MDF and aluminum address external vibrations, not like wood floor issues, but like vibrations induced in furniture? I'm mildly allergic to some component of MDF so I prefer to work with Baltic Birch plywood. In your opinion would Baltic Birch work similarly to MDF in this layering method?
 
Thanks for keeping the thread alive!
A bit more about why I am asking about this: my Zero is a cool player but has a bit to much rumble going on to be a candidate for my main system (where a Lenco L75 really rules and delivers!).
Have refurbed the idler and serviced motor, bearings etc. Got a bit better but still not good enough. So I am wondering how a heavier more damped plinth would work.
On the Lenco I added 10kg of mass using led shots and modelling clay to the stock plinth which I also reinforced. Results were really good.
The stock plinth on the Zero is nice but small and really thin and a bit flimsy. The bottom is just a thin sheet of masonite bord.
So not sure if I can give it the same treatment as the Lenco. But this may be my first course of action. Maybe add a thick mdf or ply bottom with some bracing and then stuff the s***t out of all the emty spacing with modelling clay and led, also remove the springs and bolt the top plate to the plinth.

...but building something from scratch is also tempting. Need some projects this fall and winter when that domestic resto project is done and I have an hour or two to kill :-)..

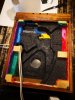
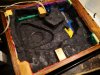
Heres some pics of the Zero 100 and the Lenco-project:

Filling the innards whith clay and led. Not enough of the black "audiophile looking"clay so had o source mor colourful stuff from a toystore.
IMG_20200323_195831_1.jpg

Sealing the led compartments
IMG_20200323_201512.jpg

Still a good looking stock Lenco, right! ...but wait until you try to lift it ;-)
IMG_20200323_204151_1.jpg

A little less room to work with on this guy...
zero100_pic2.jpg
 
Whoa! Finally found a cool sample of a custom plinth job for a Zero100 (among tons of Thorens and Lenco builds). On a Korean blog of all places :-). Nicked this picture from it:
Would mind having something like this in my setup:

2020-08-28_095806.jpg
 
my Zero is a cool player but has a bit to much rumble going on to be a candidate for my main system (where a Lenco L75 really rules and delivers!).
If I'm not very much mistaken, the reason you're experiencing so much noise is because the motor is mounted directly to the top plate.
bloggarrardzero100sb7.jpg

Removing the motor from the top plate and attaching it to the main chassis, and having the top plate isolated from the main chassis, should yield much better results than any kind of heavy plinth will. Think about it: regardless of how heavy or non-resonant the plinth is, the motor is still fixed to the plate which holds the main bearing and tonearm.
Btw, the picture is taken from this page: https://stereonomono.blogspot.com/2014/10/garrard-zero-100sb.html
Might be worth a read.
 
Marc Morin recommended the same configuration to me and I'm going to use it for my SP-10's plinth. I'm curious what you think about bolting the DD motor base and the tonearm to the layer of aluminum. Doing so creates a loop of sorts for the vibration much like that in suspended turntables such as the AR XA/XB, SOTA, Linn etc. Reed shows that loop on their website: https://www.reed.lt/5174/research/wood-vs-the-rest-testing-armtube-material/ in the context of discussing arm tube material but I find the diagram instructional. The aluminum plate in your layering scheme would be the "chassis" in the Reed diagram.


Did the alternate layers of MDF and aluminum address external vibrations, not like wood floor issues, but like vibrations induced in furniture? I'm mildly allergic to some component of MDF so I prefer to work with Baltic Birch plywood. In your opinion would Baltic Birch work similarly to MDF in this layering method?

One way pf viewing the way the layers work is like an electrical circuit filter. The materials have resonances- that is they allow vibrations at certain frequencies to pass through virtually unattenuated. If you place multiple layers of materials that have different resonance frequencies in series then there is attenuation at more frequencies including the resonance frequencies. Note that this does not work properly if the materials are tightly coupled- that is they are a composite made with stiff glue or bolted together.
I do not know the properties of baltic birch, but I would think that the principle is the same.
https://www.lencoheaven.net/forum/index.php?topic=5319.0
In the thread above birch ply is discussed.
Here is an updated damping list from catsquirrel
https://qualia.webs.com/newdampingfactors.htm
Note "sole" which is an Al/MDF/AL structure which has excellent damping factor.
https://www.lencoheaven.net/forum/index.php?topic=25514.0
It's stated that it is better than MDF/Al/MDF, but I do not know if that is the case. Also- thicknesses matter. thicker is not necessarily better.
VPI use MDF/Al/MDF layers on their plinths. They started doing this somewhat after I had a conversation with Harry Westfield on this very subject, but I expect that they already had this structure in mind. In their case the Al is thicker, which is not, I think, beneficial, and they do not cover the entire structure in automotive grade acrylic lacquer.
I'm sorry to not be more specific. It's been several years since my interest peaked in this subject and it has subsequently waned. However, I did put together a finite element simulating environment, bought accelerometers and built a number of structures, subsequently setting on a plinth design.
In my opinion it's important that the platter bearing and arm be rigidly coupled and separate from the motor, and that there be a vibration rejecting path from the motor to the arm/bearing structure.
Other than that I have no specific advice.
That people can think a plinth can be too dead amazes me. They probably enjoy the coloration that some resonant peak or other adds to the sound.
 
Marc Morin recommended the same configuration to me and I'm going to use it for my SP-10's plinth. I'm curious what you think about bolting the DD motor base and the tonearm to the layer of aluminum. Doing so creates a loop of sorts for the vibration much like that in suspended turntables such as the AR XA/XB, SOTA, Linn etc. Reed shows that loop on their website: https://www.reed.lt/5174/research/wood-vs-the-rest-testing-armtube-material/ in the context of discussing arm tube material but I find the diagram instructional. The aluminum plate in your layering scheme would be the "chassis" in the Reed diagram.


Did the alternate layers of MDF and aluminum address external vibrations, not like wood floor issues, but like vibrations induced in furniture? I'm mildly allergic to some component of MDF so I prefer to work with Baltic Birch plywood. In your opinion would Baltic Birch work similarly to MDF in this layering method?

When I had the plinth done for my SP10 MK II I tried using concepts behing the Natais plinths. While I could not get the ratios I believe the plinth was built with an MDF core that was the vibration sink in the plinth. The mounting bolts get anchored directly to the MDF, but the holes are over sized so they do not touch the other layers. Then a lossy layer of glue was used to a boundary level of acrylic or aluminum around the MDF, and then layers of baltic birch on top with another layer of lossy glue. Larry then wrapped it in ribbon mahogany veneer. This was a good plinth, but of course I didnt have the ability to A/B it against other materials. Just another possibility.
 
Back
Top Bottom