• The move to the new server is done. There are some software and database maintenance updates in process. This has us passing the hat around to help out. We appreciate any donations. Seriously, even a dollar helps. The payment page may be found here - https://www.audiokarma.org/support.html

Mach One 4024, 4024A, 4029 Information and Upgrades!

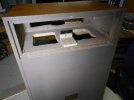
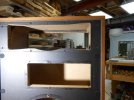
Let the games begin!---Again. I have opened up the partition a little more than previously suggested. Three holes of 3-1/2" is approx 30 sq. inches. These holes have an area of 45 sq inches. I feel less restriction will avoid any influence on the proposed base reflex duct tuning. The stock driver Fs is too high for an acoustic suspension cabinet. Other proposed mods are an external brace across the lower rear panel, the remaining centre divider will be reinforced with a 1/4" plywood strip glued top and botton, and the cabinet top will need an internal rib etc as I have discovered it is only 7/16" particle board.
 

Attachments

  • DSCN3194.JPG
    DSCN3194.JPG
    78.9 KB · Views: 25
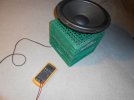
I thought someone had measured the Free air resonance of the 4024a driver but it was quicker to measure mine than to search! Surprised that the Fs of the driver is that low. Fs of this driver is 26 Hz.
From calculations it seems a fairly substantial duct would be required. First experiment will be an additional rear chamber attached to the rear of the cabinet.....The blue line in my crude cabinet sketch is the additional rear panel, closed on three sides, open on the bottom. All demensions will be determined by tuning. I could to lunch---or maybe on to something! Worth a try.
 

Attachments

  • DSCN3198.JPG
    DSCN3198.JPG
    93.7 KB · Views: 22
  • DSCN3204.JPG
    DSCN3204.JPG
    58.8 KB · Views: 22
  • DSCN3205[1].JPG
    DSCN3205[1].JPG
    44.8 KB · Views: 23
Last edited:
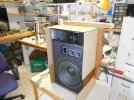
So, instead of trusting all the experience of the previous 131 pages, I learned the hard way that no amount of porting or ducting is going to change the behavior of this woofer. I decided to apply Richard Koch's principle and do 20% of the modifications that yield 80% of the results.
Pictured is an attempt at rear ducting.
 

Attachments

  • DSCN3206.JPG
    DSCN3206.JPG
    116.8 KB · Views: 49
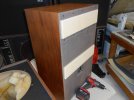
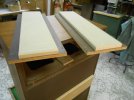
The most improvement was from opening the horn compartment to the main cabinet. The upper rear access panel is only 3/8" thick so it was reinforced. The second picture shows a 1/2" x 1/2" wood block glued at the upper rear of the cabinet to support longer screws for the rear panel.
 

Attachments

  • DSCN3328.JPG
    DSCN3328.JPG
    89.3 KB · Views: 38
  • DSCN3313.JPG
    DSCN3313.JPG
    103.7 KB · Views: 37
  • DSCN3265.JPG
    DSCN3265.JPG
    81.2 KB · Views: 37
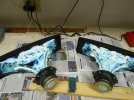
An easy enough mod was to apply a rubberized coating to the back of the horns. I replaced the rotted foam around the diaphragms of the mid compression drivers. I believe that if this foam is too thick or too dense it will restrict the diaphragm motion rather than dampen it. I did not remove the diaphragm from the magnet structure as it appeared to be glued in place. I trust that it was assembled with some sort of a locating jig and did not want to re-centre it 'by ear'. The application of felt to the centre pole piece has questionable benefits IMHO. If the idea was to reduce interference from reflections, the wavelength at 10 kHz is still almost 1-1/2" so maybe a non-issue in such small spaces?
Also, I found myself too lazy to build new plates for the level controls. I found the quickest solution was to re attach the broken pieces with acetone used as a solvent cement. Pure acetone painted over cracks seamed to penetrate very well. I dissolved plexiglass chunks in acetone (takes about 48 hours to dissolve) and painted the solution on the front and back of the flange. The final result was then painted.
The bi-polar caps in the crossover all measured within spec on these 4026a's. I was tempted to eliminate the crossovers (at least for the woofer) and bi-amp the speakers but we all draw the line somewhere! I'm going to just enjoy these vintage speakers and be happy that they are probably sounding better than ever.
Peter
 

Attachments

  • DSCN3234.JPG
    DSCN3234.JPG
    116.5 KB · Views: 46
  • DSCN3322.JPG
    DSCN3322.JPG
    156.8 KB · Views: 46
  • DSCN3329.JPG
    DSCN3329.JPG
    96.7 KB · Views: 46
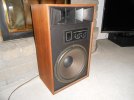
Just picked up a pair of 2024a last week. Amazed at how they sound d and how freaking loud they get. But four this thread after doing so research. The mods see to be the way to go. I have done my best, but there are a ton of pages here. Anyone have a direct link to the mod list for the 2024a for crossover work and cutting the 3 x 4 holes?
 
The best thing to do is to spend an evening reading the pages, and printing the ones that have the information. It takes a while, but the learning from it is worth the trouble.
I did that last night and this morning. Still have plenty to go, but I do enjoy the process until my eyes get tired.
 
Attached is the ORIGINAL VL upgrade document. You're welcome.

4024: Foam surrounds. NOT rubber, period, end of conversation. I've owned many. They were a treated foam. There were a couple other companies that used them as well, pretty rare. 4024 came with all wood finish and a Lifetime Warranty.
4024a: standard foam. 5 year warranty. Early serial numbers had wood finish on the bottom, later had grey painted finish. I'm assuming the early were left over cabinet inventory. Cross overs were the same. Both these early models had an RCA jack for the early speaker wires sold by Radio Shack. Lets face it, many people didn't understand polarity, so the RCA wires made for "plug and play" ease.
4029: All changed. Only the woofer is the same, spec wise. Ferrofluid introduced in the Tweeter and Midrange. Crossover plate no longer has the RCA jack, just the newer quick release/attach wire connectors. Crossover had different cap values and resistor values due to the newer drivers.

The Tier1 upgrades CAN be performed on early Mach One's. Just need to be careful not to drive them too hard.

I recently picked up a nice clean pair of 4029's. They'll get a new revised treatment. I've designed and 3D printed an adapter to use modern midrange compression drivers. I'll likely have to add resistance values due to the higher output. Also, I'll be able to drop the crossover point, substantially, which VL noted was the one weak point in the system, woofer was being driven too high, 1200hz. He recommended 600, I'll be dropping it down to 800-900hz, but we'll see. The mid horn I have can be driven down to 600, but volume will be restricted as it would be easier to blow out. Also, the newer drivers have replacement parts, something the older drivers do not have.

I believe that VL determined the VC windings may have been different, i.e. round wired vs flat and also what the wire was made of, but can't verify at the moment.

Enjoy!
 
Interesting read on these, saw this on another site, not sure if this had been discussed prior.View attachment 3531376
Wow, finally it makes sense! I bought Mach Ones back in the 1970s, and didn't like them - for reasons similar to what is described in the quoted post. I traded them in and got T-200s, and loved those for many years. I always wondered why the Mach Ones were so popular, given my experience with them. Now I'm tempted to grab a pair!
 
Hi everyone!! Resurrecting this thread again since I finally found a pair 4024a locally that I could buy, So... I have read about half of this MONSTER thread and I have a few questions. Maybe they are addressed later in the thread, but I just cant keep reading it right now, I want to get started fixing these up. So I am sorry if I am posting repeat topics.

1) I need to understand the sealing of the horn driver. I have already cut 4.5" holes to the horn chamber and when I started studying the horn driver, there are four sets of slots (vents?) around the flange. That would be a pretty large air leak in a sealed cabinet, Do I need to plug them? Moreover, do I remember reading that the exterior of the driver housing (NOT the horn itself,,, I already have DynaMat on the horn body) needs dampening?

2) I am considering the CA glue stiffening, but am terrified I would screw it up beyond repair... That isnt necessarily my point here. My point is that I use a great deal of CA glue in my woodworking hobby. It comes in three thicknesses (thin, medium, thick... duh). the thin is very fluid and can get unwieldy if you arent careful. The medium is still relatively thick but not having any Crazy Glue branded glue around, I cant compare the thickness factors. And of course, the thick is REALLY thick,,, so that is out for sure. Any ideas which I should use?

3) I have ordered a few options for new 1" driver flanges and am CONSIDERING swapping out the OEM driver for a proper 1" driver like a JBL. I know people are 3D printing these things and have tried this. Any results and/or improvement? It seems they would have a higher power rating and be less prone to blowing. But at what cost? Can you maintain the stock crossover points and swap out to a better driver?

4) Looking at VL's schematic, the mid crossover is a simple 2nd order high-pass. Why not (or why isnt it) a full-on band-pass filter? Wouldnt there be a ton of phasing and comb filter issues?

5) In a carpeted room, does the "keep them on the floor" idea pretty much go out of the window?

All that said... I have NOT opted to build the Tier 1 crossovers... YET. I have ordered the parts, BUT I want to hear them stock(ish) first so I can decide which way I like it better. I am a retired pro audio guy and toured with, and was in, some loud environments for many years. My hearing is pretty well shot, so the nuances of a few db here and there will be totally lost on me. However, if I do decide to sell these guys on later, I'd like them to be right for the next owner.

Thanks for reading all this gibberish! If you would be so kind as to answer any of the questions you know about. Certainly not asking for you to get to them ALL if you dont want to. Thanks again everybody!!!

 
1- The vents you speak of are to allow the mid diaphragm to have freedom to move, I'm not certain they would be a leak to the outside. I covered the horn lense back side with DynaMat insulation to help stop resonation. Once those holes are cut into the mid chamber, the back cover has to be sealed with weatherstripping.

2 - You want to use a thin superglue and wick it gradually into the cone, it will soak it up like a sponge. Keep it away from the surround for obvious reasons.

3 - Switching drivers will open a big can of worms. The original mid when tested leaves a hole in the frequency range between the woofer and the mid. The crossover change from VL is supposed to bring the woofer range closer to the midrange output. I have always had issue with the mid horn location being so far from the woofer, nearfield listening suffers because of this. If you look at a Cornwall or Heresy, the midrange horn is fairly close to the woofer.

4 - I believe at some point VL states that the Mach 1 is more of a two way design with the super tweeter to help with the highs. Not sure I want to get into that analysis.

5 - When I decided to build my larger cabinets to closer spec to what the woofer requires, I added the new volume mostly to the bottom. It raised the woofer and resembled the Klipsch Forte design for woofer placement. They really produced very deep powerful bass like that.

The VL crossover mod did make the speaker less efficient and want more power to truly perform, but they did improve greatly. The Mid horn lense was always my issue, it didn't allow the mid to go low enough to match the woofer, and it being at the top made it sound shouty and detached. Not bad for room filling sound production, but not audiphile type performance. It was really a fun project; I learned quite a bit from doing it about speaker design.

 
Thanks Steve!

Regarding point 1… I do plan on sealing the back plate with foam tapeand use longer screws to hold it in place… but… Those driver vents are totally open to the outside and would allow pressurized woofer air to escape thru the mid horn. Would covering them be a problem? What would it change?
 
Thanks Steve!

Regarding point 1… I do plan on sealing the back plate with foam tapeand use longer screws to hold it in place… but… Those driver vents are totally open to the outside and would allow pressurized woofer air to escape thru the mid horn. Would covering them be a problem? What would it change?
I believe I just surrounded those areas with stuffing and left them alone. It's been way to long since I did all of that Mach 1 work.
 
#3, before getting yourself too deep into that, I'm the one with the Adapter for the Midrange. Converts the horn mount to a 1" 8-TPI thread for standard screw on compression drivers. I'll post images later.

Listen to Steve, he's been a major contributor on this topic for years. He also made these awesome metal L-pad/Driver plates.
 
#3, before getting yourself too deep into that, I'm the one with the Adapter for the Midrange. Converts the horn mount to a 1" 8-TPI thread for standard screw on compression drivers. I'll post images later.

Listen to Steve, he's been a major contributor on this topic for years. He also made these awesome metal L-pad/Driver plates.
There is no expectation to not listen to him. ‍:)

I picked up a few options for adaptors. The left ones are a tad big and the right are a tad small, but the middle ones, with a little modification will work. I havent opted to go this route yet. I want to build new crossovers first so if there is a need to adjust the crossover points one way or another, it is as easy as swapping out a cap. But since you have done this already, what are your results? (I’m sure it is probably cover within the 132 other pages… I havent seen it yet and I am only halfway thru it)
 

Attachments

  • IMG_3717.jpeg
    IMG_3717.jpeg
    260.2 KB · Views: 13
Last edited:
So here's the adapter. Very clean and simple. I have not YET tested this. Took me years to find a pair of Mach One speakers (already had the replacement horns and drivers. I bought the speakers shortly after moving into my new home, but many other more urgent things had to be addressed, including my retirement. Now that I am retired I'm slowly taking on projects like this. I hope to test soon. I already have a thread started for this, but haven't made any updates, yet. Stay tuned. At some point I'm going to enlist help to identify crossover mods for the driver I have, which is readily available and reasonably priced. It will be a much better match to the woofer, but could be challenging in the upper frequencies, but we'll see. I truly believe this opens the door to keeping these jewels functional well into the future when original midrange drivers dry up. Oh, I hope to confirm that the clearance will be "dead nuts on" for clearance with the rear panel.
 

Attachments

  • 1769112645080.png
    1769112645080.png
    521.4 KB · Views: 12
So here's the adapter. Very clean and simple. I have not YET tested this. Took me years to find a pair of Mach One speakers (already had the replacement horns and drivers. I bought the speakers shortly after moving into my new home, but many other more urgent things had to be addressed, including my retirement. Now that I am retired I'm slowly taking on projects like this. I hope to test soon. I already have a thread started for this, but haven't made any updates, yet. Stay tuned. At some point I'm going to enlist help to identify crossover mods for the driver I have, which is readily available and reasonably priced. It will be a much better match to the woofer, but could be challenging in the upper frequencies, but we'll see. I truly believe this opens the door to keeping these jewels functional well into the future when original midrange drivers dry up. Oh, I hope to confirm that the clearance will be "dead nuts on" for clearance with the rear panel.
If I ever do another pair, I will design the mid to be just above the woofer, and the tweeter at the top. Most likely will use a different mid horn, and adapt the tweeter to attach to the original mid horn at the top. That way they look just like a regular Mach 1.
 
So here's the adapter. Very clean and simple. I have not YET tested this. Took me years to find a pair of Mach One speakers (already had the replacement horns and drivers. I bought the speakers shortly after moving into my new home, but many other more urgent things had to be addressed, including my retirement. Now that I am retired I'm slowly taking on projects like this. I hope to test soon. I already have a thread started for this, but haven't made any updates, yet. Stay tuned. At some point I'm going to enlist help to identify crossover mods for the driver I have, which is readily available and reasonably priced. It will be a much better match to the woofer, but could be challenging in the upper frequencies, but we'll see. I truly believe this opens the door to keeping these jewels functional well into the future when original midrange drivers dry up. Oh, I hope to confirm that the clearance will be "dead nuts on" for clearance with the rear panel.
Thanks… Can you point me to that thread so I can “watch” it, please?
 
Back
Top Bottom