• The move to the new server is done. There are some software and database maintenance updates in process. This has us passing the hat around to help out. We appreciate any donations. Seriously, even a dollar helps. The payment page may be found here - https://www.audiokarma.org/support.html

Marantz 2235 Right Speaker Hiss

As far as removing PE01, I haven't worked on a 2235, but most units similar to this just require removing the nuts that hold the bass, mid and treble pots to the chassis. It should slide out the back with wires still attached. Usually, you can twist it around enough to get to the solder side.
 
No question- right side is really hissing- audible at about 10 o'clock on the volume dial. Left I don't hear anything unless it's cranked. I swapped R & L to see if it might be the speaker or the cable, but the hiss was present in whatever was plugged into the right channel. I again checked both remote and mains, and the same issue is present on both. And checked multiple inputs. Same thing.

Guessing I may as well replace the preamp transistors for the right channel to see what happens...?
 
No question- right side is really hissing- audible at about 10 o'clock on the volume dial. Left I don't hear anything unless it's cranked. I swapped R & L to see if it might be the speaker or the cable, but the hiss was present in whatever was plugged into the right channel. I again checked both remote and mains, and the same issue is present on both. And checked multiple inputs. Same thing.

Guessing I may as well replace the preamp transistors for the right channel to see what happens...?
That's what I would do.
 
Replaced the right side transistors...

WORKED. Dead Quiet!

Now that the right side isn't hissing, I notice the left side sounds all buzzy. Going to replace those transistors tomorrow. THANK YOU, Audiokarma heroes! :beerchug:

Steven- thanks so much for the transistors.

Can't wait until I get this thing going with the turntable after they're all replaced.

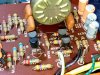
BTW: once I got the board upside down in the light, the legs on some of the old transistor legs were solid black. Take a look at HE08 and the soon to be replaced HE07 in this pre-replacement photo. Not sure that's normal for their age, but not all the transistors looked like that (note the original HE05 & HE06 in the same photo), so guessing these may have been quite well burnt?

IMG_7064 (1).jpg
 
I musta got lost------I thought he already did------duh on me---lol
Nope. My bad. I was really trying everything I could first to avoid replacing the original components. But I did say the new transistors arrived Monday. Understand that could've been misleading as I didn't put them in and finish driving myself insane with troubleshooting until tonight.
 
Nope. My bad. I was really trying everything I could first to avoid replacing the original components. But I did say the new transistors arrived Monday. Understand that could've been misleading as I didn't put them in and finish driving myself insane with troubleshooting until tonight.
Like Manfred Mann would say.. "But mama, that's where the fun is". When I get a piece that was sold for parts but actually works after some cleaning part of me feels let down.
 
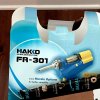
Ted, I don’t know if you have a powered solder sucker, but if you don’t, it will change your life. You won’t think twice about replacing a component if it is suspect. I did a little video of my Hakko FR-300 a few years ago. They now have an FR-301. It may be my favorite workbench tool.
https://audiokarma.org/forums/index.php?threads/use-of-hakko-fr300-desoldering-gun-video.741463/

I agree with Steven about the powered sucker.
I have this one, but mine was purchased at M.P.J.A.--------I guess Scamazon has it now.

https://www.amazon.com/Digital-Deso...rds=desoldering+station&qid=1623245319&sr=8-3
 
Ted, I don’t know if you have a powered solder sucker, but if you don’t, it will change your life. You won’t think twice about replacing a component if it is suspect. I did a little video of my Hakko FR-300 a few years ago. They now have an FR-301. It may be my favorite workbench tool.
https://audiokarma.org/forums/index.php?threads/use-of-hakko-fr300-desoldering-gun-video.741463/

Been wanting one forever- finally pulled the trigger on this sucker a couple days ago...
IMG_7065.jpg

Don't know how I lived without one.
 
Been wanting one forever- finally pulled the trigger on this sucker a couple days ago...
View attachment 2253257

Don't know how I lived without one.
Awesome. Just keep that tip orifice cleaned out with the rigid cleaning wire. I run the wire through it every 10-15 components that I remove. If it gets clogged, the motor will make a higher pitched sound and you will lose your suction.
 
OK, so swapped out the left side.

Side note, the wires that were connected to the "J" posts were super brittle- I think almost all of them broke off and I had to rewrap them. Went ahead and added a dot of solder just to be safe.

So now that I'm finished, my family is asleep and I can't test it with speakers in the living room because I will get yelled at (again). They are very selfish.
 
Brittle wires are common in these. Sometimes they break inside the insulation while twisting boards around. THAT can make a tough diagnostic problem. I always solder wrapped wires if I have to remove them. 1) - I don’t have a proper wire wrap tool, and 2) - I don’t trust that brittle wire to wrap properly.
 
Brittle wires are common in these. Sometimes they break inside the insulation while twisting boards around. THAT can make a tough diagnostic problem. I always solder wrapped wires if I have to remove them. 1) - I don’t have a proper wire wrap tool, and 2) - I don’t trust that brittle wire to wrap properly.
One suggestion I read around here is to actually unsolder the post itself leaving the wrapped wire untouched for that very reason - after you unwrap, it becomes brittle and not suitable for wrapping again. You can always get wire and the tool but the cost is somewhat high.
 
Brittle wires are common in these. Sometimes they break inside the insulation while twisting boards around. THAT can make a tough diagnostic problem. I always solder wrapped wires if I have to remove them. 1) - I don’t have a proper wire wrap tool, and 2) - I don’t trust that brittle wire to wrap properly.
UGH. Wire breaking inside the insulation would have driven me off the edge. I'd never have found the issue. I thought about just splicing in a few inches of new wire with solder and heatshrink to give it some slack, but figured I'd try it as-is. If it continues to be a problem and I have to work more on the preamp, I'll probably at least do that.

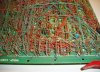
Out of curiosity, I've never seen a wire wrapped like this to make a connection- what's the benefit vs a soldered connection?
 
I've used wire wrapping on prototype boards in the mid-80s, the pins were usually gold plated and the wire was of great quality. The connection is excellent, so much so that I think some of the early computers (PDP10 comes to mind) used that in production boards.

hand_wrapped_Z80_computer_board_F2.jpg
 
Back
Top Bottom