• The move to the new server is done. There are some software and database maintenance updates in process. This has us passing the hat around to help out. We appreciate any donations. Seriously, even a dollar helps. The payment page may be found here - https://www.audiokarma.org/support.html

Marantz 6300 speed issue

Golanr

Active Member
Hello,
I bought this TT 3-4 years ago and never got around to testing it.
After recapping few amps, I decided to check the 6300 with the hope of restoring the electronics and mechanics, as well as re-veneer the wood.
First thing I did was to turn it on and test the speed and auto stop. The platter rotated, but I could not keep a stable speed. It wasn't going crazy, but was not perfect too.
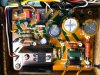
I decided to start with a recap of the power supply and then replace the speed control pots. I also replaced the Thyristor which controls the solenoid, the 3 large resistors, H803 Transistor and H804 Zener. The two small electrolytes were replaced with Wima BP (Same size as original). I have yet to replace the speed pots.

After turning the 6300 back on, The motor now works like a step motor, making a quarter turn, stoping for 1-2 seconds then making a quarter turn again. Nothing changes when I play with the speed pots, (both the ones outside and on the motor.)
All power looks fine, the auto stop solenoid works perfectly when I move the tone arm to the end. I thought maybe the 2 Wimas are the issue, so I put the originals back in, no change

The only possible issue I see is the voltage on the MJE15030G collector (H803) replacing the Sanyo D331D, it should be 34v but it alternates between 29v-35v. I see the same on R802 and R801. Base and Emitter show 17v. Any suggestions as to where to go to from here?
 

Attachments
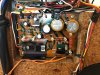
  • 6300 P800.JPG
    6300 P800.JPG
    139.4 KB · Views: 80
Last edited:
Register to hide this ad
Motor issue fixed. Apparently the heavy platter needs to be mounted for the motor to properly (sit?) work :) It did not fix the speed alignment issue, but it works again. I’ll replace (again) the 2 small caps so all is fresh. One of them is a tantalum and as EchoWars explained, it was critical where leakage current was a concern. Any modern suggestions for replacement, or should I just get another tantalum?
 
Last edited:
issue fixed, apparently the heavy platter needs to be mounted for the motor to properly (sit?) work :)
Yup, it is strange how that works. The platter has to be on for the motor to turn correctly.

I gotta say, I love my 6300. I know some feel like they aren't as good as the price they demand, but I put a Denon DL-103 on it and I really love it.

Did you get your 6300 speed fixed? If not, or even if you did, here is a great, and long, thread about the 6300 and speed issues.

http://audiokarma.org/forums/index.php?threads/marantz-6300-is-breaking-my-heart.272782
 
Thank you @kmp14 . Yes, I did read this one. Pretty frustrating, because he never followed through...I also read @Echoplex thread on his rebuild. It was a great reference.
The 45 is now perfect, but the pitch control is turned all the way, so it does not give me any flex, the 33 is still not aligning, even with a full turn, but it’s stable. My next step is to replace the 2 speed pots, the micro switches and align everything. Then I will open the motor, clean and adjust its pots and recap it too. I have the 2nd gen motor.

Last but not least, which is most intimidating to me, it to remove the tone arm and top aluminum plate and re-veneer the wood. Unlike electronics, this will be my first time doing so. I’ll keep updating and promise full closure.

@Echoplex, can you advise what you had to remove in order to remove the 2 speed pots?

Golan
 
Last edited:
Thank you @kmp14
Last but not least, which is most intimidating to me, it to remove the tone arm and top aluminum plate and re-veneer the wood. Unlike electronics, this will be my first time doing so. I’ll keep updating and promise full closure.

@Echoplex, can you advise what you had to remove in order to remove the 2 speed pots?

Golan

I did the same with my 6300. It was several years ago, and it is still going strong. Everything comes apart pretty easily. You do have to remove the tonearm and silver plate to get to the speed pots. I struggled with the speed on mine too. I found a couple auctions selling parts and grabbed a couple motors. I don't recall which one I ended up using, rev wise, but I have been good since then.

This was my first wood re-veneer project. I used a cherry veneer and tung oil finish. I wasn't thrilled with the color at first, but as the tung oil has aged it has gotten darker and I like it now. I didnt not re-install the metal badge on the front about "auto stop" and Servo etc, looks much nicer without it. I have attached a quick snapshot if it today:

20180421_183037.jpg
 
This was my first wood re-veneer project. I used a cherry veneer and tung oil finish. I wasn't thrilled with the color at first, but as the tung oil has aged it has gotten darker and I like it now. I didnt not re-install the metal badge on the front about "auto stop" and Servo etc, looks much nicer without it. I have attached a quick snapshot if it today:
View attachment 1169134

Looks very nice! I think I read your story a week ago on this or another forum.
 
Last edited:
Sure, be happy to!
  1. Flip the deck over and prop it up on some foam blocks so that the tonearm assembly is free and clear of any weight being placed onto it.
  2. Loosen the four screws and remove the plastic bottom cover, then remove the front foot and support bracket.
  3. Remove the knurled knobs for the speed pots first, then remove the six screws for the control panel sub-chassis assembly bolted onto the plinth, and lift it up and turn it over slightly.
  4. Once you're able to get the control panel out far enough, take photos of the old potentiometers (pots) and the four wires (orange, orange & white, yellow, yellow & white), then desolder and remove them with a long socket and/or nut driver.
  5. Test the new potentiometers first by verifying that they are working using a DMM.
  6. If new pots test good, place them into the slots of the sub-chassis and bolt them into place. Make sure that you place them correctly into the sub-chassis and that they turn in the correct direction. Expected values for the new pots should be 0 to 1k ohms or 0 to 5k ohms depending on the motor version you have.
  7. Solder the new pots in and test.

As Balifly already alluded to....make sure to look at the motor pots that are mounted directly underneath the 18 volt motor. These pots are set at the factory, and are often overlooked but are notorious for contributing to speed drift issues.

Helpful tip: If you're having to turn the main speed pot all the way on to get it to work, then you'll need to adjust the motor pot first so that the main pot isn't the only one doing most of the work.

If all goes well, you should see a noticeable improvement in speed drift issues. Good Luck!
 
Last edited:
If all goes well, you should see a noticeable improvement in speed drift issues. Good Luck!
Thanks! @Echoplex
I figured the motor pots, they are clean now and ready to be adjusted. Ok, I thought I need to remove the whole top plate. You suggest to come from the bottom. I’ll try that, though I still think that I may need to remove it, for the re-veneer.
 
Your welcome!

Yes, if your doing just the pots, then going in from the bottom is best.

If your doing a new veneer all around, then you’ll want to strip the whole plinth.

Keep us posted on your project! Good luck!
 
Did you find a replacement for the tantalum? Nichicon makes some small electrolyric caps that will fit that small space. I've used then in several pieces of equipment where space is tight with good results.
 
Have you already purchased the new pots? If so can you share where/which ones you bought? I replaced mine several years ago, and while they work, the are "twitchy" and TINY movements result in big changes. I would like to find better ones with wider adjustment range, but I just haven't done the research.
 
Have you already purchased the new pots? If so can you share where/which ones you bought? I replaced mine several years ago, and while they work, the are "twitchy" and TINY movements result in big changes. I would like to find better ones with wider adjustment range, but I just haven't done the research.
These are your two options on Mouser:
PDB181-E415K-102B for 1Kohm
PDB181-E420K-502B for 5kohm


You could look for 25 turn pots, but you'll need to fabricate something to connect the knurled knobs to them.
 
Last edited:
Did you find a replacement for the tantalum? Nichicon makes some small electrolyric caps that will fit that small space. I've used then in several pieces of equipment where space is tight with good results.
Yes, I was thinking going this way, with a good low ESR cap, but then I read this https://www.electronicsweekly.com/news/now-alternative-solid-tantalum-capacitors-2017-03/
Which I found very interesting. So I’m still contemplating. Space is not a concern for me. I just want to make sure I get the right precision.
 
Last edited:
I hope the restoration works out for you. My 6300 was purchased new in summer 1976, and the only part replaced was the neon strobe bulb (with an exact replacement bulb & resistor) Please note that the best maintenance is simply keeping the unit clean and lubricated. I start by removing the rotor every couple of years, cleaning the ball bearing and old oil out of the shaft, and re-oiling with a fine quality light machine oil. I used deoxit very sparingly as it tends to wash out the lubricant grease in the pitch control potentiometers, causing them to turn too freely. You can still buy original headshells and pitch control pots (used, of course), on Ebay. Good luck, its a great turntable!
 
I hope the restoration works out for you. My 6300 was purchased new in summer 1976, and the only part replaced was the neon strobe bulb (with an exact replacement bulb & resistor) Please note that the best maintenance is simply keeping the unit clean and lubricated. I start by removing the rotor every couple of years, cleaning the ball bearing and old oil out of the shaft, and re-oiling with a fine quality light machine oil. I used deoxit very sparingly as it tends to wash out the lubricant grease in the pitch control potentiometers, causing them to turn too freely. You can still buy original headshells and pitch control pots (used, of course), on Ebay. Good luck, its a great turntable!

Nice Avatar, rolex! The 1933 original has been my all-time favourite flic since my dad woke me up at 1am - when I was 3 years old or so - to watch it on the late night movie show.
 
After Recap and adjustments, speed is perfect. Thank you all!

Installed the small WIMA caps again.

6300 After 2.JPG


Now to the part I dreaded the most, taking everything apart and re-veneering the 6300.
I'll post updates and photos as I make progress. Got some work travel this week, so it'll be slow. But, making progress! :)
 
Last edited:
Back
Top Bottom