

You are using an out of date browser. It may not display this or other websites correctly.
You should upgrade or use an alternative browser.
You should upgrade or use an alternative browser.
MC240 - Back to Life
- Thread starter chrisinsc
- Start date

chrisinsc
Active Member
I'll dig up photos of my MC240 rebuilt. I got caps made in Germany which dropped into the original mountings.
That would be highly appreciated! Thanks.

sxty8goats
Super Member
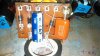
Images. This is after two hours of cleaning...
I just finished one a month or two back. Yours looks as if a single cap in the power supply may have been replaced but the rest of it looks stock.
I used cap/ resistor and power supply kits from Jim McShane. You can find a link to my thread in my sig.
I picked up a similar deal and thought I got a great deal at $1000 for a MC240 +MX110z. Mine look new but I would be tickled pink to pick up the pair you did for $300. Nice score.
chrisinsc
Active Member
I just finished one a month or two back. Yours looks as if a single cap in the power supply may have been replaced but the rest of it looks stock.
I used cap/ resistor and power supply kits from Jim McShane. You can find a link to my thread in my sig.
I picked up a similar deal and thought I got a great deal at $1000 for a MC240 +MX110z. Mine look new but I would be tickled pink to pick up the pair you did for $300. Nice score.
Same kit! Awesome thread for my purposes! Thanks a ton!

dshoaf
That high voltage buzz
diodes and c21 and c27, need to know if this looks ok. I will be adding a second cap to the c27 position as a bypass and the end result will look mush neater than this. This is just with components loosely places.
Just took a look at the bias board's lash-up. It all looks good from this point with one exception that may be a phono angle thing:
- The second diode from the left appears to be connected to the first - a jumper, so to speak. This isn't supposed to be that way.
Again, it may be the way the pic was taken.
Cheers,
David
chrisinsc
Active Member
Just took a look at the bias board's lash-up. It all looks good from this point with one exception that may be a phono angle thing:
- The second diode from the left appears to be connected to the first - a jumper, so to speak. This isn't supposed to be that way.
Again, it may be the way the pic was taken.
Cheers,
David
Its the bent tail of sr3. Its in place and snipped off now. Thanks david.
sxty8goats
Super Member
Same kit! Awesome thread for my purposes! Thanks a ton!
Some people feel that the original carbon comp resistors sound better than new metal foil/film resistors. When I was pulling resistors from my board for replacement I found that the majority of them were in spec. Of course I didn't realize that many thought they sounded better so I pulled most of them and replaced them with the higher quality, far more accurate to spec, resistors that I bought from Jim. There are a couple I kept and a couple that Jim didn't include in his kit but I think he has added them after emailing back and forth. He offered to send me the ones I was looking for but I ended up using a couple of the originals.
From my emails to Jim. Please note, Jim provides a great kit and great service. This is only meant to help you and I believe that Jim is now including these in the kits as a result of this conversation. There were a few design changes to the MC240 over the years so yours may differ from mine.
I've run short on 56 k resistors. There are two groups of 4 resistors and a ninth 56k is r61 on my schematic. Your kit supplies 8 and doesn't list r61.
I found R58, a 100k was also not supplied, or rather it is called out as R60 and R60 was not supplied.
R60-100k ohm and the previously mentioned R61-56 ohm, are both on the board and the others, R58, R59 and R57 are on the power supply caps. These come with the power supply kit, R60 should be the same 100k ohm as R14 and R37. R60 and R61 are both spec'd as 5% resistors and would complete the resistor kit parts kit.
Please don't take this as complaining or dissatisfaction with your kits. Even with the two missing resistors it is a good kit that saved me a ton of time sourcing parts. Before I started this project if couldn't have done it without the kit. Having it eased the learning curve immensely.
chrisinsc
Active Member
My philosophy on this project is to retain as many components as possible and replace those that the voltage testing and resistance tests indicate are out of spec. However with the power supply its different because almost every person who has posted about these old amps says to make sure that is robust and delivering the proper voltages to the proper places. I read your entire thread and others about the resistors and good sprague caps on the audio board. I will retain as many of those as possible. Did you keep yours in case I need an old one in good condition? 
sxty8goats
Super Member
My philosophy on this project is to retain as many components as possible and replace those that the voltage testing and resistance tests indicate are out of spec. However with the power supply its different because almost every person who has posted about these old amps says to make sure that is robust and delivering the proper voltages to the proper places. I read your entire thread and others about the resistors and good sprague caps on the audio board. I will retain as many of those as possible. Did you keep yours in case I need an old one in good condition?
The black beauties were left in the amps. The bumble bees were pulled. So yes, I kept them but no, they are not available.

sxty8goats
Super Member
Bias board complete. Old eyes and the kitchen table resulted in a burn divot in the board. Whoops.
That looks very familiar.
chrisinsc
Active Member
Lookin' good......
Cheers,
David
Thanks david. Wish it were as easy as it looks. The 300 watt gun and trying to replace the bits without desoldering any existing wiring was a chore to say the least. The method the assemblers used makes it easier to leave the wires while removing the componenents thank goodness. I must have some sort of masochistic streak...
chrisinsc
Active Member
That looks very familiar.
Glad im not alone in that! The gun has more power than my pencil irons but its harder to be precise. I can see why folks get more industrial type tools for this if it becomes a habit...
chrisinsc
Active Member
The black beauties were left in the amps. The bumble bees were pulled. So yes, I kept them but no, they are not available.
What about the resistors?

chrisinsc
Active Member
as I was mocking up the bias board/M207/C23-C24/M209input part of the circuit last night I found there was a difference between the schematic I had from the service manual and the schematic that sxty8goats has linked in his thread where C23 and C24 are connected with the red wire from M207 between them. Am I seeing things? sxty8goats' schematic looked right in terms of polarities. SHould I go with that?
sxty8goats
Super Member
as I was mocking up the bias board/M207/C23-C24/M209input part of the circuit last night I found there was a difference between the schematic I had from the service manual and the schematic that sxty8goats has linked in his thread where C23 and C24 are connected with the red wire from M207 between them. Am I seeing things? sxty8goats' schematic looked right in terms of polarities. SHould I go with that?
They changed the circuit over the years. If your service manual is the one that was supplied with the amp, I would go with that.
But I would also confirm that the polarities are right. It may be that they are showing the diodes in reverse and in turn, the caps will look out of polarity. That is the rectifier. Turns AC into DC, Then M-209 smooths it out.