• The move to the new server is done. There are some software and database maintenance updates in process. This has us passing the hat around to help out. We appreciate any donations. Seriously, even a dollar helps. The payment page may be found here - https://www.audiokarma.org/support.html

Minor CR-1020 Restoration

Greyfixer

New Member
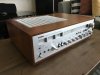
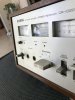
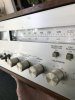
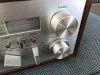
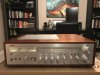
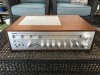
First, here is the finished product:
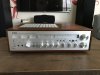
IMG_4632.JPG
IMG_4630.JPG

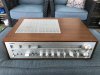
Here is the unit the day I bought it. I got it off a guy from Facebook Marketplace for $100. It turned on but wouldn't play any sound. It was a bit grimey and had a few dents in it but it was in good condition otherwise.
IMG_4291.JPG

Lots of grime...
IMG_4305.JPG IMG_4306.JPG IMG_4299.JPG

A few scratches but nothing too terrible.
IMG_4295.JPG

Here is the outside after a good cleaning. I used a melamine (Magic Eraser) sponge to clean everything. I had to wash the sponge probably six or seven times to clean off all the grime and tobacco I was pulling off the unit.
IMG_4316.JPG

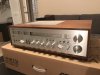
The front cleaned up pretty good as well. I may have lucked out as I found out afterwards the melamine can be a little overly abrasive and remove the lettering but I didn’t have any issues. I also ironed out the dents immediately after this taking this photo but I didn’t take any pictures of the process.
IMG_4318.JPG
 

Attachments

  • IMG_4334.JPG
    IMG_4334.JPG
    142.9 KB · Views: 12
Register to hide this ad
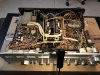
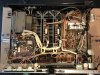
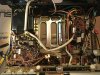
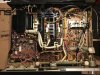
I took the case off to start troubleshooting and to try to figure out why it wouldn’t turn on.
IMG_4337.JPG

Everything was covered in a layer of dirt but there was nothing obviously burned or damaged. The good news: I got the unit to turn on simply by tapping on the relay. It was sticky at first but after giving the relay a few taps after flipping the power switch, the relay began to click on reliably every time I turned it on. I feel like it may have just been stuck from a lack of use like it had been in storage for many years.
IMG_4334.JPG

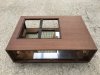
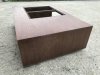
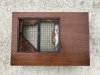
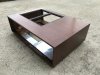
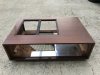
Here is the plywood-and-veneer case removed from the unit. Notice the dents are gone for the most part. You can’t really see the flaws in this pic because of the lighting but they’re there.
IMG_4384.JPG

Here you can see the condition of the veneer a bit better.
IMG_4387.JPG

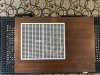
Here is a 50/50 split of the oiled side on the left and the non-oiled side on the right. I used Danish Oil with a light walnut tint. It does slightly darken the overall appearance but that’s what I wanted.
IMG_4388.JPG

Top while still wet.
IMG_4396.JPG

I let the oil set in for about 15 minutes then I would wipe off the excess with a cloth. I did this 3 times and then spot treated for a 4th pass.
IMG_4395.JPG

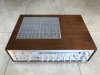
Here is the finished case.
IMG_4392.JPG
 
Now to start recapping the power supplies and amplifier boards. This is my makeshift soldering station in my home office since it’s too hot to work in the garage during the Florida summer. I cleaned as much as I could on the inside using compressed air and a damp rag.
IMG_4507.JPG

The amplifier boards came out easy enough. The only issue was two of the wires on the top were on the verge of breaking off so I went ahead and re-soldered them when I put everything back together.
IMG_4525.JPG

Here are the power supply boards removed from the unit. I had to de-solder the two blue wires on the left side to wiggle these two free but it made everything else from then on out a lot easier.
IMG_4487.JPG

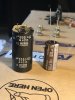
Most of the new capacitors (right) were smaller that the originals (left) they replaced.
IMG_4515.JPG

This is the original left amplifier board.
IMG_4494.JPG

This is the right board.
IMG_4498.JPG

Here is the recapped amplifier board. I used all Nichicon capacitors. I used a mix of PW, FG, KZ, KT, and KA series caps. A lot of the values I had looked for were out of stock in certain series so I just went with the best available at the time.
IMG_4503.JPG

Another recapped board.
IMG_4500.JPG

Here is one of the recapped power supply boards. I did this board last because it was the most difficult and I wanted to knock the rust off my soldering skills before attempting the task. It was slow and tedious but I enjoyed working on it. The little black markings are where I marked the negative lead of the caps I was removing.
IMG_4523.JPG

Here is the other power supply board. I didn’t change out the two large caps because they are not known to go bad. I performed the service bulletins for the similar CR-2020 by replacing three of the resistors and re-soldering the 6-pin connector just as preventative maintenance. I would like to mention the capacitor at the very top of the picture has a known misprint on the circuit board and the polarity is actually the opposite of what is marked. I discovered this on my own and then went online to verify. Misprints on circuit boards do happen so be careful and pay attention to the polarity when you are removing old caps.
IMG_4516.JPG
 
Cleaning everything up and putting it all back together. I cleaned the aluminum with Brasso and then put a layer of Klasse All-in-one on top to protect it from oxidation. I used 303 on the back panel to give it a nice matte sheen.
IMG_4556.JPG

Here is the finished product. I went ahead and sprayed DeOxit on the contacts of all the switches and rheostats. I also put some on cotton swabs or pipe cleaner and cleaned all the RCA inputs, headphone jacks, and speaker jacks.
IMG_4558.JPG

Giving it a test-listen before putting the case back on. It sounds beautiful and everything works perfectly!
IMG_4563.JPG

Here is the finished product with the case back on.
IMG_4565.JPG

Another pic of the final result. I’m very pleased with how it came out.
IMG_4570.JPG

Giving it another listen with the Yamaha NS-690s I picked up along the way.
IMG_4573.JPG

The 690s are amazing but need some work.
IMG_4578.JPG
A few more shots of the final result.
IMG_4585.JPG
 

Attachments

  • IMG_4558.JPG
    IMG_4558.JPG
    140 KB · Views: 8
No more grime.
IMG_4587.JPG
IMG_4588.JPG IMG_4589.JPG
The scratches are still there but are barely noticeable. Now they’re more “character” than “flaw.”
IMG_4586.JPG
IMG_4590.JPG
IMG_4591.JPG

Not great pictures of the back but I’m proud of how well everything cleaned up.
IMG_4592.JPG
IMG_4593.JPG

Lighting has a big impact on the case. Under some lighting, it looks copper-ish, while under other conditions, it takes on a darker walnut color (like this one).
IMG_4598.JPG
 

Attachments

  • IMG_4586.JPG
    IMG_4586.JPG
    141.7 KB · Views: 3
Very nice job, beautiful receiver.

How difficult was the recapping? Are the boards fairly accessible?
Recapping was not too difficult. I just went slow and took my time with it. There is a misprint on one of the boards so you have to pay close attention to get the polarity right. I also had a few traces come up that I had to tack back down. The boards are a little tricky to get to. Yamaha's are known for being some of the more difficult receivers to work on because everything is buried in there but it wasn't too bad. I had to desolder a few wires to get the power supply boards out.
 
Thanks for the info. I've recapped a few Sansui's (5000X, Eight, AU-9500, TU-717) some were easier than others...
I may be buying one of these so wanted to get an idea how difficult it will be
 
Back
Top Bottom