• The move to the new server is done. There are some software and database maintenance updates in process. This has us passing the hat around to help out. We appreciate any donations. Seriously, even a dollar helps. The payment page may be found here - https://www.audiokarma.org/support.html

Next Yamaha PX3 linear TT on Audiokarma - restoration (problems with photo elements solved)

When that happens, you have no choice but to eat every one you can get your hands on! Achtung!!!
 
Seriously though I have very much enjoyed following your thread.

Thank you !!!


you have no choice but to eat every one

Yummy Yum... and work done.

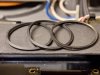
I changed belts

If you looked very, very closely with good light and a bit of magnification, one could see the very tiny beginnings of cracking in the old belts

my looks better,

Old one:

20221107_183921.jpg

and new one:

20221107_183847.jpg

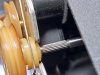
I checked one more time gummy drive wheel. I don't have crack and stamps.

20221107_183956.jpg

Last time I cleaned all wheel and shafts with solvent, brush and soap. Now I put with thin needle new oil on all shaft.

PX-3 mission - complete !!!


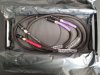
but... Yamaha has Mogami Neglex 2496 interconnect

20221107_215651.jpg


It's good cable but enought good for this TT ??

I have three options:

- leave as is
- change cable with better one
- change cable with high level RCA socket ( without drill in PC-3 body )

What do you think ??
 
and I forgot about it:

Before changed belts when I tilted PX3 my tonearm goes from left to right side.

Now I can tilt near 90 degree and tonearm is still on place !!!
 
... will try to find proper new LED.

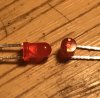
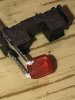
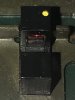
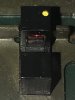
Thank you for your hard work and very detailed report. With the help of guys like you, I was able to restore my turntable. I myself am very weak in electronics. With your permission, I will post photos, as I did. I cut and polished the LEDs, bent the legs close to the base, carefully opened the sensor housings and placed the new converted LEDs there. Externally and functionally, it looks like an original part. I understand that at first glance I did a lot of unnecessary work, but I love beautiful work and this is my hobby.
 

Attachments

  • D817E4BD-A23A-4C0C-ADB3-9FD7C9B6B11E.jpeg
    D817E4BD-A23A-4C0C-ADB3-9FD7C9B6B11E.jpeg
    80.9 KB · Views: 20
  • BB171A16-E73F-40EC-963A-446170C9DCE1.jpeg
    BB171A16-E73F-40EC-963A-446170C9DCE1.jpeg
    119 KB · Views: 21
  • A413C2B0-6DDA-42E6-8A75-A66A2AFCC878.jpeg
    A413C2B0-6DDA-42E6-8A75-A66A2AFCC878.jpeg
    69.8 KB · Views: 22
  • 2791EA5D-666F-4CBB-AD1E-55CA0E470A63.jpeg
    2791EA5D-666F-4CBB-AD1E-55CA0E470A63.jpeg
    94 KB · Views: 22
  • 0395FAEC-3B4F-4C33-A5C0-EB5CCD20B2F0.jpeg
    0395FAEC-3B4F-4C33-A5C0-EB5CCD20B2F0.jpeg
    98.9 KB · Views: 20
  • A10325A2-2360-4B25-BAC6-B8B158BA181E.jpeg
    A10325A2-2360-4B25-BAC6-B8B158BA181E.jpeg
    96.6 KB · Views: 19
  • 3CB61472-2306-48D1-985F-C1C67DD452ED.jpeg
    3CB61472-2306-48D1-985F-C1C67DD452ED.jpeg
    83.4 KB · Views: 20
  • EB3DFFAE-C066-4448-8774-76B123A83397.jpeg
    EB3DFFAE-C066-4448-8774-76B123A83397.jpeg
    78.9 KB · Views: 20
  • BDAFC0AC-EBFA-4F80-A94F-F1841FCEDD5B.jpeg
    BDAFC0AC-EBFA-4F80-A94F-F1841FCEDD5B.jpeg
    96.6 KB · Views: 20
  • F5164446-7453-44C3-B60A-E6E2BCD61919.jpeg
    F5164446-7453-44C3-B60A-E6E2BCD61919.jpeg
    118.3 KB · Views: 20
it looks like an original part

Yes, work level - PRO !!!

It's nice to hear that my work impressed you to repair PX.

I finished my PX-3 completely.

Do you remember :

Yamaha has Mogami Neglex 2496 interconnect

index.php


It's good cable but enought good for this TT ??

My friends said that it is one of higher Mogami and it is not necessary to change it but I bought new one. Because I have all interconects Tellurium Q Ultra Black II and speaker cable TQ too I decided to get the same for Yamaha.

I bought Tellurium Q Ultra Black II Phono RCA
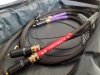
20230316_170006.jpg

20230316_165935.jpg

removed old Mogami and clean soldering points from old tin
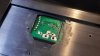
20230316_185912.jpg

reoved one side of RCA and soldering it with silver/gold/tin
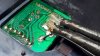
20230316_191401.jpg

and now I have new interconnect for TT.

20230316_192045.jpg

Did it change anything... YES !!! Change everything. If you check my posts you can find that I build tube analog outputs for DAC and CD, I build completly DAC with tube too. It is my source number one becouse of dynamics, analytic sounds and for big, wide and high, 3D sound stage. Now on TQ UB II I first time have the same holographic sound stage like from DAC's. Sound is not only the same 3D but much dynamic !!!

I think that oryginal Mogami connectors are Yamaha PX-3 bottleneck.,

 
Continue to be very impressed with your work, Marcin! Wish Poland weren't so dang far away as I'd just love to hear what you are hearing now with the new interconnects.....happy listening, amigo!
 
This is one of the most impressive refurbishing I've ever seen anywhere. I had an old Pioneer PL-L800 that I really loved but had to sell on ebay as non-working for parts because I have no sense of electronics. To say that the work on the Yamaha is impressive is like calling Niagra Falls a regular waterfall.
 
Do you know how big should be drop to change H to L ?

I added another 240 ohms to the 680 ohm R37 resistor. With new LED and 920 ohm low voltage of sensor is 0.906 volts and auto mode works great. With original 680 ohm low voltage 0.885 volts. My plan is to increase the 680 ohms step by step until the circuit stops working again and then measure this critical low voltage. But for this I need to buy resistors first. It interesting to me because I want to increase the life of the sensors by reducing the LED current.
 
Last edited:
this post gets you real close on belt length: #9
IME even ugly primary (small) belts worked OK
The secondary/large flat belt is often troublesome and NLA....anywhere AFAIK.
 
this post gets you real close on belt length: #9
Thank you!
The size of the square of three old dried brittle belts of my turntable is 1.4x1.4mm. and length 88mm. (half-length 44). I assumed that they might be not the original ones, or they might have shrunk a lot in size.
 
Last edited:
I added another 240 ohms to the 680 ohm R37 resistor. With new LED and 920 ohm low voltage of sensor is 0.906 volts and auto mode works great. With original 680 ohm low voltage 0.885 volts. My plan is to increase the 680 ohms step by step until the circuit stops working again and then measure this critical low voltage. But for this I need to buy resistors first. It interesting to me because I want to increase the life of the sensors by reducing the LED current.
I'm curious, because I would expect you to be able to increase the life of the LEDs by reducing the current through them, but I wouldn't expect that to help the sensors.
 
I wouldn't expect that to help the sensors.

Thank you for your comment.
I already installed the new LEDs and also tested the circuit with an additional 240 ohm resistor (680 R37+additional 240=920 ohms) and the circuit works fine. With the additional resistor, the current through the LEDs decreased by 27%, and the low voltage of sensor with only original resistor was best by 2.5%. I don't know if these numbers would suggest that without increasing the resistor, the light from the new LEDs is redundant, but I think it could be.
However, electronics is not my forte.
 
Last edited:
Do you know how big should be drop to change H to L ?? to 6V or low ??

OK.
I did a low voltage test by dimming new red 3mm LEDs by adding resistance.


R37 680 Ohm - low voltage 0.885V
920 Ohm - 0.906V
1160 - 0.942
1400 - 1.35
1640 - 3.4
1760 -4.5 - still working.
1880 - 5.4V - now auto mode not working.
 
Last edited:
Guten Morgen Herr @Fishead :)
, and I do "Polish polish" :)
(...)
and do handjob :)

LOL

Great pictures, thank you very much for sharing your work. I also repair turntables.

The cover looks excellent, which Polish polish are you using to polish in Poland? No, seriously, is the "headlight polish" 3M brand? It looks like new...

Greetings from Lima, Peru
 
Back
Top Bottom