Follow along with the video below to see how to install our site as a web app on your home screen.
Note: This feature may not be available in some browsers.
The move to the new server is done. There are some software and database maintenance updates in process. This has us passing the hat around to help out. We appreciate any donations. Seriously, even a dollar helps. The payment page may be found here - https://www.audiokarma.org/support.html
Firstly thanks 39cross for this valuable info, and you're telling me...
I have my T-4500 apart now, getting the display board out was relatively straight forward, but from there?
You can't separate the two halves (display and it's PCB) so what did you do to remove the capacitor, is it safe to pry them apart somewhat? I noticed there's a flat capacitor in the way of the apparent pathway out. Any advice would be much appreciated
Darn, of all the places to put it with all the room in that case. And just a few minutes prior I was marveling at the quality of the board with its Nichicon caps and super tidy layout.
Be sure to "bleed" the existing caps with a 1K resistor before removing and especially, if for some reason, you want to remove the new one after turning the unit on. My Technics ST-G7 uses two of them in series and I destroyed the foil trace under one of the leads when I shorted them with a soldering iron. I had to make a wire workaround.
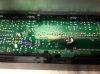
It's been 5 years now, I don't recall how I removed it, except that it was difficult. If I remember more I'll update my post. It was a delicate operation. But I did succeed. Because of how difficult it was, perhaps to make it easier to replace if needed in the future (or I just couldn't stuff the new cap in there), I soldered the new cap via wires to the back of the board and glued it. Picture of the new cap is below.
I just did the repair following other instructions about separating the display enough to get the old cap out. PIA, but the pic above was worth a thousand words of explanation! important to determine the neg side!!!