• The move to the new server is done. There are some software and database maintenance updates in process. This has us passing the hat around to help out. We appreciate any donations. Seriously, even a dollar helps. The payment page may be found here - https://www.audiokarma.org/support.html

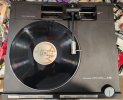
Pioneer PL-L1000A Thread

I will be posting photos of each section as I go, but a quick initial survey showed that the rubber boot around the tonearm lift motor is deteriorated and cracking, and the drive band has fallen off. This might be a big reason why my son stopped using the TT. :biggrin:
So this is something that I will have to deal with.

This is the very first time that the unit has been opened up so it was kind of amusing to see that someone has stuck a piece of a cable tie between the lift motor boot and the mounting frame to tighten it in place. That has to be a factory Tech Job.

View attachment 3309562

:beerchug:,
James
You will find that the foam surround of the elevation motor rots away, that causes the motor to skew and the belt loosen. I discarded the foam and cut a piece of leather from hobby lobby. Wrapped the motor until it was snug in the bracket. Works great.

While you are in there, make certain to test the micro switches for continuity. I had to service both of mine. Not making contact causes all sorts of problems.
 
My biggest takeaway from reading this entire thread is that post-lunch naps are awesome, but I already knew that.

Congrats on the meticulous restoration. Waiting on my new drive belt before I get into tonearm adjustments.

A couple of observations. The service manual instructions on the muting adjustment are crap - your pics show the correct way (it's not in the tonearm carriage - it is a microswitch that works off rotation of the cueing bar).
Tonearm adjustments are a bit of a mystery. The screw for adjusting height is locked in place by a funky security type screw (two pins rather than a slot or philips) that I managed to loosen with a pair of pliers and some tape without damaging the chrome. The service manual is very light on how the carriage assembly works and I've had issues trying to locate the operating manual for this thing but have some time while I wait for the belt.

Will definitely be revisiting as I move forward. Fortunately none of the "plastic" parts on this table are cracked (knock on wood).

Thanks for the detailed workup.
 
You will find that the foam surround of the elevation motor rots away, that causes the motor to skew and the belt loosen. I discarded the foam and cut a piece of leather from hobby lobby. Wrapped the motor until it was snug in the bracket. Works great.

While you are in there, make certain to test the micro switches for continuity. I had to service both of mine. Not making contact causes all sorts of problems.

Yeah, the lift motor sleeve didn't age well. My first consideration was to cut a strip off of a bicycle inner tube and do like you did with the leather and roll it until tight.

I think that properly sized o-rings are a viable solution. Even with only 2 rings the motor was held quite firmly in the frame. I think that by the time that 6 or 7 were pressed on it would be totally secure.

In the end the new 3D printed sleeve worked perfectly.

:beerchug:
James
 
My biggest takeaway from reading this entire thread is that post-lunch naps are awesome, but I already knew that.

Congrats on the meticulous restoration. Waiting on my new drive belt before I get into tonearm adjustments.

A couple of observations. The service manual instructions on the muting adjustment are crap - your pics show the correct way (it's not in the tonearm carriage - it is a microswitch that works off rotation of the cueing bar).
Tonearm adjustments are a bit of a mystery. The screw for adjusting height is locked in place by a funky security type screw (two pins rather than a slot or philips) that I managed to loosen with a pair of pliers and some tape without damaging the chrome. The service manual is very light on how the carriage assembly works and I've had issues trying to locate the operating manual for this thing but have some time while I wait for the belt.

Will definitely be revisiting as I move forward. Fortunately none of the "plastic" parts on this table are cracked (knock on wood).

Thanks for the detailed workup.

I would have replied earlier but I was taking an extended mid-afternoon nap. :biggrin:

My memory of adjusting the sled height to get the tonarm parallel is very dim. I did that once when the table was new in 1983 and remember it as being frustrating. Lucky for me I did not have to readjust it and it measured level with a small spirit level.

Thanks very much for the kind comments. If you want to post about your work here then by all means feel free, it will be interesting to see.

:beerchug:
James
 
Hi, James how is AT playing? Pavel ;)
Hi Pavel,

I have not been using the table very much yet because I still have only a very few LP's here. But I am liking the AT cartridge very much.
The weather is finally turning good here and I hope to have some wood cut for record cabinets in the next week or so.

:beerchug:
James
 
New cueing belt installed. Slapped a new cart/stylus on. Cleaned up a bit more. Only thing left is to clean/polish the dust cover and we're done.

Not sure if this is the original headshell but looks okay.

I didn't end up putting new damping fluid in the rear wheel as it seems to be working correctly. Just cleaned the rails/rollers as best I could.

Importantly - plays great and functions work as they are supposed to.

Pardon the workbench mess. One of these days I'm going to clean it all up.

1746878285582.jpeg
 
New cueing belt installed. Slapped a new cart/stylus on. Cleaned up a bit more. Only thing left is to clean/polish the dust cover and we're done.

Not sure if this is the original headshell but looks okay.

I didn't end up putting new damping fluid in the rear wheel as it seems to be working correctly. Just cleaned the rails/rollers as best I could.

Importantly - plays great and functions work as they are supposed to.

Pardon the workbench mess. One of these days I'm going to clean it all up.

View attachment 3500219
Yes, that's the original headshell.
 
So I've been using this table as a "test" platform for records for the last week or so and had a couple of observations.

1) The cueing is a bit thunky - I need to pull the cover back off and see if this is part of the original design or what
2) When the stylus lifts on pressing the stop button the cartridge jumps a bit to the right (outwards) which is annoying. Don't know if the tracking zero is off or what.
3) There is a distinct electrical noise (click) from the receiver when you press the left/right control buttons
4) I can't figure out how I'm supposed to adjust any of the VRs on the board and access the test points with the unit operable. I can take the cover off but then all of the controls and power are disconnected. Will have to take another look and see what I can do.

Beyond these issues I'm a big fan but want to get everything sorted out.

BTW - the easiest linear table I've worked on was a Realistic (Radio Shack) where the dustcover came off leaving the tonearm/transit in place and you could get to the test points easily. Was really easy to zero and adjust the tracking on that one.
 
4) I can't figure out how I'm supposed to adjust any of the VRs on the board and access the test points with the unit operable. I can take the cover off but then all of the controls and power are disconnected. Will have to take another look and see what I can do.
Member jjbunn posted this link in another thread:
https://www.amazon.com/dp/B07GD3KDG9?ref=ppx_yo2ov_dt_b_fed_asin_title&th=1

I bought the set and they work quite well to extend/jumper the top cover to the control boards.
See post #178 for photos of them in use.

:beerchug:
James
 
So I've been using this table as a "test" platform for records for the last week or so and had a couple of observations.

1) The cueing is a bit thunky - I need to pull the cover back off and see if this is part of the original design or what
2) When the stylus lifts on pressing the stop button the cartridge jumps a bit to the right (outwards) which is annoying. Don't know if the tracking zero is off or what.
3) There is a distinct electrical noise (click) from the receiver when you press the left/right control buttons
4) I can't figure out how I'm supposed to adjust any of the VRs on the board and access the test points with the unit operable. I can take the cover off but then all of the controls and power are disconnected. Will have to take another look and see what I can do.

Beyond these issues I'm a big fan but want to get everything sorted out.

BTW - the easiest linear table I've worked on was a Realistic (Radio Shack) where the dustcover came off leaving the tonearm/transit in place and you could get to the test points easily. Was really easy to zero and adjust the tracking on that one.
I had a 1000A a year or so ago. Yes. the arm movements were a bit twitchy. Had a tendency to drift. One fellow said the cds would need adjusting.
 
Last edited:
It has been almost a year since I have posted here.

For a retired guy I have been busier than a one legged tap dancer so far this year. But in the next week or two I should be in a position to post on some developments. Record cabinets, records, visits and a new problem.

:beerchug:
James
 
@Bratwurst7s Look forward to your upcoming posts!
I still have my PL-L1000A .. It awaits my repair as life has gotten in the way.
I have cobbled together pretty much all the repair pieces with the exception of a spare cartridge.

Were you the guy that worked with me in a way long thread about our McIntosh amps, or was it just this one?

Best to you. :biggrin:
 
@Bratwurst7s Look forward to your upcoming posts!
I still have my PL-L1000A .. It awaits my repair as life has gotten in the way.
I have cobbled together pretty much all the repair pieces with the exception of a spare cartridge.

Were you the guy that worked with me in a way long thread about our McIntosh amps, or was it just this one?

Best to you. :biggrin:
Thanks for the good thoughts.:)

Unfortunately I have never had any experience with Mac's.

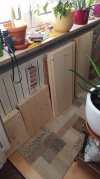
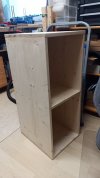
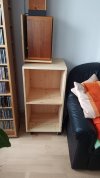
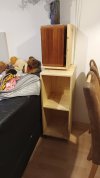
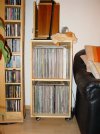
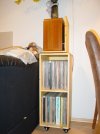
So, first off, last summer I built some record cabinets. I have very limited space in the living/dining room, just enough for one 50cm cab on the right, and one 30cm on the left. Enough for about 2/3 of the records.

Construction was from 18mm spruce shelving boards.

IMG_20250825_182614_869a.jpg

:beerchug:
James
 
Last edited:
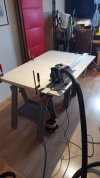
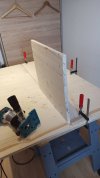
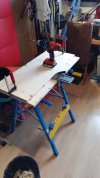
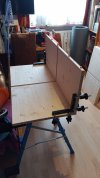
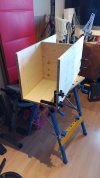
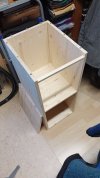
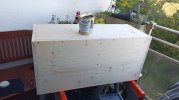
This is some very basic and simple construction.

Cut to size, a center slot routed for the middle shelf, drilled for 28 hardwood dowels and 42 50mm long screws, and glued together.

IMG_20250828_111118_231a.jpgIMG_20250828_131934_419a.jpgIMG_20250828_114938_813a.jpgIMG_20250917_105127_854a.jpgIMG_20250917_140825_452a.jpg

:beerchug:
 
Back in the mid '80s when I was still collecting LP's antistatic sleeves were pretty expensive. But now they are very affordable so after my son brought over all of the albums they got inner antistatic and outer protective sleeves.

The cabinets are very simple but at the same time quite robust. With a front cover and some padding added they will easily function as transport containers for whoever inherits them.

DSC03794.JPGDSC03795.JPG

I only had a small collection, about 350, and they are all here now except for the MFSL box set of The Rollong Stones.

I have not seen these things for quite some time. It is interesting to see how much my musical tastes have changed over time, from mainly rock/hard rock to Blues now. But there are some gems in there.

:beerchug:
James
 
Back
Top Bottom