• The move to the new server is done. There are some software and database maintenance updates in process. This has us passing the hat around to help out. We appreciate any donations. Seriously, even a dollar helps. The payment page may be found here - https://www.audiokarma.org/support.html

Pioneer sa-8100 case cleaning/refurbish

Fusion 101

New Member
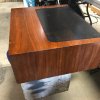
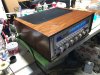
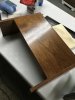
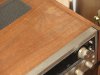
hello. Just bought this 8100 (just shipped) and would like to know what I need to do to bring the case back to its original splendor. Thanks, and happy to join this group.
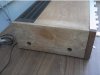
DE9B754F-0D9C-482F-A57E-1A1FF3C6A1D8.jpeg 9E0508E8-51E8-4328-9ED4-EFC2020405FD.jpeg
 
Register to hide this ad
Just did an SX-828 all dried out like that. Clean the dust off, wipe it down with an acetone wetted cloth to remove all old oil and dirt. Let dry. Sand with 320, if you don't have bumps and bruises. If you do steam those sections, let dry and sand. Then if you want darker, lots of choices, I used Watco Oil Finish (Dark Walnut). After that a Howard's feed-n-wax. Done looks like new.
Steam is an iron on medium heat over a damp towel to raise the grain. Don't let it sit for long, watch it as you work.

Or do some of the following steps that others will post. Everyone has their particular way.


We want after pics and the method you used
 
Last edited:
I'd go at it a bit differently. I would give it a wipe with steel wool (0000) and some lacquer thinner to strip off any leftover finish). A light sanding with 320. Then wood bleach to even it out. Then a sealer.. then stain of choice. You still may need to use a toner over the stain to even out the colors. Then clear of choice.. lacquer being the most forgiving and period correct. A good of wax after a week or so of letting everything dry out applied with steelwool which knocks off the nibs and takes down the gloss a touch but lets the wax give it that rich gloss. I just did something along these lines to a Marantz case but the difference is I didnt bleach. i wanted to keep the patina so I did the lacquer and steel wool to get off the custy old finish and then did the light sanding( very light). I used a thinned out walnut stain and then toner to even it all out.

I left the dent and a few scratches. I figured the radio earned it all and it is part of it's history :)

IMG_3590 (1).jpg IMG_3592 (1).jpg IMG_3700.jpg
 
Can I use nail polish remover, which is 96% acetone?
Please dont. They add stuff to the remover to help to keep from ruining nails and skin. Glycerin and Aloe Vera wont do your new finish any favors :/
  • Acetone (carbon, hydrogen, oxygen) C3H6O

  • Ethyl Acetate- colorless, flammable liquid

  • Butyl Acetate- production of lacquers

  • Aloe Vera- protects and conditions the nails

  • Glycerin- helps nails and skin from drying out

  • Cetyl Acetate- skin conditioning agent and emollient

  • Petroleum- chemical compound with 5 membered lactam

  • Phthalic Anhydride- made from crystalline
 
Roger Wilco on the nail polish remover, Mike. Thanks for the tips, and good job on that Marantz.
I’ve not yet started but assume it’s better to take off the sides and cover. What about the two front pieces. They look attached to the faceplate
 
I’ve not yet started but assume it’s better to take off the sides and cover. What about the two front pieces. They look attached to the faceplate
Yes sir.. you definitely want to remove the pieces before you attempt this. Lacquer thinner and steel wool bits are not healthy for electronics :o I dont own one of these so I dont know the magic to get the front pieces off. But the factory got them on so they do come off :) I'm sure someone else here knows the magic.
 
I didn't want to spend hours on the cabinet on the SX-828 I did so my short course was what I elected to do.
Before:
Cab top.jpg

the clean up was faceplate off and included internals as I brought this one back from 'kinda, might work, one channel isn't right" to a nice unit.

Front after 2.jpg

The unit could use some more Feed-n-Wax as the cabinet was not fed for decades and I'll do that. I did not remove the front corners as they were not as worn out as the cabinet.

A pair of EPI M50s got the same treatment and well they came out very nice.
EPI M50 2.jpg

There are lots of ways to refinish these cabinets but returning to an oiled walnut as original is what I like most. No poly or whatever.

Basically,
Clean the cabinet of dirt and oil
Raise the bumps and bruises as desired
Sand the cabinet to your level of smoothness, 320 is good, doesn't take too much off
Clean
Finish of choice, whatever that is and however many steps you need to do to get what you like. Stain, Oil Finish, Boiled Linseed Oil or whatever. Here is where folks spend some time sanding in the second to last or so coats with some 600 grit. But it depends on the original condition and the results as you move forward to a great looking unit you can proudly put out in the mancave.
 

Attachments

  • Cabinet wear.jpg
    Cabinet wear.jpg
    99.9 KB · Views: 15
B6C75991-7A5C-46BB-9292-77F53182BC42.jpeg
I have three coats of Watco oil on it now. How long do I have to wait until I apply the beeswax?

I treated the front pieces in place.
AA746E93-81AE-4DDA-A62C-36BE24919EA9.jpeg
3F37059B-9567-430A-B4FA-BB85DF077A29.jpeg
 
Last edited:
I've give it a few days. Normally it's about 8 to 12 hours depending on number coats, humidity, full moon etc. ;) But I find two - three days to be very reliable to make sure it's dried. My favorite application of wax is using 0000 steel wool dipped in wax and then microfiber towels to buff it. Your mileage may vary
 
While waiting for the oil to dry, I built a dim bulb tester and powered up the amp. The 60w bulb lit up and then dimmed as the protection circuit engaged and then went normal. I shot a video the second time but the light bulb did not light this time. You can see the protection circuit coming in and then releasing.

I was changing the battery on my dvm and broke the connector. No checking for voltages at the speaker terminals until I fix it.
 
Last edited:
While waiting for the oil to dry, I built a dim bulb tester and powered up the amp. The 60w bulb lit up and then dimmed as the protection circuit engaged and then went normal. I shot a video the second time but the light bulb did not light this time. You can see the protection circuit coming in and then releasing.

I was changing the battery on my dvm and broke the connector. No checking for voltages at the speaker terminals until I fix it.
So, the implied question there was, why didn’t the bulb light up the second time around (or the third)?
 
Because the current draw to fill the capacitors was not needed since the big caps were not empty like the first time. If you were to short the caps through a resistor to drain them you would get the bulb lighting up again but heck it seems like it will work and you are going to be happy with the cabinet refinish so just enjoy it and of course list the steps you took to make the cabinet so nice.
 
Because the current draw to fill the capacitors was not needed since the big caps were not empty like the first time. If you were to short the caps through a resistor to drain them you would get the bulb lighting up again but heck it seems like it will work and you are going to be happy with the cabinet refinish so just enjoy it and of course list the steps you took to make the cabinet so nice.

I thought as much; that the caps had charged but I’m so rusty w my electronics that I could not figure it out myself
Anyways, as prescribed, I cleaned with acetone and a microfiber rag. I then sanded very lightly w 320 on a wooden block. I’m nit sure what I should’ve done differently on the left side panel, as it was pretty ragged to begin with, and the oil application does not look as nice as the rest. Maybe should’ve sanded more?
D7426E30-3C0A-478B-B2F0-3FD59FD8DAFD.jpeg
FF4E89EA-6F04-491F-8332-744527C3CDEA.jpeg
Sorry not a good picture of the left side after the third application of the Danish oil.

I did three coats of the Watch dark walnut, trying to saturate the wood every coat. Waited fifteen minutes between coats. And no sanding between coats either. Can’t wait to add the wax and get a little sheen.
 
Last edited:
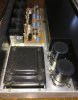
Does anyone know what it means when the electrolytic capacitors have a red maker line across the tops? Is it a check someone did, and what for?
sa-8100-power-amp-board.jpg
IMG_1656.jpg

They all have the mark. Some don't show up as marked in the picture
 
Last edited:
It could be for a number of reasons. Maybe someone was checking inventory to do a recap and marked em when comparing to the SM or when listed or just counting them. I've seen a few different sharpie marks on caps in different units and I have put marks on them when doing the inventory. Someone that checks caps in circuit would need to comment about if that might have happened but checking is much better out of circuit and if that happens it is just more logical to install new.
 
Waiting to buff the single feed n wax application,
64BBF53B-081E-4213-B727-5C33E26C11D7.jpeg

discovered the pre/main jumpers are missing. Very clean back panel

F0BD9800-A420-426A-9C85-7C8B9D07440F.jpeg
 
Back
Top Bottom