• The move to the new server is done. There are some software and database maintenance updates in process. This has us passing the hat around to help out. We appreciate any donations. Seriously, even a dollar helps. The payment page may be found here - https://www.audiokarma.org/support.html

Pioneer SX-580 audio issue

RobbySX

New Member
Recently I was passed down a 580 that’s been sitting in a closet for I don’t know how long. Cosmetically it looks great, I’m not much of a electronics expert unless you’re talking cars. Anyhow the issue, it powers on lights up and all, however the volume (both channels) is super quiet, with that constant hum mixed in with what little audible sound comes out. At full volume it’s got a little more sound coming out but it’s super high treble sounding, no bass and of course that hum and the power meters barely start to move at full volume. It’s a really neat looking unit and would like to use it as a garage system. Any pointing in the right direction as to what could be wrong would be greatly appreciated.
 
Register to hide this ad
OK, thanks, that rules out a couple of ... ahem ... silly things I've done (like, ipod as source with volume on the ipod turned way down :rolleyes:).

Comfortable using a multimeter in electrical circuits?
 
OK, thanks, that rules out a couple of ... ahem ... silly things I've done (like, ipod as source with volume on the ipod turned way down :rolleyes:).

Comfortable using a multimeter in electrical circuits?
Yeah I’ve been there haha, the issue sustains through all inputs, and well I’ve used them on cars I don’t know how different it is to household electronics but yeah I can use them.
 
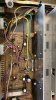
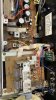
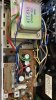
Nothing immediately jumps out to me as burned or toasted. Can you provide some photos of the bottom so folks can review those for suspicious solder joints, etc?
 
Sure, can do. I labeled F for front and R for rear. So everyone knows what direction is which.
 

Attachments

  • F9404EF7-D266-411E-8E1E-775C07610122.jpeg
    F9404EF7-D266-411E-8E1E-775C07610122.jpeg
    171.5 KB · Views: 15
  • 54712B39-C075-4B88-A9D6-6FAD8E997DBE.jpeg
    54712B39-C075-4B88-A9D6-6FAD8E997DBE.jpeg
    181.9 KB · Views: 14
  • 88D52DC2-CDD6-45F9-85C5-5C2E670D01D3.jpeg
    88D52DC2-CDD6-45F9-85C5-5C2E670D01D3.jpeg
    167.1 KB · Views: 14
Looks like there are a few solder joints that could be cleaned up, even if they’re not at fault for the issue.

I’d take a close look at the ones that are near heat marks to see if they’re stressed or cracked. A quick touch up with the soldering iron (if you’re comfortable with one). If you have some isopropyl alcohol clean up the surroundings area from old flux as well.

Before starting, make sure the unit it unplugged and the capacitors are safely discharged. They can hold voltages for a while after unplugged. Some multimeters have a discharge capability.
 
Looks like there are a few solder joints that could be cleaned up, even if they’re not at fault for the issue.

I’d take a close look at the ones that are near heat marks to see if they’re stressed or cracked. A quick touch up with the soldering iron (if you’re comfortable with one). If you have some isopropyl alcohol clean up the surroundings area from old flux as well.

Before starting, make sure the unit it unplugged and the capacitors are safely discharged. They can hold voltages for a while after unplugged. Some multimeters have a discharge capability.
Alright, I can do that. I’ve been reading that schematics and probing resistors to see how they’re holding up in accordance to their rating as the schematics say, most of them read a little below their rating but to the untrained mind seems like it shouldn’t be cause for such lacking output or would that be wrong?
 
Voltage measurements will be revealing when you start taking them. But my first step is always a visual inspection to see if I can identify any obvious problems first.

I’m sure that people with more expertise will begin weighing in soon. But getting the basics covered at the start is good practice.
 
Back
Top Bottom