• The move to the new server is done. There are some software and database maintenance updates in process. This has us passing the hat around to help out. We appreciate any donations. Seriously, even a dollar helps. The payment page may be found here - https://www.audiokarma.org/support.html

Pioneer SX-750 Popping/Crackling ReCap Question

Ok, will do!
I *should* have a bunch of free time tonight after work to really roll up my sleeves and dig into this.

Question:
When I'm doing Bias Adjustments and exercising the VR1 & VR2 Trimpots, is there a threshold or limit that I should watch out for, as to not damage the receiver?

I stumbled across this thread:
http://audiokarma.org/forums/index.php?threads/sx-750-left-channel-distortion.147992/

On page 2, MarkTheFixer mentions to "NEVER" go above 45mV when adjusting Bias. I am positive that I momentarily went well above this (probably into the 70 or 80mV range) when first messing with these VR's. It was momentary, and nothing seemed to happen. (Fingers crossed everything is ok).

I dont want to be overly paranoid here, and I know that the SM calls for Biasing at 50mV for the first 20 mins, but should I always be adjusting the Bias first (to, say, 50mV), then turning those VR's downward when checking these Transistors? I was thinking that if Im starting with the VR's all the way down, then Im blindly turning VRs up/down while testing, I may be going well above the 50mV threshold, and causing further problems.

I just bought a mid-range DMM to replace my old one, so I suppose I could hook up two at once:
One for keeping an eye on the Bias, and one for checking those Transistors, but that seems like double the work, and a lot to keep my eye on at once. Is there a specific workflow for doing this safely with one DMM?

What do you think? Should I be more careful and adjust Bias first, then turn VRs down to see what ranges Im getting on Transistors?

Or is it safe to continue doing what Im doing because Im using a DBT?

Thanks!
 
Your fine with the set on the DBT.
One risk is using the old trimmers. If one should have an open spot it could damage the outputs by making them go to full on.
You found out they are working fine :)
This issue can be difficult to track down troubleshooting as the components work in a symbiotic relationship.
In most cases it is operator error where a solder connection was missing or poorly done. Checking transistor subs or improper component replacement.
Reading the past threads will show swapping components from the good channel will eliminate what is good and whats bad. This has drawbacks, it can lead to self induced issues.
A good visual check, reflow the solder connections, check every resistor for value. Check the diode D1. Check the wire wrap connections to the outputs looking close at the wraps at the output sockets.
You swapped the outputs so look at the sockets making sure the emitter pins are making contact through the socket to the board's wire wrap posts.
Just accessing the amp board could of jimmy'ed something. Stiff wiring a weak post etc.

MTF has this voltage check he does where you connect the the meter to the Base of the two driver transistors. It's a NON Ground based/reference measurement. Then compare to the good channel. You then check the voltage readings starting with the trimmer at zero ohms and dial it up to idle current.
I'm not sure what is gained?
When he has suggested this procedure the OP's never comply completely.
Maybe Mark will comment on this procedure.

Continue with the checks posted yesterday but keep in mind this post as your working the driver board.
 
Last edited:
This issue can be difficult to track down troubleshooting as the components work in a symbiotic relationship.
Yeah, my thoughts exactly. Since this whole board is designed to balance itself out, it makes it tough.

Question:
When I am checking the Emitters on Q5 & Q7, how am I accessing these Transistors with the Output Transistor Wiring Harnesses connected? I am unable to reach those (Q5 and Q7). I could reach them by unplugging the Output Transistors' Wiring Harnesses, but doesn't that defeat the purpose? Should I be doing these tests with the OT's Wiring Harnesses disconnected? Is that safe to do, to run the circuit like that with the receiver turned on? I typically remove those wiring harnesses to remove the board and gain access to the back of it, or the bottom of it. If I can safely run the receiver turned on, and not have those transistors plugged in, I could remove the heatsink and transistors completely, and it would give me a TON more room to move around in there and do my testing.

Let me know, and thanks!
 
Q5 and Q7 are on the board? I've never had a 750 in front of me. The emitters connections pop out at pins 4 and 9. Clip on there?

I hope Mark sees this thread.
What recap list are you using?
 
I hope really hope Mark sees this too. Ive been waiting for him to chime in and drop some knowledge, haha.

I tried to upload an excel file that contains my BOM, but I guess its not a valid file type.

Earlier in this post, I go over what used for my BOM. Ill list it here, if it helps.
 
I placed two orders, but added together, they make up my 'Full ReCap BOM'.

They are compiled from two of Marks BOM Lists put together (the most recent taking precedent), and a few substitutes that I scrounged up. When the most recent was not in stock, I went to the older list. When neither was available, I found a substitute.

Keep in mind, I have not replaced/installed all of these, I have just purchased these. I will continue the recap after I (We) conquer this distortion problem! :thumbsup:

Here it is Copy/Pasted out of excel. It looks a little crappy, but here is Part 1 (First Order):

awg-046 c1 0.47 25v cssa 0.47 100 667-ECQ-E2474KB3 SUBSTITUTE Suggested by two.dogs
awg-046 c2 0.47 25v cssa 0.47 100 667-ECQ-E2474KB3 SUBSTITUTE Suggested by two.dogs
awg-046 c3 100 6v cea 100 10 647-UPW1A101MDD
awg-046 c4 100 6v cea 100 10 647-UPW1A101MDD
awg-046 c7 220 35v cea 220 35 647-UPW1V221MPD
awg-046 c8 220 35v cea 220 35 647-UPW1V221MPD
awg-046 c9 4.7 25v ceanl 4.7 50 647-UKL1H4R7KDDANA
awg-046 c10 4.7 25v ceanl 4.7 50 647-UKL1H4R7KDDANA

awh-046 c1 1 25v csza 1 50 647-UKL1H010KDDANA
awh-046 c2 1 25v csza 1 50 647-UKL1H010KDDANA
awh-046 c7 220 6v cea 220 10 647-UPW1A221MED
awh-046 c8 220 6v cea 220 10 647-UPW1A221MED
awh-046 c9 100 35v cea 100 50 647-UPW1H101MPD
awh-046 c10 100 35v cea 100 50 647-UPW1H101MPD
awh-046 c13 220 6v cea 220 10 647-UPW1A221MED
awh-046 c14 220 6v cea 220 10 647-UPW1A221MED

awr-099 c1 0.22 10v cssa 0.22 250 667-ECQ-E2224KF SUBSTITUTE
awr-099 c2 0.22 10v cssa 0.22 250 667-ECQ-E2224KF SUBSTITUTE
awr-099 c3 330 6v cea 330 10 647-UPW1A331MPD
awr-099 c4 330 6v cea 330 10 647-UPW1A331MPD
awr-099 c5 3.3 10v cea 3.3 50 647-UPW1H3R3MDD
awr-099 c6 220 16v cea 220 35 647-UPW1V221MPD
awr-099 c7 220 16v cea 220 35 647-UPW1V221MPD
awr-099 c8 100 35v cea 100 50 647-UPW1H101MPD
awr-099 c9 100 50v cea 100 50 647-UPW1H101MPD
awr-099 c10 100 50v cea 100 50 647-UPW1H101MPD
awr-099 c11 4.7 35v cea 4.7 50 647-UPW1H4R7MDD
awr-099 c12 220 16v cea 220 35 647-UPW1V221MPD
awr-099 c13 100 35v cea 100 50 647-UPW1H101MPD
awr-099 c15 100 50v cea 100 50 647-UPW1H101MPD
awr-099 c16 100 50v cea 100 50 647-UPW1H101MPD
awr-099 c17 330 50v cea 330 50 647-UPW1J331MHD SUBSTITUTE
awr-099 c18 330 50v cea 330 50 647-UPW1J331MHD SUBSTITUTE

awr-100 c1 470 10v cea 470 16 647-UPW1E471MPD

awk-065 c3 100 10v cea 100 10 647-UPW1A101MDD6
 
Last edited:
BOM for Second order:

awm-094 c1 2.2 25v csza 2.2 50 647-UKL1H2R2MDDANA (SUBSTITUTE)
awm-094 c2 2.2 25v csza 2.2 50 647-UKL1H2R2MDDANA (SUBSTITUTE)
awm-094 c3 10 35v cea 10 50 647-UPW1H100MDD1TD
awm-094 c5 100 35v cea 100 50 647-UPW1H101MPD
awm-094 c7 1 25v csza 1 50 647-UKL1H010KDDANA

awe-073 c27 0.47 50v cea 0.47 50 667-ECQ-E2474JB (SUBSTITUTE - I picked)
awe-073 c41 100 16v cea 100 50 647-UPW1H101MPD
awe-073 c42 220 16v cea 220 35 647-UPW1V221MPD
awe-073 c45 4.7 16v csza 4.7 50 647-UKL1H4R7KDDANA
awe-073 c46 1 25v csza 1 50 647-UKL1H010KDDANA
awe-073 c47 3.3 10v csza 3.3 50 647-UKL1H3R3KDDANA
awe-073 c48 0.22 35v csza 0.22 50 667-ECQ-E2224JB (SUBSTITUTE - I picked)
awe-073 c54 220 6v cea 220 10 647-UPW1A221MED
awe-073 c60 4.7 35v cea 4.7 50 647-UPW1H4R7MDD
awe-073 c61 47 6v cea 47 35 647-UPW1V470MED1TD
awe-073 c62 220 16v cea 220 35 647-UPW1V221MPD
awe-073 c66 0.1 35v csza 0.1 50 667-ECQ-E2104JB (SUBSTITUTE - I found, Confirmed by larryderouin)
awe-073 c80 10 16v cea 10 50 647-UPW1H100MDD1TD
awe-073 c81 10 16v cea 10 50 647-UPW1H100MDD1TD
awe-073 c82 1 25v csza 1 50 647-UKL1H010KDDANA
awe-073 c83 1 25v csza 1 50 647-UKL1H010KDDANA
awe-073 c84 220 25v cea 220 35 647-UPW1V221MPD
awe-073 c85 220 25v cea 220 35 647-UPW1V221MPD
awe-073 c86 4.7 16v ceanlnp 4.7 50 647-UKL1H4R7KDDANA
awe-073 c88 100 6v cea 100 10 647-UPW1A101MDD
awe-073 c89 100 6v cea 100 10 647-UPW1A101MDD
awe-073 c98 2.2 25v csza 2.2 50 647-UKL1H2R2MDDANA (SUBSTITUTE)
awe-073 c99 2.2 25v csza 2.2 50 647-UKL1H2R2MDDANA (SUBSTITUTE)
 
Last edited:
Update:

Left Channel:
Q5 Emitter when exercising VR1:
Max Left: 419 mV
Max Right: 498 mV

Q7 Emitter when exercising VR1:
Max Left: -418 mV
Max Right: -531mV

Right Channel for Comparison:
Q6 Emitter when exercising VR2:
Far Left: 500 mV
Biased: 614 mV

Q8 Emitter when exercising VR2:
Far Left: -450 mV
Biased: -564 mV

These numbers look to be consistent from Left to Right, but Id love to hear from the experts!


I also tested Diodes - (In Circuit, Power Off, & VRs all the way left):
D1: .642 V
D2: .642 V

About as consistent as you can get, for these two Diodes.


I have not checked Resistor values yet, but I am going there next. As Im doing that I will check for continuity of the circuit and report back.

Are there any other Transistors, or other components to check out? Any other suggestions or thought are always welcome!!

Thank you! :D
 
Hello All!!

Update!! I think I may have found the issue!! :banana:

I did some more poking around. I did a pretty thorough visual inspection of the board. I checked all my solder joints from replaced Caps for continuity. I checked the continuity of all of the Output Transistor sockets to the board. I checked Diodes 3 & 4 with a Diode Tester. They were both consistent from L to R channel. They were 1.5 V with the Diode Testing Function of my DMM, and they both came in at around 3.2-3.6 M Ohms.

Then I started checking Resistors. I one of the first ones I checked was R27. Its supposed to be 10 Ohms, but it checked out at 127k Ohms!

I had previously been doing all checking of components IN circuit, until I found a sniff of something that looked worth investigating further. I removed the Resistor, and after pulling away the white protective sleeve, I uncovered that it was partially blackened, and it tested at around 250 KOhms. (Maybe because of the soldering iron's heat pushing it further out of spec?) Anyway, this is obviously WAY out of spec, and from the looks of where it lies in the circuit, it is most certainly causing some, if not all, of the issues Im seeing. Unfortunately, after tearing into my stash of electrical resistors, caps, etc like a little kid on Christmas, I realized that I do not have any 10 Ohm resistors, so Ill be placing yet another order soon. I think Im going to toss in a bunch of Transistors too, just for good measure. They seem to be pretty cheap compared to paying shipping on more orders.

I am currently researching problematic Transistors now to make a list of Transistors to gather, and then Ill be placing the order.

Next up Ill continue with the recap. I will most likely do the Power Supply board.

Thanks for all the help Zebulon, and everyone else!! Ill update soon. :thumbsup:
 
That's good news! There is a list of transistors available for this Amp somewhere on here, use Google and search only within audiokarma. There is also a list on here of suitable relays to use too if you are making another order. There is a plethora of extremely capable and knowledgeable experts here who can point you in the right direction if you cannot find the list on your own.
 
Hi K-Schick
Below is the list of the complete BOM for the sx750, taken from a post by MTF (cannot find it at the minute but i had this saved in a word doc) . This list contains everything inclusive of caps, but the transistors are on it also. All credit to mark the fixer


Filters & Muting Assembly
AWM-094 Q1 2SA733-Q mute 512-KSA992FBU
AWM-094 Q2 2SA733-Q mute 512-KSA992FBU
AWM-094 Q3 2SC945-R 512-KSC1845FTA
AWM-094 Q4 2SC945-R 512-KSC1845FTA
AWM-094 Q5 2SC945-R 512-KSC1845FTA
AWM-094 D1 1S2473 512-1n4148
AWM-094 D2 1S2473 512-1n4148

Power Amplifier Assembly
AWH-046 Q1 2SA798-F dual/diff leave alone
AWH-046 Q2 2SA798-F dual/diff leave alone
AWH-046 Q3 2SC1438-V vas 512-KSC2383YTA
AWH-046 Q4 2SC1438-V vas 512-KSC2383YTA
AWH-046 Q5 2SD357-C driver 512-KSC2690AYS
AWH-046 Q6 2SD357-C driver 512-KSC2690AYS
AWH-046 Q7 2SB527-C driver 512-KSA1220AYS
AWH-046 Q8 2SB527-C driver 512-KSA1220AYS
AWH-046 D1 1S2473 512-1n4148
AWH-046 D2 1S2473 512-1n4148
AWH-046 D3 STV4H leave alone
AWH-046 D4 STV4H leave alone
AWH-046 VR1 100 ohms might not fit 652-3386H-1-101LF
AWH-046 VR2 100 ohms might not fit 652-3386H-1-101LF

Power Supply & Protection Assembly
AWR-099 Q1 2SC869-C o/c 512-KSC1845FTA
AWR-099 Q2 2SC869-C o/c 512-KSC1845FTA
AWR-099 Q3 2SC945-A dc 512-KSC1845FTA
AWR-099 Q4 2SC945-A dc 512-KSC1845FTA
AWR-099 Q5 2SA733-Q logic leave alone!! 512-KSA992FBU
AWR-099 Q6 2SC945-A dischg 512-KSC2383YTA
AWR-099 Q7 2SC1384-R relay drive 512-KSC2690AYS
AWR-099 Q8 2SD313-D pass +13 512-KSC2073TU
AWR-099 Q9 2SC945-Q dar +13 512-KSC2383YTA
AWR-099 Q10 2SD313-D pass +34 512-KSC2073TU
AWR-099 Q11 2SC945-Q dar +34 512-KSC2383YTA
AWR-099 Q12 2SB507-D pass -38 512-KSA940TU
AWR-099 D1 1S1554 512-1N4148
AWR-099 D2 1S1554 512-1N4148
AWR-099 D3 1S1554 512-1N4148
AWR-099 D4 1S1554 512-1N4148
AWR-099 D5 1S1555 512-1N4148
AWR-099 D6 1S1555 512-1N4148
AWR-099 D7 1S1555 512-1N4148
AWR-099 D8 1S1554 512-1N4148
AWR-099 D9 1S1555 512-1n4004
AWR-099 D10 WZ-140 (Zener) 512-1N5244B
AWR-099 D11 WZ-240 (Zener) 512-1N5252B
AWR-099 D12 WZ-140 (Zener) 512-1N5244B

Power Supply Assembly
AWR-100 D1 1S1885 512-1n4004
AWR-100 D2 1S1886 512-1n4004
AWR-100 D3 1S1886 512-1n4004
AWR-100 D4 1S1886 512-1n4004
AWR-100 D5 1S1886 512-1n4004
AWR-100 D6 SR3AM-8 512-1N5404
AWR-100 D7 SR3AM-8 512-1N5404
AWR-100 D8 SR3AM-8 512-1N5404
AWR-100 D9 SR3AM-8 512-1N5404

Tuner, AF & Control Assembly
AWE-073 Q2 2SC535-B mixer leave alone!!
AWE-073 Q3 2SC717 loc osc leave alone!!
AWE-073 Q11 2SA725-G mic amp 512-KSA992FBU
AWE-073 Q12 2SC1344-D mic amp 512-KSC1845FTA
AWE-073 Q13 2SA733-Q muting 512-KSA992FBU
AWE-073 D1 1S2076 leave alone!!
AWE-073 D2 1S2076 leave alone!!
AWE-073 D3 1S2076 leave alone!!
AWE-073 D4 1S2076 leave alone!!
AWE-073 D5 1S188FM-1 leave alone!!
AWE-073 D6 1S188FM-1 leave alone!!
AWE-073 D7 1S2076 leave alone!!
AWE-073 D8 1S2076 leave alone!!
AWE-073 D9 1S2076 leave alone!!
AWE-073 D10 1S2076 leave alone!!
AWE-073 D11 1S2076 leave alone!!
AWE-073 D12 WZ-192 (Zener) no 19v zener , 18 leave alone!!
AWE-073 D13 WZ-210 (Zener) no 21v zener, 24 leave alone!!
VR1 C92-048 (Semi-fixed, 47k-B) meter cal leave alone!!
VR2 ACP-055 (Semi-fixed, 4.7k-B) 76khz leave alone!!
VR3 C92-047 (Semi-fixed, 100k-B) sep leave alone!!
VR4 ACV-135 (Balance) leave alone!!
VR5 ACV-179 (Volume) leave alone!!

Amplifier Assembly
AWK-065 Q1 2SA725-G (2SA640-E) 512-KSA992FBU
AWK-065 Q2 2SA725-G (2SA640-E) 512-KSA992FBU
AWK-065 Q3 2SC1313-G 512-KSC1845FTA
AWK-065 Q4 2SA726-G (2SA640-E) 512-KSA992FBU
 
Wow, Paultlaw! Thanks for all that info!!

That is super thorough! :thumbsup: Excellent.

I had already found a handful of transistors to purchase when saw your post, but that is still phenomenal info!!

Thanks for contributing!! :biggrin:
 
Your welcome, remember it is not my information, thank the likes of Zebulon, Larryderouin, Echowars, and MTF.
All i have done is copy and paste, they have done all the hard work.
Thanks
 
I'm only a user with tons of gratitude.
I have mastered the art of AK searching.
Mark and Echowars have so many posts that they will live in infamy.
Between the two: Almost any issue has been touched on.
Then Larry, that old sea dog won't let you fail.
 
Haha, for sure. Mark, Echowars, Larry, and Watthour have all shared a hugely massive wealth of info, (of which I have barely scratched the surface). It is always much appreciated to go back through their posts and learn something valuable.

But many thanks to you too Zebulon. You've been the one most recently to personally help me out, so, at least from me, much gratitude should go your way as well. :)

And, of course Paultlaw. I just meant thanks for compiling all that info. After compiling a full recap list myslef, from those guys' info, I know how time consuming digging through and sorting that information can be, and I just wanted to extend my thanks to you for collecting all of that and posting it here for me and everyone else to use and see. :)
 
Thanks for the kind words.
If not for the mentioned three members I wouldn't be where I am today. They and several other members here on AK; for them to share their experience and wisdom on me is a treat beyond words.
 
I literally copied everything from a single post, and pasted it in here, so it only cost me a few clicks of a mouse.
Homage should be paid to those who actually use their brains for our benefit because in fairness mine does not work all that well :crazy:
 
Hello again everyone!!

Recap UPDATE:

I figured this was the case, but I have now confirmed that the R27 Resistor WAS indeed the culprit! After swapping out a new Resistor, I could bias it properly, and the distortion in the left channel went away. Whoo Hoo!
I have also just completed a ReCap of the Power Supply Board AWR-099. Everything went smoothly, and its sounding fantastic now!! :banana::music:

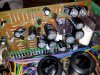
Here are Before & After Pictures of the Power Supply:
The board is flipped upside down for access, but you get the idea.

20170205_193634.jpg 20170207_215527.jpg
 
Back
Top Bottom