• The move to the new server is done. There are some software and database maintenance updates in process. This has us passing the hat around to help out. We appreciate any donations. Seriously, even a dollar helps. The payment page may be found here - https://www.audiokarma.org/support.html

QLS-1 - The King is dead, long live the King

seifreit

AK Subscriber
Subscriber
PART 1 - A Rare Find

I am starting this thread to document my restoration journey with the QLS-1s, pair 1420/21. For this first post of many I will give a little background as to the acquisition of them.

I was looking through FB Market Place as I do several times a day on the lookout for interesting audio and specifically Infinity gear. One evening I came across a posting for a pair of QLS-1s. The first I have come across that were even remotely close to me and at a fair price. The posting had only been up for a couple hours and I did not hesitate to contact the seller.

Luck was with me as I was the first to contact her. I explained to her that it may be 3-4 days before I could pick them up and asked if she was willing to hold them for that time period. I convinced her that I was a serious buyer and had no problem paying her full asking price. She agreed and I told her I would get in touch the next day with details as to when I could get there to pick them up.

The next day I had worked out the details for picking them up which included coordinating with my son for help loading and unloading. I contacted the seller and they said the date was fine and that she had 4 other interested buyers after I had first contacted her but she would honor her promise to hold them.

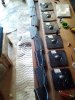
Three days later my son and I along with a large hand truck and heavy moving blankets were off on the 150 mile round trip to collect the QLS-1s. We arrived in good time considering it was rush hour and South Orlando is not a place to be at rush hour. The seller had only included a couple pictures in the ad so I wasn't sure what I was going to find. The cabinets were in very good shape with only some minor veneer lifting on the side of one of the bases. The woofers had been re-foamed at some point and very poorly as you will see in the picture. Everything was there though and I was happy with what I saw.

I asked here if she had any background or paperwork on them. She said no but shared that they were her father's and he was the original owner. She knew he worked at a stereo store for much of his life in some capacity but didn't know if he owned it or was a manager. He had passed away a few years ago and she was getting around to clearing out some of his things.

My son and I loaded them onto the truck, carefully wrapped in heavy moving blankets and headed back home. I was excited to see how they might sound initially, knowing there would be some work needed. I could see the broken tinsel leads on several of the mid domes and knew the woofers would need to be re-foamed properly. I also figured there would be much more to do once I had time to fully evaluate what I had just acquired.
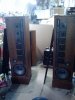
0428220746a.jpg 0428221816a.jpg

Next - Part 2 - Assessment and Plan of Attack
 
Last edited:
Register to hide this ad
Cool story.
And I would be happy to deal with that lady. She gave you her word and stuck to it. As did you.
Good luck with the restoration and final listening.

As a child 60 years ago I lived in Lake Wales, based on your location not that far away I'd assume.
 
Cool story.
And I would be happy to deal with that lady. She gave you her word and stuck to it. As did you.
Good luck with the restoration and final listening.

As a child 60 years ago I lived in Lake Wales, based on your location not that far away I'd assume.

Thanks. The restoration is complete (at least for now). I am just finally finding time to post it here for others who may be doing the same in the future.

I'm west of Orlando, close to Tampa. My brother lives in Lake Wales so I am quite familiar with the area.
 
Next - Part 2 - Assessment and Plan of Attack

With the QLS-1s safely at home it was a couple days before I was able to try them out and see what was and wasn't working. First, I wanted to just hook them up and listen to what I was starting with, sort of a baseline so I could assess how the restoration was going during each stage. I pulled the fuse and checked for condition, good. The previous owner must have run them with a single amp as there were "jumpers" between the upper and lower binding post, the "jumpers" comprised of a sewing pin, a cut off staple and what looked like bare 18g wire. I removed them and wired them up for bi-amping with a Parasound HCA-1206 I keep in the shop for testing.

I was rewarded with sound, but not everything was working. One of the mid bass drivers, and most of the mid domes were not producing sound. A quick, vigorous spin of the nobs in the back cleaned off enough gunk in the pots to bring the other mid bass to life and I know by the condition of the mid dome tinsels that they were not going to play no matter what I did. Still, what I was hearing was unlike any other Infinitys I do or have owned. Not a better sound at this point with so many drivers not functioning or marginal, but different, a sense of space and effortlessness I've not heard before. So, these had potential.

It was a couple more days before I could crack open the cabinet and get a good look at the crossovers and see what was going to need fixing. replacing and/or updating. These speakers were definitely designed at a time when wire was not considered important as 18g wire is used throughout. I decided to at least upgrade the woofer wiring to 16 g as it would be the easiest to get to and would provided the biggest improvement. The mid bass caps are the old Mexico red and black caps which means they are definitely on the list. They measured 40-50% out of spec. The two large can caps for the woofers measured good but let's be honest they are at least 40 year old NPEs so they will get replaced too. The rest of the caps are yellow polys and all measured good but I may consider replacing them as I progress through the restoration.

Clearly the mid domes needed to be repaired and the woofers need to be refoamed properly as noted earlier. All the EMITS appeared to be working but would still get pulled and tested. I was also on the fence about replacing all the EMIT diaphragms even though they all appeared to be working on first listening. There was the veneer on the side of the one base that needed repair and a general cleaning and oiling was in order for the cabinet. The grill clothes were in fair condition but the outer frame had come unglued from the masonite/cloth centers and needed to be repainted and re-glued. And of course, the plastics velcro tabs were barely holding the grills on, the slightest bump would instantly knock them off. Fortunately I found a solution for that that retains the factory look and function but grips much better.

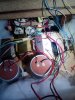
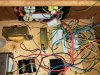
0507220825.jpg This is the original crossover as seen through the woofer hole, a late revision with the large can caps for the woofers and large single resistors instead of the resistor bundles.

0612221617a.jpg The hard velcro button on the left is the original. The one on the right is one I found that has a higher density of nibs and has a much higher grip strength. It is available from 3-M.

Part 3 - The work begins
 
Last edited:
Mid bass driver is lame find a better replacement…I’d get a hold of Watkins and see if they have suggestions on a better component
 
I may have to check out that button solution. While functional, my small dab of white museum putty is hardy attractive. Maybe if it was black putty it wouldn't look so bad...

ADDED--could you be more specific about the buttons.
I searched 3m velcro buttons, 3m snap buttons, etc and did not find anything like your image.
 
Last edited:
Part 3 - The work begins

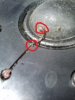
I decided to focus on getting the mid drivers working first. This was going to be some task as it appeared after my initial assessment that 9 of the 12 mids were not functional. Some were obvious by the fact that the tinsel leads between the dome and face plate had broken completely. The rest had some sort of open in one or both leads but the hardened outer coating was holding everything together. Here is a picture of the dome up close and circled are the two locations where a break will usually occur.
mid-repair1.jpg

I started searching the interweb to see what others had come up with regarding a repair solution. I was lucky and found this video on YouTube which covered a repair process pretty thoroughly.


Some of you may have seen it before, it's been out for a while. I studied it a couple times and jumped into the first dome. Let me just say this, it is very tedious work. It requires a magnifying glass (at least for me), very fine tweezers, a sewing needle and a lot of patience. The first one took me about an hour but I had a working dome. I recorded the dc resistance and marked it on a piece of masking tape and stuck it on the front of the driver face. This picture shows the first tower of domes completed with each ones impedance.
0430221604a (2).jpg
Why did I record all the impedances? Well, the drivers are wired in series pairs then 3 series pairs are wired in parallel. I figured I would get the most consistent output if I tried to get each pair to be as close as possible to the same impedance. It was about 2 weekends worth of work and I ended up rebuilding all12 because I knew the 3 that were working would probably fail in the very near future so why not just do them all and be done with it. It was pure irony that just as I completed the last domes Midwest Speaker released their replacement dome which would have saved me a lot of time. Unfortunately my budget would have taken too big a hit at $85ea x 12 drivers. Time I have, capitol not so much.

So now I had all drivers functioning. I gave them a quick listen and the reality is the sound didn't change much. In fact I felt a little disillusioned that there wasn't a huge improvement now that all the drivers were working. I figured some of it was due to the bad caps and such. I pressed on. Next task, the crossovers. During this time I also decided on what caps I would be using for the crossover repairs/updates now that I had all the drivers working.

Part 4 - The crossovers and wiring
 
Last edited:
I may have to check out that button solution. While functional, my small dab of white museum putty is hardy attractive. Maybe if it was black putty it wouldn't look so bad...

ADDED--could you be more specific about the buttons.
I searched 3m velcro buttons, 3m snap buttons, etc and did not find anything like your image.

I thought about that after I posted and I had to go back and look it up. Here is a link to a site that has them for sale. They are referred to as Dual Lock fasteners.

https://www.rshughes.com/p/3M-Dual-...MI0sa3uNWc-wIVScDICh1PNQ9ZEAQYBSABEgJYrvD_BwE
 
Did you order from that website or just have some on hand?

No, I didn't buy through them at the time. I had actually purchased the Dual Locks about a year ago when I was working on the Quantum 3s. I was looking for original replacements as many had broken nibs. I came across these on eBay from a seller in Israel who had 1 bag of 50 pcs they were selling on closeout. I've used them on the QLS-1s, Quantum 3s and Quantum 5s. I think I have maybe 2-3 pieces leftso if I need more I will be buying from them.
 
Part 4 - The crossover and wiring

So, all drivers working and a bit disillusioned with the sound, I pressed on with the crossover in hopes of good results. As I noted earlier, I knew the mid-bass needed replacing and I was committed to replacing the big NPEs for the woofers due to sheer age. I decided on Mundorf AC E-caps for the NPEs and Mundorf MKP film caps for the mid-bass. I could have replaced to mid-bass caps with NPEs as the original were but decided to "splurge" a little bit and step up to the film caps as they wouldn't add too much to the overall budget.

Just a word about the crossover in general. I've seen comments here and in other forums about how Infinity "cheaped out" on them given the status of the QLS-1 as a halo product. One only needs to read the literature Infinity published at the time to understand why the crossover were designed the way they were. They may be simple by comparison to something like the RS 9 Kappa crossover but the QLS-1 was designed under a different philosophy with different design goals. The crossover is the right solution for what the speakers are meant to be and do.

Here is a picture of the stock crossover.
0507220825a.jpg

One thing that bothered me was the fact that the big inductors for the woofers and mid-bass were jammed up right next to each other. With the new NPE bundles being a bit smaller it would allow for room to spread the inductors out a bit. The NPEs for the two big can caps required bundles to make up the correct value. The mid-bass cap also required a combination of two small caps to get to the 40uf value called for.

While the earlier mid dome repairs were being done I had read some articles and comments about replacing aging resistors and how they can impact sound quality. I decided I would also replace the resistor as again. this would not be too big a hit to the budget given there are only 3 resistors in the crossover. I went again to the Mundorf parts bin and used their R25 series resistors. I learned from rebuilding my RS 9 Kappa crossovers that matching components between the two speakers does play a role in how stable imaging is and if I have resistor that are off-value then driver output levels will be off.

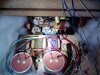
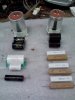
Here is a picture of the original parts and their replacements. Notice on the resistors I wrote down the measured value in pencil.
0528221315a.jpg

Here are the parts installed and the inductors have been moved to get some space between them.
0528221309c.jpg

While I had the woofers out, I went ahead and upgraded the 18g wire to 16g OFC wire. I can't say that this will improve the sound but at least there will be more power going to the woofers and less lost to impedance from the smaller wire. I also installed t-nuts for all the woofer screws and used Allen head 10-24 bolts to make it easier to take the woofers in and out during the whole project.

The last part of this step was replacing the binding post. The old ones were fine but anyone who has older Infinitys will know that the post holes will not accept stripped 12g wire. You might be able to get a 14g wire in at best and even that is tight. So, out with the old an in with the new. The last thing to do was thoroughly clean the pots and fuse contacts. I won't bore you with those details as the subject is covered quite frequently elsewhere.

You may be wondering why I did this through the woofer holes when many have posted in other threads that the crossover is easier to work on if you lay the speaker on its back and separate the base from the main cabinet. Call me a glutton for punishment but I found that I could access everything I need to by going through the woofer hole and at the time I didn't have the space in the shop to have these two big boxes laying on their backs for a couple weeks.

So, how did they sound after all this work? I was still not hearing anything that lead me to believe that these speakers would be keepers or even have hopes of being in the main system. I was expecting them to blow me away at this point but I was not hearing that. I will say, to be fair, they were not set up in an optimal condition. Even though the shop is 900 sqft I am working on these in a small area and mainly listening in what would be considered near-field or mid-field at best and I don't think these speakers can be used that way and be at their best. Sure, the bass was fantastic and deep which it should be given the volume of space they were playing in but just no magic. Still, I was committed to carry on and see these out to the end where ever it may be.

Part 5 - Final work and a discovery
 
Last edited:
Part 5 - Final work and discovery

There were a few final things to take care of before considering the restoration finished and ready to be brought in to audition in the main system. First was fixing the veneer issue on the side of the base. I had never done veneer repair before but I figured how hard could it be to glue a very thin piece of wood to another piece of wood. I was in luck as a new wood working supply shop had opened up near me so I had a close source of veneer and other supplies. I wasn't sure about the veneer, if theses were Walnut units or Rosewood. The finish had a bit of a reddish tone nd of course I was hoping Rosewood as it is rarer. I had taken a piece of the damaged veneer with me to match up. The associate at the store told me the damaged sample looked like mahogany that had been finished to match Walnut. Now I wondered if maybe the base had been repaired at some earlier point. I decide to get Walnut as that seemed to be what would match best along with the correct glue and a roller for spreading the glue to the correct thickness.

Armed with all the supplies I carefully removed the rest of the damaged veneer trying not to create any gouges in the MDF that might show through the new veneer. I sanded the surface smooth and cleaned it thoroughly, then applied a thin layer of glue and placed the veneer sheet with care and placed a piece of plywood topped with 16 lb leads weights to apply pressure while it dried. I waited about an hour which the instructions said was sufficient time for the glue to set up. I removed the weights and plywood to discover a rippled mess. Apparently 32 lbs of lead weight is not sufficient force to keep the veneer from expanding as it absorbed the moisture from the glue and leaving the veneer overhang long meant the outside edges stayed dry and caused even further issues. I quickly tried to remove the horrible mess before it dried any further.

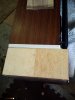
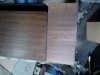
So back to the drawing board. I had another 100 lbs of lead plates and I figured if I trimmed the veneer with maybe 1/4" overhang around the edges it should work ok. So that is what I did. I pre-trimmed to just cover the surface with a little overhang, placed nearly 150 lbs of lead plates on the plywood to spread the force out and prayed that it would work this time. You can see the result below. It was something I really should have taken to a professional but I think it turned out ok. At least it was much better than what I started with.
0807220954.jpg 0808220746a.jpg

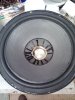
The woofers still needed refoaming and the center caps fixed. As luck would have it, a pair of Watkins woofers came available online for a great price such that I couldn't pass them up. I wasn't sure what I was going to find when I started on the original woofers. The other ones where taken from QLS-1s that a seller was parting out so I knew they would be correct. This gave me the option of choosing between the best two of the four and using the other two in the Quantum 3s which had borrowed woofers from the Quantum 5s which were woofer-less at the moment. I could then move the borrowed woofers back into the Q5s. Win-Win. I used the shim method for the refoam as I had to remove the incorrect dust caps from the bad refoam job anyway and I didn't want any doubts as to correct v.c. alignment.
0702221254.jpg 0702221315.jpg

During this whole process I debated the thought of replacing all the EMIT diaphragms with new ones from @Bobbyd38 . I decide to go for it and ordered 16 new diaphragms as I was going to have to remove all the EMITS anyway to test and confirm they were working. Plus the view of 16 new perfectly flat diaphragms would enhance the idea of how they might have sounded brand new off the showroom floor. The best way to deal with this task is to lay the cabinet on its back and unscrew all 8 EMITS and flip hem over as a unit. These are all soldered connections and trying to remove one at a time vertical would be a real pain to try to unsolder, keep the polarity of the leads straight, test the EMIT and then solder it back in again. Here is what that looks like.
0604221129a.jpg

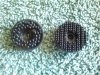
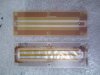
Fourteen of the EMITs measured good but all were very rippled. One was off by about 3 ohms high and a second one was significantly off so there would have been at least two to replace if I hadn't committed to doing them all. Here is a picture of a 40 year old rippled original vs. a new one.
0604220943.jpg

With all the work done I was now ready to be amazed at the "new" speakers I had. But no, still not the magic I was hoping for. But I did discover a few things and was starting to make sense of why I wasn't being blown away by these speakers. First, these speakers need space, listening to them near-field just doesn't work and they need to be separated further than what I had in the shop . I only had them about 4 ft apart and they didn't have the space to develop the soundstage they are capable of. They also demand quite a bit of power, not because of any low impedance dips but because they are so darn inefficient.

As I would also discover, these speakers are very amp dependent. By that I mean amps will definitely affect how they sound. I had been using 4 channels of a Parasound HCA-1206(135w@8, 200w@4)to drive them bi-amped and the amp never struggled. Just before I was preparing to move them into the main house system I lucked into a Threshold S/300series IIe. I decided to hook that up before moving it into the main system just to see how the QLS-1s would respond. THERE WAS THE MAGIC!!!. Or at least a vast improvement over what I had heard up to that point. Still not the best soundstage but man, everything was just so effortless, so fluid.

Part 6 - The big move and final thoughts/impressions
 
Last edited:
Part 5 - Final work and discovery

There were a few final things to take care of before considering the restoration finished and ready to be brought in to audition in the main system. First was fixing the veneer issue on the side of the base. I had never done veneer repair before but I figured how hard could it be to glue a very thin piece of wood to another piece of wood. I was in luck as a new wood working supply shop had opened up near me so I had a close source of veneer and other supplies. I wasn't sure about the veneer, if theses were Walnut units or Rosewood. The finish had a bit of a reddish tone nd of course I was hoping Rosewood as it is rarer. I had taken a piece of the damaged veneer with me to match up. The associate at the store told me the damaged sample looked like mahogany that had been finished to match Walnut. Now I wondered if maybe the base had been repaired at some earlier point. I decide to get Walnut as that seemed to be what would match best along with the correct glue and a roller for spreading the glue to the correct thickness.

Armed with all the supplies I carefully removed the rest of the damaged veneer trying not to create any gouges in the MDF that might show through the new veneer. I sanded the surface smooth and cleaned it thoroughly, then applied a thin layer of glue and placed the veneer sheet with care and placed a piece of plywood topped with 16 lb leads weights to apply pressure while it dried. I waited about an hour which the instructions said was sufficient time for the glue to set up. I removed the weights and plywood to discover a rippled mess. Apparently 32 lbs of lead weight is not sufficient force to keep the veneer from expanding as it absorbed the moisture from the glue and leaving the veneer overhang long meant the outside edges stayed dry and caused even further issues. I quickly tried to remove the horrible mess before it dried any further.

So back to the drawing board. I had another 100 lbs of lead plates and I figured if I trimmed the veneer with maybe 1/4" overhang around the edges it should work ok. So that is what I did. I pre-trimmed to just cover the surface with a little overhang, placed nearly 150 lbs of lead plates on the plywood to spread the force out and prayed that it would work this time. You can see the result below. It was something I really should have taken to a professional but I think it turned out ok. At least it was much better than what I started with.
View attachment 2709714 View attachment 2709715

The woofers still needed refoaming and the center caps fixed. As luck would have it, a pair of Watkins woofers came available online for a great price such that I couldn't pass them up. I wasn't sure what I was going to find when I started on the original woofers. The other ones where taken from QLS-1s that a seller was parting out so I knew they would be correct. This gave me the option of choosing between the best two of the four and using the other two in the Quantum 3s which had borrowed woofers from the Quantum 5s which were woofer-less at the moment. I could then move the borrowed woofers back into the Q5s. Win-Win. I used the shim method for the refoam as I had to remove the incorrect dust caps from the bad refoam job anyway and I didn't want any doubts as to correct v.c. alignment.
View attachment 2709718 View attachment 2709719

During this whole process I debated the thought of replacing all the EMIT diaphragms with new ones from @Bobbyd38 . I decide to go for it and ordered 16 new diaphragms as I was going to have to remove all the EMITS anyway to test and confirm they were working. Plus the view of 16 new perfectly flat diaphragms would enhance the idea of how they might have sound brand new off the showroom floor. The bes way to deal with this task is to lay the cabinet on its back and unscrew all 8 EMITS and flip hem over as a unit. These are all soldered connections and trying to remove on at a time vertical would be a real pain to try to unsolder, keep the polarity of the leads straight, test the EMIT and then solder it back in again. Here is what that looks like.
View attachment 2709727

Fourteen of the EMITs measured good but all were very rippled. One was off by about 3 ohms high and a second one was significantly off so there would have been at least two to replace if I hadn't committed to doing them all. Here is a picture of a 40 year old rippled original vs. a new one.
View attachment 2709728

With all the work done I was now ready to be amazed at the "new" speakers I had. But no, still not the magic I was hoping for. But I did discover a few things and was starting to make sense of why I wasn't being blown away by these speakers. First, these speakers need space, listening to them near-field just doesn't work and they need to be separated further than what I had in the shop . I only had them about 4 ft apart and they didn't have the space to develop the soundstage they are capable of. They also demand quite a bit of power, not because of any low impedance dips but because they are so darn inefficient.

As I would also discover, these speakers are very amp dependent. By that I mean amps will definitely affect how they sound. I had been using 4 channels of a Parasound HCA-1206(135w@8, 200w@4)to drive them bi-amped and the amp never struggled. Just before I was preparing to move them into the main house system I lucked into a Threshold S/300series IIe. I decided to hook that up before moving it into the main system just to see how the QLS-1s would respond. THERE WAS THE MAGIC!!!. Or at least a vast improvement over what I had heard up to that point. Still not the best soundstage but man, everything was just so effortless, so fluid.

Part 6 - The big move and final thoughts/impressions
What's funny is how closely this parallels others views of the QLS 1, the room is as important as the speakers, they need room to 'breath' or form a coherent wavefront, it seems.

nearfield they don't do it. (note this is third hand I've never heard them)

on another note, Nicole sure did mess up our festival, but almost everything is fixed now.
 
Part 6 - The big move and final thoughts/impressions

Encouraged by a renewed optimism, I decided to make one more change/upgrade to the crossover before moving them in the house where such work would be more difficult. I had toyed with the idea of upgrading/updating the mid dome caps and add a bypass for the tweeter circuit. For consistency I stuck with the Mundorf MKP film caps for the mids and a step up to the Mundorf Supreme for the EMIT bypass. While waiting for them to arrive I did some more listening with the Threshold to confirm what I had initially heard was not a fluke. Each follow-up listening session confirmed what I initially heard.

Here is a picture of the mid/EMIT caps installed.
image11.jpeg

Because of the unique crossover design for the EMITS there are 3 different crossover caps used for fine tuning. The bypass cap has to be installed in such a way that is is in-circuit regardless of which setting is used.

With everything complete, it was time to move them into the house for their debut in the main system. As when I initially picked them up, help and a hand truck are your friends. The biggest question would be how they would react to the space and how would they fare against the current king of the house, the RS 9 Kappas. This was going to be a very interesting matchup. The 9s have been the main system speakers for nearly 3 years and had gone through pretty much the same restoration. I love my 9s and they have rewarded me with better sound after every system upgrade since I acquired them. Plus, the 9s are 10 years newer. How would a speaker designed in the 70's compete with one from the late 80's?

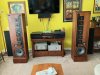
Nothing was changed with regards to electronics and sources between the 9s and the QLS-1s. The Threshold had been moved into the main system a couple weeks prior so I had plenty of time with it hooked up to the 9s for evaluation and comparison. The QLS-1 were positioned in the room in pretty much the exact same position as the 9s occupied. Let the face-off begin.
image3.jpeg

As I had talked about previously, the QLS-1s needed more space and a far-field listening position. Turn on the system, load a CD and sit back. The sound stage, my god, THE SOUND STAGE! I've rarely ever heard a soundstage with that depth before, at least not in my listening space. Only on systems at Hi-Fi Shows with speaker cables that cost more than I have invested in my entire system have I heard such a soundstage. The 9s have a great left to right soundstage with decent depth but not like what I was hearing from the QLS-1. The other thing I was hearing was the room, not my room, but the room the recording was done in. Most often we talk about the music played as if the musicians were in the room. This was beyond that. With the right recordings I was listening to music in its original room. It is a sense of space as if my room had grown in size to match that of the original recording space. Granted, it wasn't there for every recording but when it was it, just WOW!.

The QLS-1s also presented a greater sense of playing without effort. This was a comment I had heard from others and in reviews. Even at very high SPL they never give a sense that they are struggling or straining. It is a very seductive, siren-like sense that they just entice you to play louder and louder without ever feeling that they are indeed exceeding SPL levels you would normally be uncomfortable with on most other speakers. I had inklings of this when listening to them in the shop. I found myself turning them up beyond levels I would normally consider too loud and not even thinking twice about it. So far, they were living up to the challenge.

The one area where I felt the 9s had a small edge was fine details. I always found the 9s to exhibit the ability to present the finest details when fed good sources and proper amplification, sometimes almost to a fault though as they also will bring out the worst in a poor recording. Not to say that the QLS-1 didn't have the ability to present amazing detail but they achieve it in a different way by spreading the load out to multiple common drivers as opposed to using better quality drivers over a more divided range like the 9s.

Before I finish I would like to take a moment to thank those who have posted about their QLS-1 here on AudioKarma. They have been a great source of information and opinions. And, thanks to those of you who have chosen to follow me along the journey. If you have the opportunity to acquire a set of QLS-1s and have any questions I will be happy to answer any questions you have regarding what I have posted or not posted.

So, for nearly 3 years the RS 9 Kappas have been residing at the top of my main system, ruling the throne and providing hours of pleasure. But, there is a new ruler now. The King is dead. Long live the King.
 
Last edited:
You got rewarded big time for all your hard work. When I sit in front of my QLS-1’s, I feel the magic you speak of. Arnie Nudell was a genius speaker designer, his creations leave a presentation that definitely take you to another place. My heart is with horn’s, but Emit’s offer something that no other speaker has, it has to be experienced.
 
Just before I was preparing to move them into the main house system I lucked into a Threshold S/300series IIe. I decided to hook that up before moving it into the main system just to see how the QLS-1s would respond. THERE WAS THE MAGIC!!!
Have you ever experienced Class D amplifiers with Infinity speakers. I use a pair of power amplifiers with Icepower 1200As2 with great satisfaction.
 
Back
Top Bottom