• Please note that Audiokarma will be offline briefly for updates early on Monday morning, September 28th.

QLS-1 - The King is dead, long live the King

Absolutely, these are 250 per inch count while the old ones were something far less than that. I was already pondering how to attach the ones to the grill side, which, as you say were originally stapled on there and a square shape rather than round, at least on my Quantum 4s that was the case. Question, I'm looking at the screw that holds the round one on the standoff on the speaker itself. The screw passes all the way through the standoff and then holds it securely to the front of the cabinet. That screw is phillips dome head screw and the head sticks up somewhat, which I always thought got in the way of the two surfaces mating together properly. What kind of head does your screw that holds the standoff have? I was thinking of trying to replace them with a flathead woodscrew so that the little mushrooms don't come into contact with the head.....your thoughts?
 
Absolutely, these are 250 per inch count while the old ones were something far less than that. I was already pondering how to attach the ones to the grill side, which, as you say were originally stapled on there and a square shape rather than round, at least on my Quantum 4s that was the case. Question, I'm looking at the screw that holds the round one on the standoff on the speaker itself. The screw passes all the way through the standoff and then holds it securely to the front of the cabinet. That screw is phillips dome head screw and the head sticks up somewhat, which I always thought got in the way of the two surfaces mating together properly. What kind of head does your screw that holds the standoff have? I was thinking of trying to replace them with a flathead woodscrew so that the little mushrooms don't come into contact with the head.....your thoughts?

I noticed that too about the original screws. Kind of a design flaw in my thinking. I ground the heads down a bit when I was restoring the Q3s, before I came across the higher count 3M we've been discussing. It helped a bit but like most everyone else, there were so many broken 40 year old nibs that even with the shorter screw head it really didn't help much. If most of the nibs on the grill side are intact you can try replacing just the cabinet side and see how it works. I tried that with one grill the Q5s were there were a couple flat grill side squares with most of the nibs intact. It did work a little but not as good as having two new higher count pieces installed.
 
Thanks seifreit. The fact they do indeed adhere to each other is the most important part..
I was just asking because if you use two "loops" they won't stick together, and it appears the ones mentioned are close to using two "hooks" if that makes sense.

I mentioned before that I'm using lumps of museum (sticky) putty to hold the ones on my RS II's in place.
Can't see it, doesn't bother me, the cat doesn't seem to mind* but if there's a good alternative that's not too costly I'd go for it.
I just looked at the ones on my RS II's. The pad on the rod has a screw, the pad on the grille is wider than the circular one on the rod, and it is held in place with two very narrow staples. I don't know if the QLS-1 uses the same types. I can probably figure a way to "trim" one of the circular pads if needed. If it has a round hole I guess a small screw would work best, for me. I do know my grilles are made of fiberboard or whatever, and when I was repairing them I found it is not real receptive to some screws and or staples. Just guessing I assume many RSII grilles have broken over the years due to the design and cut outs for the top woofer. Hopefully the QLS-1 grilles don't have the same issue.


*Got my cat from a rescue center. She has claws and they made me sign a form saying I would not declaw her. I'm a man of my word. I told them I'm not worried about my furniture or carpet, but if the cat claws on my speaker grilles there will be a problem. First cat I've had that wasn't declawed.
Anyways I put double sided carpet tape along the edges of the speaker grilles and near a I can tell she's never clawed on them. I'm not a cat, but it seems to me those tall cloth things might look like good scratching posts to a cat.
 
Last edited:
Reporting back after receiving and installing the new hook fasteners from Digikey.

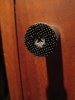
They do work and are really strong, so removing the grills is not exactly an easy task and you have to be careful as the grills can come apart from their frames and will require gluing them back together....ask me how I know? Also, as mentioned before, the original screws were just not a good fit and I chose to replace them with some wood screws that were the proper length and diameter. These I was able to recess a bit farther down into the hole and they don't get in the way nearly as much, although I did have to grind the heads to a slightly smaller diameter.

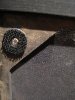
The only way I found to attach the fasteners to the inside of the grill that will hold them there is, I believe, with a screw that is short enough not to protrude through the grill yet large enough to hold them securely. This is, again, not an ideal solution but after messing with it for a while I was able to get things sorted so it all does work. I'm just not happy with the amount of energy it takes to get the dang grill off after installing these. In retrospect, it may be that the Velcro pads I'd used might be just as good and a lot easier to work with while still holding the grills securely to the front of the speaker. Here are a few pics....

On the standoffs:

IMG_4839.JPG

IMG_4840.JPG

IMG_4841.JPG

On the inside of the grills:

IMG_4838.JPG

I'll say it again, those are extremely hard to separate, as in I had to find a tool to create enough leverage because just trying to pull them off made things rather unstable. Once I no longer have the Monitor 7s on top, it will be easier from that perspective but I'm telling you, these things once adhered to one another are serious business to get apart!
 
Thanks for the follow up Fishead.
As mentioned I have RS II's, not QLS 1's. So my grille frames were broken when I purchased them a few years ago. The repairs also made them a little bit off square so lining up the 4 holes on the grille with the plastic tabs is already slightly challenging. Once that's done it's pretty easy for the dabs of putty to hold the top of the grille in place. I suspect other RS II owners had/have broken frames as well.
FOR ME I think I'll just stick with the dabs of putty as I'm afraid my compromised grilles might not fare well with such tight fitting button fasteners.
But it is great to know there is a source for these button type fasteners and this thread and info might help others in the future.
 
@goodolpg, I think you are wise to do that, amigo.....My brain has been rebooting since I put these on last night and I'm thinking of putting a very light coating of a silicone spray, LPS 1 on the fasteners to make them release a bit easier. I'll let you know how it goes....
 
I'll say it again, those are extremely hard to separate, as in I had to find a tool to create enough leverage because just trying to pull them off made things rather unstable.

I think you will find that after taking the grills on and off a few times the the nibs will loosen up a bit and removing them won't take as much effort. I had the same experience when mine were fresh. I felt like I was going the rip the stand-offs out of the cabinet but now after having them on and off a few times they have loosened up a bit and are relatively easy to remove but still retain a firm grip when in place.
 
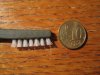
Using a very small brush:

IMG_4842.JPG

I applied a very light coating of the LPS 1 to all mating surfaces. The result is that they come off easier, still pretty tight, but at least I don't need a pry bar any more to get them off. I think repeated operations will, as @seifreit suggests, also loosen things up even more and they should be fine. Pretty happy with the result and can recommend this for others wishing to repair/replace their old, worn out with broken nibs fasteners as a good solution.

I think I will do an overhaul on the grills themselves though, seeing that the wooden outer frame that the cloth covered inner frame rest within has been pretty scuffed up over the years. This will require some re-gluing of the inner frame where it has pulled loose in a couple corners, then masking the cloth area with some painters tape holding either newspaper or visqueen plastic in place so as to paint just the frames. I think that will help to restore the things to a most acceptable state!
 
Next - Part 2 - Assessment and Plan of Attack

With the QLS-1s safely at home it was a couple days before I was able to try them out and see what was and wasn't working. First, I wanted to just hook them up and listen to what I was starting with, sort of a baseline so I could assess how the restoration was going during each stage. I pulled the fuse and checked for condition, good. The previous owner must have run them with a single amp as there were "jumpers" between the upper and lower binding post, the "jumpers" comprised of a sewing pin, a cut off staple and what looked like bare 18g wire. I removed them and wired them up for bi-amping with a Parasound HCA-1206 I keep in the shop for testing.

I was rewarded with sound, but not everything was working. One of the mid bass drivers, and most of the mid domes were not producing sound. A quick, vigorous spin of the nobs in the back cleaned off enough gunk in the pots to bring the other mid bass to life and I know by the condition of the mid dome tinsels that they were not going to play no matter what I did. Still, what I was hearing was unlike any other Infinitys I do or have owned. Not a better sound at this point with so many drivers not functioning or marginal, but different, a sense of space and effortlessness I've not heard before. So, these had potential.

It was a couple more days before I could crack open the cabinet and get a good look at the crossovers and see what was going to need fixing. replacing and/or updating. These speakers were definitely designed at a time when wire was not considered important as 18g wire is used throughout. I decided to at least upgrade the woofer wiring to 16 g as it would be the easiest to get to and would provided the biggest improvement. The mid bass caps are the old Mexico red and black caps which means they are definitely on the list. They measured 40-50% out of spec. The two large can caps for the woofers measured good but let's be honest they are at least 40 year old NPEs so they will get replaced too. The rest of the caps are yellow polys and all measured good but I may consider replacing them as I progress through the restoration.

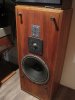
Clearly the mid domes needed to be repaired and the woofers need to be refoamed properly as noted earlier. All the EMITS appeared to be working but would still get pulled and tested. I was also on the fence about replacing all the EMIT diaphragms even though they all appeared to be working on first listening. There was the veneer on the side of the one base that needed repair and a general cleaning and oiling was in order for the cabinet. The grill clothes were in fair condition but the outer frame had come unglued from the masonite/cloth centers and needed to be repainted and re-glued. And of course, the plastics velcro tabs were barely holding the grills on, the slightest bump would instantly knock them off. Fortunately I found a solution for that that retains the factory look and function but grips much better.

View attachment 2705037 This is the original crossover as seen through the woofer hole, a late revision with the large can caps for the woofers and large single resistors instead of the resistor bundles.

View attachment 2705039 The hard velcro button on the left is the original. The one on the right is one I found that has a higher density of nibs and has a much higher grip strength. It is available from 3-M.

Part 3 - The work begins

I am currently re-assembling my QLS-1's and although I have all the nib buttons for the screen, I seem to have lost 2 of the posts that they sit on! This is the only thing that I'm missing now which is just painful after all the time and expense to refresh the rest of the equipment. Do you have any idea if those posts might exist somewhere else or if it's a material, I can buy a stock piece of and cut to fit for my 2 missing ones? Any help or direction is appreciated!
 
I can buy a stock piece of and cut to fit for my 2 missing ones?
It's basically plastic tube cut to length with a screw long enough to pass through the center and attach to the cabinet. I would imagine a plastics supplier should be able to match up something if you took them one of the originals.
 
Back
Top Bottom