Glue removal, replacement of - selected resistors and film capacitors, some transistors, some diodes, trimmers, general cleaning, including switch contacts and rear panel sockets, speaker relay, thermal compound, possible mains cable replacement, speaker terminals, not forgetting Main PSU capacitors - then you'll have something that not only sounds good, but is safe, and smells good too!
What you should aim for:-
https://audiokarma.org/forums/index...ade-of-a-sansui-au-719.1002364/#post-15762357
Hyperion covered most if not all of what you can consider, This long list can be a little intimidating, but taken a step at a time, it's not too bad. To get the most from your efforts, I would suggest prioritizing to fist make the amp safe from self-destruction, then replace worn out components, then work on things that will improve long-term reliable operation. Based on these criteria, here's an approach you can use to prioritize your restoration:
1) Black flag caps are known to fail and sometimes cause catastrophic failures on other components. Some recommend not powering a unit until these are replaced. Do this first.
2) All things mechanical - cleaning switches, pots, relays, etc. These things will not make your unit blow up nor cause personal harm, so they aren't a top priority. For that reason, I wouldn't prioritize this over the black flag caps or fixing a bad power cord. But, these items may cause dropped channels and system noise that can be mistaken for bad components. If you clean all controls and switches, you can (usually) eliminate them as a cause of problems when diagnosing.
3a) Electrolytics, fusistors, stabistors (multiple diodes in series) and some types of transistors wear out and cause poor operations. I normally work on the power supply first. It's the foundation for every other system and can cause problems throughout your system. Then I move to the amplifier boards/modules because the heat causes components to fail and this is the source of the most heat in your amp.
3b) That corrosive glue eats away at components. As you remove the electrolytics, you can remove this glue and replace any corroded components at the same time.
4) Clean as you go. When you work on a board, clean it, including removal of flux after the soldering is finished. Clean the chassis when you can get to everything. Cotton swaps can be used to reach into nooks. It's a small effort to get it looking like new.
5) Main PS capacitors - the priority is really dependent on your system. If you can check their capacitance and ESR, you can determine if they need to be replaced right away or not. They are the most expensive components, and can usually be done without a bunch of disassembly, so you can replace them at any step in your restoration.
6) Power cord replacement depends on the condition. Some are fine, but if cracked or the plug is damaged, this should be first on the list for obvious safety reasons.
7) Thermal compound - do this when you are working on the amp module - you can remove the heat sinks, wash them thoroughly, and apply new compound to a nice clean heat sink. Use isopropyl alcohol to remove the old dried up compound.
8) Speaker terminals - most are fine. Some require repair or replacement. Some folks like to replace with modern terminals. This work can usually wait until you've sorted out the stuff above, especially if your unit has two or three sets.
9) Cleaning the faceplate and all the knobs is perhaps the most rewarding thing you can do. Be careful not to remove any printing from using harsh chemicals. I normally do an initial wash with liquid dish soap. You can usually use something stronger on the knobs.
Please post your progress, and good luck.



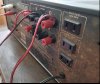
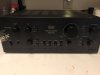


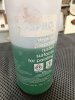


 - I think the chances are high that this is just the Sansui Glue/PCB sickly sweet / Citrussy / Cat's pee smell that we know so well.


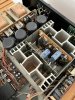


 consequent oscillation risk due to 'Black Flags', besides all that, do you like how it smells?