• The move to the new server is done. There are some software and database maintenance updates in process. This has us passing the hat around to help out. We appreciate any donations. Seriously, even a dollar helps. The payment page may be found here - https://www.audiokarma.org/support.html

Question about veneering a plinth

Aaron Brown

New Member
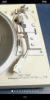
I was always told ,that If you want to learn to do something, you have to start somewhere. So here I am!! Diving in and doing some due diligence.... I'm going to try doing a veneer job on a Pioneer PL 516....I have an extra plinth that I picked up from a wrecked unit. I currently listen to a PL 516 that runs very nice, but doesn't look great. With time on my hands I figure a beautification would be a nice project. I would, Re-veneer the spare plinth and then when done, swap the internals into a better looking plinth
My question is in regards to the type set on the original covering. I actually noticed where someone was able to add the model information and other font wording and markings onto the veneer. (I'm not talking about the pioneer name plate or paper labels). I'm not sure how this was done. Does anyone know how they where able to add that onto the new veneer?
 
Register to hide this ad
You can buy decals online at places like Etsy and Ebay that you can customize to your needs.....they're pretty cheap too.

Also I'd suggest you practice with the veneer on a scrap piece before moving onto the plinth.
 
Good ideas! I will definitely do a practice jod before actually going to town on the plinth. I will try to upload an image of the wording I want to add into the veneer.
 

Attachments

  • Screenshot_20220202-062709.png
    Screenshot_20220202-062709.png
    356.2 KB · Views: 62
Thank you, that is indeed good advice. I actually have some experience in that area. My main question was how to add the verbage or fonts and symbols that were on the vinyl originally installed. I will be looking at a printed sticker and then I will look into applying a light varnish over the top of it. This step will require a trial run.
It seems the biggest quality issues I see is in applying finish. Again, practice practice practice.
Thanks for the tip! Noticed your avatar pic of the "Herb Albert whipped cream and other delights" gave it a listen and liked it a bunch. Even sent for a CD copy.
 
I made a custom watch case for my son in law and had his name engraved with a laser, you may find someone near you that can do laser engraving, they may be able to create the text and fonts you need.
 

Attachments

  • Seans Watch Box.jpg
    Seans Watch Box.jpg
    60.2 KB · Views: 33
Your going to have a hard-time printing on it, it should be silk-screened originally. You can buy a small kit if you want to try it, it's not really hard, make a transparancy with a photocopier, put that on a treated screen and burn the image into it with light bulbs. Water washes out the "stencil" then print on the wood.

You could also print on adhesive clear paper and stick that on, 8-Bit Guy has a youtube video where's he's worked on some of his 80's toys using this method but it won't look original.

I have printer paper that once you get an image on it, you can iron it on a shirt. I'm not sure if it would stick to wood?
 
Your going to have a hard-time printing on it, it should be silk-screened originally. You can buy a small kit if you want to try it, it's not really hard, make a transparancy with a photocopier, put that on a treated screen and burn the image into it with light bulbs. Water washes out the "stencil" then print on the wood.

You could also print on adhesive clear paper and stick that on, 8-Bit Guy has a youtube video where's he's worked on some of his 80's toys using this method but it won't look original.

I have printer paper that once you get an image on it, you can iron it on a shirt. I'm not sure if it would stick to wood?
I think I'll experiment and do a silk screen test, and see what happens I think the results may depend on how porous the wood is and may also either work better before or maybe after the varnish or stain. Alot of variables. Good tip thanks..
 
I made a custom watch case for my son in law and had his name engraved with a laser, you may find someone near you that can do laser engraving, they may be able to create the text and fonts you need.
This is another option. I don't know it's my first choice. But have to keep it as a vaible option. Thank you sir
 
It seems the biggest quality issues I see is in applying finish. Again, practice practice practice.

On the bright side, it would be quite hard to beat the ugliness of some of those 70s and 80s finishes. They were way too in love with plastic back then - e.g. the "rosewood" "veneer" on Denons.

Applying new veneer as securely and neatly as possible is going to be a major part of the job for anyone doing it the first time. I'm about to dive in myself, using a flush trim bit (followed by sanding) to get the edges right. My experiment on a piece of scrap wood came out fine. I'm going to stick with a very simple oil finish because they're easy to do (in my opinion) and I really don't trust myself with anything more demanding.
 
Last edited:
Personally, I'd go with the graphics available on eBay, but if you think you can get graphics to look like the original, then go for it. A nice walnut veneer, silk-screened graphics and a spray on varnish will make it environmentally stable and look awesome.
 
Maybe you can get die-cut decals in reverse. Apply and peel out the lettering; dust-spray with an airbrush until you have color depth desired and then pull the stencil off and clear it.
 
You can buy decals online at places like Etsy and Ebay that you can customize to your needs.....they're pretty cheap too.

Also I'd suggest you practice with the veneer on a scrap piece before moving onto the plinth.
I found what your talking about on Etsythese actually look promising. Have you tried them yourself?
 
Back
Top Bottom