• The move to the new server is done. There are some software and database maintenance updates in process. This has us passing the hat around to help out. We appreciate any donations. Seriously, even a dollar helps. The payment page may be found here - https://www.audiokarma.org/support.html

RCA 4VF534 Console restoration

Well that Amp looks like what I just restored in this thread:
https://audiokarma.org/forums/index.php?threads/rca-console-pull-project.977520/

I did modify it to make it a better stand-alone Amp but perhaps there is some info in there to help.
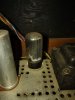
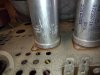
Question for you and the group, I'm pulling the tubes out of the amp so as to minimize breakage while I pull the amp out of the cabinet. Any idea about the rectifier tube as to how it is removed? I don't want to pull hard on it. Attached is a picture of it's current state.
 

Attachments

  • IMG_20211231_133257706.jpg
    IMG_20211231_133257706.jpg
    96.2 KB · Views: 34
Looks like it has a keeper ring around the base. The ring has gripper points to grab onto the tube base. Press down on each side to release the grippers and remove the tube normally.
 
Looks like it has a keeper ring around the base. The ring has gripper points to grab onto the tube base. Press down on each side to release the grippers and remove the tube normally.
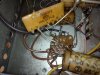
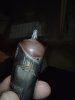
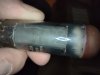
That worked! Thank you. Also is it normal to see a little, all I can describe it as cruddy looking at the top inside the tubes? This was one that looked pink previously.
 

Attachments

  • IMG_20211231_132315750_HDR.jpg
    IMG_20211231_132315750_HDR.jpg
    39.7 KB · Views: 38
  • IMG_20211231_132331630_HDR.jpg
    IMG_20211231_132331630_HDR.jpg
    47.9 KB · Views: 37
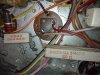
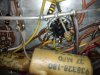
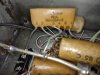
Yep all original caps.
 

Attachments

  • IMG_20211231_141833145.jpg
    IMG_20211231_141833145.jpg
    133.3 KB · Views: 29
  • IMG_20211231_142743751_HDR.jpg
    IMG_20211231_142743751_HDR.jpg
    104.9 KB · Views: 28
  • IMG_20211231_142738739.jpg
    IMG_20211231_142738739.jpg
    121.6 KB · Views: 27
  • IMG_20211231_142552673_HDR.jpg
    IMG_20211231_142552673_HDR.jpg
    124 KB · Views: 28
  • IMG_20211231_142547301_HDR.jpg
    IMG_20211231_142547301_HDR.jpg
    129.4 KB · Views: 24
  • IMG_20211231_142541099.jpg
    IMG_20211231_142541099.jpg
    110.3 KB · Views: 25
  • IMG_20211231_142534932_HDR.jpg
    IMG_20211231_142534932_HDR.jpg
    90.4 KB · Views: 27
The brown-pink getter usually means its gotten pretty hot. It may indicate the tube is now fairly tired as a result, or maybe not.

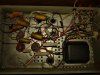
The flat things are a PEC, packaged electronic component. Usually has a bunch of parts inside. I'd probably leave them be for now unless they give signs of trouble.

The others are just common paper caps. A modern film cap will work fine there. I use a lot of Illinois MPW caps, but most anything will work fine. Voltage needs to match or exceed the original.
 
Might as well get polypropylene film for 7 cents more than the 47 cent polyester... https://www.digikey.com/en/products/detail/panasonic-electronic-components/ECW-FD2W274K4/4271878

Axial leads would be nice but of the nine listed by DigiKey, none are in stock, 100 piece (or more) minimum order...

F&T and JJ make dual 500V electrolytics - (32 x 2 and 50 x 2) use separate ones for the low-voltage ones. RCA used 80 X 2, which is hard on the rectifier - I think 50 is plenty.

That 6BQ5 may be cooked... getter flash is almost gone. This amp would like matched pairs.
 
Might as well get polypropylene film for 7 cents more than the 47 cent polyester... https://www.digikey.com/en/products/detail/panasonic-electronic-components/ECW-FD2W274K4/4271878

Axial leads would be nice but of the nine listed by DigiKey, none are in stock, 100 piece (or more) minimum order...

F&T and JJ make dual 500V electrolytics - (32 x 2 and 50 x 2) use separate ones for the low-voltage ones. RCA used 80 X 2, which is hard on the rectifier - I think 50 is plenty.

That 6BQ5 may be cooked... getter flash is almost gone. This amp would like matched pairs.
Found these...https://www.tedss.com/MPE11-.27-400-2 would these be a good replacement?
 
I'd have probably gone for 2 matched pairs, fair bet that if one set is tired the other ain't so awesome. New production are fine honestly.
 
The others didn't look burnt like the pictures I posted. Will recap and put the new tubes in and see how it does. I did find one other site that has these tubes but its phone or fax order so will wait till after the holidays for that one. I would like to replace the other set too down the road.
 
Last edited:
I'd have probably gone for 2 matched pairs, fair bet that if one set is tired the other ain't so awesome. New production are fine honestly.
I'd imagine both left and right channels need to be balanced/matched?

So I reached out to cancel that order for two and next week will put in an order for four matched. Thanks again for mentioning that.
 
Last edited:
When you get red plating, aside from the tube itself being bad, its usually electrically leaky coupling capacitors. Since all capacitors in this amp are original including the power filter electrolytics, it was suggested to just go ahead and do 'em all. At its age, they are past due anyway and this way, it will out live you and me.

Power transformers are pretty much bullet proof but since the OP already had it powered up, none of the original electrolytics were shorted and since it had no hum, none were open. I suppose I forgot to mention that it would be a good idea to add a fuse for extra added protection.

I probably should have also mentioned that if it still had the original coupling capacitors, the new tubes might have also red plated and taken them out as well.

So before using the new tubes, replace ALL capacitors first and you should be fine and dandy.
 
My first foray into vintage consoles involved letting the magic smoke out of the power transformer when I was was 11 or 12 years old, messing with the beautiful console in my grandparent’s living room. Plugged it in to see if it would work, and that was the end of that. As you pointed out, Definitely need to check *all* capacitors in stuff that age, due to crappy paper/wax coupling capacitors too!
 
Happy New Year everyone!
I've watched a few hours of YouTube videos on replacing the caps in vintage amps. Here is one I'm not sure how to go about. Originally I wanted to keep the design as original as possible, however several of the videos mentioned the difficulty in repacking the electrolytic capacitors. In your honest opinion would it be better to try and locate a modern can and rivet a clamp to hold it in, or pull the material out of the old can and re pack it with modern axial capacitors? Another video shows using a Dremel and cutting the can off at the base and soldering modern electrolytic capacitors and wrapping them with metal tape for shielding instead of placing the old can back over and gluing it back onto the base. Thoughts?
 
Back
Top Bottom