
• The move to the new server is done. There are some software and database maintenance updates in process. This has us passing the hat around to help out. We appreciate any donations. Seriously, even a dollar helps. The payment page may be found here - https://www.audiokarma.org/support.html

RCA 4VF534 Console restoration

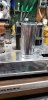
The cans are pretty easy to restuff but not everyone likes to do it. I did one last week for a friend. I use an Xacto type razor saw and cut around the top of the bottom ridge. I score around using the saw backwards first and then use the scored indent to guide the saw. Get a very fine toothed saw. Drill holes through the bottom part for the new cap leads to emerge by the original terminals. I group the commons into a single hole in the middle which then needs to be reconnected to the original system ground. Since you have the wafer mountings, you just need to drill out the rivets. I glue the can top part back to the bottom with 2 part gray JB Weld and then wipe gently with acetone to smooth the join. Use a plastic glove. There are a number of threads about the process on AK.
F35DDFBE-A585-459D-9C98-6EAD1349856C.jpeg

These capacitor adapter pc boards are a convenient way to replace a can cap when the apperance and access isn't a problem.
https://msquaredcircuits.com/shop/
 
Last edited:
In your honest opinion would it be better to try and locate a modern can and rivet a clamp to hold it in, or pull the material out of the old can and re pack it with modern axial capacitors? Another video shows using a Dremel and cutting the can off at the base and soldering modern electrolytic capacitors and wrapping them with metal tape for shielding instead of placing the old can back over and gluing it back onto the base. Thoughts?

I would do what you want to do. People will stuff a can capacitor to keep the original look but if you are going to show it off to friends, only you will know the original parts. If you are going to repair it and then close it up so no one else will ever see it, then who cares if the can is original or not or it has new capacitors under the chassis? :dunno:

I get the fact that if it has been worked on and then you sell it, the buyer might not appreciate what might seem to him to be a hack job and that the previous person might not have known what he was doing.

This is just me, and just my .02 cents, I have several amps missing the can capacitor with new caps underneath but I am keeping them 'til I die. I'll let the next owner worry about if its been hacked up or not. I'll be dead! :rflmao:
 
Happy New Year everyone!
I've watched a few hours of YouTube videos on replacing the caps in vintage amps. Here is one I'm not sure how to go about. Originally I wanted to keep the design as original as possible, however several of the videos mentioned the difficulty in repacking the electrolytic capacitors. In your honest opinion would it be better to try and locate a modern can and rivet a clamp to hold it in, or pull the material out of the old can and re pack it with modern axial capacitors? Another video shows using a Dremel and cutting the can off at the base and soldering modern electrolytic capacitors and wrapping them with metal tape for shielding instead of placing the old can back over and gluing it back onto the base. Thoughts?

depends on how much time you want to spend tinkering. You don’t need any shielding, or to wrap them with metal tape. The negative side is already “shielded” by being located in a can of its own underneath the plastic shrink wrap label//insulating material. If nobody is going to see the amp, no harm in attaching newer capacitors and ditching the can. Just make sure they’re good enough for the job. Many modern capacitors have no surge voltage rating, and are not designed to handle conditions where they have more than the rated voltage applied to them, so if the original electrolytic capacitors are rated only 350V, and the circuit has more than 300V on it in normal use, use 400 or 450 volt rated capacitors. People got away with a lot of marginal designs in the past for various reasons, and the parts we have today are in many ways better, but not always 100% compatible in all situations without a little thought as to part selection based on usage in circuit. You can’t hurt anything using parts rated for a higher voltage than they will see in circuit. You don’t want to go radically changing the amount of capacitance used, though. Stick with something close. 39uF is good where 40 is called for, 80 or 100, maybe not so much. 22uF is totally fine in pretty much any place where 20 was called for.

new cans are the easiest solution, just make sure you’re getting good parts, and not some mystery crap with no available data sheet.
 
depends on how much time you want to spend tinkering. You don’t need any shielding, or to wrap them with metal tape. The negative side is already “shielded” by being located in a can of its own underneath the plastic shrink wrap label//insulating material. If nobody is going to see the amp, no harm in attaching newer capacitors and ditching the can. Just make sure they’re good enough for the job. Many modern capacitors have no surge voltage rating, and are not designed to handle conditions where they have more than the rated voltage applied to them, so if the original electrolytic capacitors are rated only 350V, and the circuit has more than 300V on it in normal use, use 400 or 450 volt rated capacitors. People got away with a lot of marginal designs in the past for various reasons, and the parts we have today are in many ways better, but not always 100% compatible in all situations without a little thought as to part selection based on usage in circuit. You can’t hurt anything using parts rated for a higher voltage than they will see in circuit. You don’t want to go radically changing the amount of capacitance used, though. Stick with something close. 39uF is good where 40 is called for, 80 or 100, maybe not so much. 22uF is totally fine in pretty much any place where 20 was called for.

new cans are the easiest solution, just make sure you’re getting good parts, and not some mystery crap with no available data sheet.
Thanks for the advice. And yes, no Ebay parts for this one.
 
I absolutely hate re-stuffing cans. I find it to be a messy, time consuming, irritating pain in the rear. If I can't just mount a terminal strip underneath to put modern caps on, I get a Hayseed Hamfest cap, or if I don't really care so much about looks, I use an Adapt-A-Cap board for cans that are mounted on a phenolic wafer.
 
I bet you could take some heavy card stock and coat it in epoxy and make your own capacitor adapters. I hate stuffing cans too, but it looks so much cleaner than the other options, and you can get high quality capacitors from one of the Japanese manufacturers that you know are quality parts.

if I buy from mouser or another big supply house, and the part is something I’ll probably need again, I go ahead and buy ten or more. The plan is to eventually have everything that I need on hand to tackle any project that comes my way without having to order stuff... unfortunately I keep needing one thing that I don’t already have, so will probably die with a huge surplus of electronics parts for someone to go through.

I’ve recently taken to stocking 1watt resistors for 1/2 watt modern ones, as the new parts are often designed to be able to handle higher temperatures, and you usually get a bonus on he rated working voltage by buying physically larger parts. Overall temperature stays cooler, despite the same heat getting created, and the larger ones are better at dissipating the heat and staying cooler. They also tend to have thicker leads that keep more secure once installed. Same thing with larger wattage resistors. If they call for 1W, I use a 2-3W part sine it’s closer to the same size as the originals. If I were making portable equipment where weight mattered, I might worry about keeping component size small, but I’m playing with tubes here, so it’s a moot point!
 
The Adapt a Cap web page gets blocked by my anti virus softare. I have some of them I purchased earlier last year and some of the M2 versions. Can't find them right now.
 
That worked! Thank you. Also is it normal to see a little, all I can describe it as cruddy looking at the top inside the tubes? This was one that looked pink previously.
Those are about to go tits-up, if they've not already. If not too late, mark tubes for their respective sockets where more than one of each type is used in the same chassis. Those tubes pictured have already red-plated (the pink ones in previous pic) probably from bad coupling caps or resistors feeding them. Sticking replacements in there not a good idea, as same thing could happen.
 
Those are about to go tits-up, if they've not already. If not too late, mark tubes for their respective sockets where more than one of each type is used in the same chassis. Those tubes pictured have already red-plated (the pink ones in previous pic) probably from bad coupling caps or resistors feeding them. Sticking replacements in there not a good idea, as same thing could happen.
Yeah I've already labeled all the tubes and make a diagram of where they went originally. I've also pulled the amp out to see what all needs to be replaced. I'll be ordering new caps to recap the whole amp. I believe I'll also replace the paper covered resistors too as the 100 ohm one has a crack in the paper. I'll look at replacing the tubes after I've overhauled the amp. I am not going to risk letting the smoke out of it for sure.
 
The Adapt a Cap web page gets blocked by my anti virus softare. I have some of them I purchased earlier last year and some of the M2 versions. Can't find them right now.
Yeah it's not a bad price for five of those little things. I'll be putting them on my shopping list as well.
 
Yes, you could do that. It is what I do for 2 prong systems. This way you can control where the hot line connects in the circuit. It should go directly to the fuse as the first stop. This way all of the circuit will be dead downstream of the fuse holder if the fuse blows or you pull it.
 
According to the schematics the unit pulls 195 watts. Based off of ohm's law: P/E = I, 195/117= 1.67 amps. Would a 1.75 amp fuse be a good pick for protecting the amp?
 
In your first post the label you show say 235w. Either way, 195 or 235, it is a steady state normal operation number. When you first turn it on there will be a surge of current to magnetize the power transformer, the filter cap inrush and the cold tube filaments. I might try a 2A slow blow for starters and see if it holds.
 
In your first post the label you show say 235w. Either way, 195 or 235, it is a steady state normal operation number. When you first turn it on there will be a surge of current to magnetize the power transformer, the filter cap inrush and the cold tube filaments. I might try a 2A slow blow for starters and see if it holds.
You're right the back of the unit shows 235w. Maybe a misprint on the schematic. So in that case 2 amp would be minimal. What would you suggest as a maximum rating?
 
The 195 may be just for the power amp. You could fuse the power amp separately and a main fuse for the entire unit. If a 2A slow blow doesn't do it, you could try 2.5 or 3 A. The slow blow feature allows you to rate the fuse closer to the actual current needed as it will handle the momentary surges without blowing.
 
Back
Top Bottom