• The move to the new server is done. There are some software and database maintenance updates in process. This has us passing the hat around to help out. We appreciate any donations. Seriously, even a dollar helps. The payment page may be found here - https://www.audiokarma.org/support.html

Recapping a Yamaha PX-3 linear tracking turntable

dlucy

dlucy67 (Doug)
Staff member
Moderator
Subscriber
@BillWojo has this really smart perspective on his favorite vintage gear: "if it has proprietary or unobtanium parts, insure it by recapping as quick as possible"... or something like that. He asked me to do a quick recap on his Yamaha PX-3 linear turntable and it went pretty well... with only three surprises.
 
Register to hide this ad
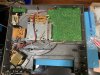
Getting to the boards is pretty simple (once Bill did the hard parts of removing the tonearm and all that delicate stuff), the internal layout is very straightforward, and disassembly is easy.

IMG_2585.JPEG
IMG_2590.JPEG
 
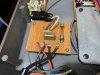
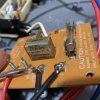
There are only three boards with caps... if you include the power in board and it's one safety cap:

IMG_2594.JPEG

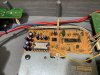
the motor board:

IMG_2607.JPEG


and the main board:

IMG_2626.JPEG
 
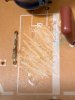
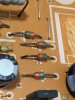
The larger electrolytic caps had been glued to the board and this particular unit on had one serious corrosive result: a jumper near one of those large caps has been eaten somewhat:

IMG_2639.JPEG

There were a good number of diodes that looked like they'd oxidized unusually... but they weren't all next to caustic glue. So, maybe the plating on the leads was susceptible to... what?

IMG_2636.JPEG
 
Last edited:
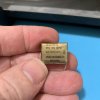
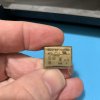
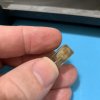
The safety cap was one that I've seen fail (or, more likely, do it's job and die under the correct circumstances) and this particular cap looked a little cracky....

IMG_2658.JPEG
IMG_2659.JPEG
IMG_2660.JPEG
IMG_2661.JPEG IMG_2662.JPEG
 
So, the recapping list was simply all the electrolytics and the one safety cap. I replaced the diodes with the odd oxidization, just to be safe.
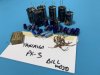
IMG_2723.JPEG

Detailed spreadsheet (edited 3/4/2020):

Board Component number Qty Type Sub-type Value 1 Value 2 Value 3 Part number Notes Mouser PN
Control D30 1 Bridge Rectifier 1D4B1 (bridge) 583-W04M
Control C32 1 Capacitor Electrolytic 0.47 uF 50 V power 647-UPW2CR47MED
Control C19 1 Capacitor Electrolytic 1 uF 50 V power 647-UPW2C010MED
Control C6,C18 2 Capacitor Electrolytic 10 uF 35 V power 647-UPW1V100MDD
Control C13 1 Capacitor Electrolytic 100 uF 35 V power 647-UPW1V101MPD1TD
Control C12,C28,C29 3 Capacitor Electrolytic 1000 uF 35 V power 647-UPW1V102MHD
Control C21,C22,C23 3 Capacitor Electrolytic 22 uF 16 V power 647-UPW1C220MDD6TP
Control C14 1 Capacitor Electrolytic 22 uF 50 V power 647-UPW1H220MDD
Control C15 1 Capacitor Electrolytic 220 uF 50 V power 647-UPW1H221MPD
Control C7 1 Capacitor Electrolytic 33 uF 16 V power 647-UPW1C330MDD
Control C24,C25 2 Capacitor Electrolytic 470 uF 35 V power 647-UPW1V471MPD
Control D12 1 Diode ??? B03W
Control D1,D2,D5,D6,D7,D8,D9,D10,D11,D15,D16,D17,D18,D19,D20,D21,D22,D23,D24,D25,D26,D27,D31,D32 24 Diode General purpose, switching, power 1N4148 1S1555 512-1N4148
Control D13,D14,D28,D29 4 Diode Rectifier 50 V 1 A W03B 512-UF4001
Control D12,D3,D4,D33,D34 4 Diode Rectifier 50 V 1 A 1S1555 512-UF4001
Control ZD1,ZD2 2 Diode Zener 6.1 V 0.5 W WZ061 512-1N5234B
Motor unit C1,C2,C3,C4,C6,C21 6 Capacitor Electrolytic 10 uF 35 V power 647-UPW1V100MDD
Motor unit C5 1 Capacitor Electrolytic 22 uF 35 V power 647-UPW1V220MDD1TD
Motor unit C9 1 Capacitor Electrolytic 4.7 uF 25 V power 647-UPW1E4R7MDD1TD
Motor unit C23,C24 2 Capacitor Non-polarized Electrolytic 33 uF 25 V power 647-UVP1V330MPD
Power Supply C34 1 Capacitor Safety Film 0.022 uF 125 VAC 275 VAC Y1 300 VAC X1 PME256MB522 0.022 uF 125 VAC 275 VAC Y1 300 VAC X1 film safety cap 80-PME271E522MR30

Cut-and-paste BOM (for Mouser.com) (edited 3/5/2020):

647-UPW1C220MDD6TP 3
647-UPW1C330MDD 1
647-UPW1E4R7MDD1TD 1
647-UPW1H220MDD 1
647-UPW1H221MPD 1
647-UPW1V100MDD 8
647-UPW1V101MPD1TD 1
647-UPW1V102MHD 3
647-UPW1V220MDD1TD 1
647-UPW1V471MPD 2
647-UPW2C010MED 1
647-UPW2CR47MED 1
647-UVP1V330MPD 2
80-PME271E522MR30 1

(and if you want to replace the diodes with the oxidization)

512-1N4148 24

 
Last edited:
I like the way your how tos have meat on the bones from the get go. Multiple posts, pics B4 and after as work goes on. I'm more likely to post as progress happens as I'm going to do with the 2285 refresh thread. Might be a week B4 I even order parts. With your thread folks can dive right in. Mine is a waiting game. Nice work.

I like the comment about how to save the very rarium and unobtainium parts.

Those RIFA caps come from the factory with cracks so they know they are supposed to shatter some time after ten years. Replace on sight for those.
 
Much obliged, dlucy......I have a PX-3 and love it. Bought it in 1982 or so new, will likely need some tlc at some point. I've had one issue with it, the tonearm drifting inward as it comes down at the start of the record and got a lot of help here to correct it. I find that the more I use it, the less it has this issue. If I leave it for a few weeks, it will sometimes still drift slightly on the first few plays. A kind gentleman here offered some advice and essentially said the way to fix the problem is to do precisely what you have done. I was pretty intimidated by the prospects of replacing everything but you have made it approachable. Can I ask, and pardon if I missed it, where one would get the parts that you outlined? Thanks again!
 
@Fishead I should have stated “the cut-and-paste BOM list was made for use with Mouser.com and their BOM tool”.
 
Ah.....good to know and thank you most kindly again. I will visit their site and check things out.
 
Doug is one of the true gems on this forum. Very smart and willing to share his efforts. That BOM will be very handy for anyone looking to extend the life of their PX-3. There is a lot of written information on how to rebuild the tonearm assembly but absolutely nothing till now on the brains of this unit.

The IC (integrated circuit) chip that is the brains of the TT, that little black rectangle on the main circuit board is responsible for every function and movement that the TT makes whether in manual or full auto mode.

The IC is a proprietary part that was made specifically for Yamaha and has long since been unattainable unless you removed one from a donor TT of the exact same model.

The IC runs on typically 5VDC that must be closely regulated and filtered. The problem is that the filters (capacitors) age and go out of spec. This can cause ripples and spikes in the 5VDC and the IC is easily damaged if run outside of it's design parameters. This happens eventually on all consumer and industrial electronics. It's one of the main reasons electronics fail.

By recapping the boards and keeping the voltages nice and clean the other components should live a long and hopefully uneventful life.

I would advise anyone who uses a vintage TT with control chips to have it recapped if it's a high value unit. It's way cheaper in the long run to recap than it is to buy a parts unit and have to recap it anyway after it fails.

BillWojo
 
You are very right, BillWojo. Explained as you have, it just makes great sense that components are inter-dependent and having an understanding of that will enable us to address issues effectively. This is such a beautiful and highly capable turntable that every consideration would be in order to preserve it. Guess I'll practice my soldering skills.....
 
i loved looking at this thread, i was wondering in the grand scheme of things how does a well kept and serviced PX-3 compares with the technics or other linear trackers? both sound quality wise and reliability wise?
 
i loved looking at this thread, i was wondering in the grand scheme of things how does a well kept and serviced PX-3 compares with the technics or other linear trackers? both sound quality wise and reliability wise?
I have a new to me PX-3 and several Technics linear trackers. Two SL-10's, a SL-J3 and SL-L2. Major difference is the Technics are P-Mount. My PX-3 was purchaced from a fellow AK'er. It has a Shure V15 type IV. I find the Technics less daunting to work on. The Yamaha seems way more robust, and sounds quite nice, but I worry more about it. Maybe I still need to get things figured out, but my SL-J3 with an AT-450 is still my best sounding TT to my ears. Maybe the EPC-310MC cartridges on the Sl-10s are worn, I don't know. They both sound great, but not quite like the SL-J3. I love the PX-3 to look at. The dust cover, tone arm etc. is awesome. But push come to shove, I could be happy with my J3 if it was my only TT. I know how to work on it, and it sounds great. Maybe after I open the PX-3 and get to know it I'll change my mind.
 
Actually the PX-3 is not that difficult to work on. The whole tonearm comes out as a unit, there are 3 cables that unplug from the main control board and I think 4 screws holding it into the chassis. At that point you can take it to your kitchen table and carefully strip it down to service it. On mine the actual tonearm didn't need any service, like most it was just the wide flat belt.
There is a nice write up on Vinyl Engine on how to do it. Look up the model and documents and it's there along with the service and owners manual.
With Doug documenting the electrical restoration this TT is pretty well covered.

BillWojo
 
Thanks for going out of your way to provide this info. I own a PX2 which probably has the same caps. I don't use it much but when I have some extra time I would like to take care of it.
 
Actually the PX-3 is not that difficult to work on. The whole tonearm comes out as a unit, there are 3 cables that unplug from the main control board and I think 4 screws holding it into the chassis. At that point you can take it to your kitchen table and carefully strip it down to service it. On mine the actual tonearm didn't need any service, like most it was just the wide flat belt.
There is a nice write up on Vinyl Engine on how to do it. Look up the model and documents and it's there along with the service and owners manual.
With Doug documenting the electrical restoration this TT is pretty well covered.

BillWojo
Yes, great to have the documentation. Looks like I should get to work on mine soon.
 
Back
Top Bottom