

You are using an out of date browser. It may not display this or other websites correctly.
You should upgrade or use an alternative browser.
You should upgrade or use an alternative browser.
Recapping and restoring a Harman Kardon 330C


buzshaws
Active Member
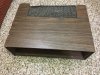
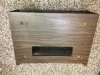
Thank you for both sets of pictures, I prefer the routed edges of the front on this cabinet over the 330 example since it does not add as much bulk to the appearance, though I prefer the wood case over the vinyl. Very helpful to see them both laid out and what options were available, thanks Doug!
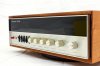
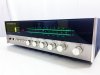
Love the picture and how it illustrates the 2nd version Doug posted with the thinner routed front trim.
I was kind of thinking instead of a full shell around the receiver, as a traditional case does, to only have the top and sides covered, not the underneath.
I also like it as it is without a wooden case as well. Mine sits like that now and just took the spotlight from a Pioneer SX-828 I rotated out. Neither receiver has had any service performed and they work so well I'm reluctant to touch them. I can't deny checking offset and bias is the right thing to do but aside from that, Deoxit, Faderlube and the occasional bulb should either need it, I'm too fearful to mess with a good thing when a good thing's already there. As visually understated as the 330c is its ironic that it's an entry level receiver when directly compared to the TOTL SX-828. The 828 is gorgeous IMO but the room has more of a sense of relaxation and calm when the 330c is in place as it's not as imposing. And the sound difference? Both H/K and Pioneer each had their own sound anyway but the H/K, musically speaking, is amazing me with its absolute pleasurable sound. Not for a "cheap" receiver, for any receiver. The FM's audio may not have the most selective and best capture but when it has hold of an FM station it is quiet and better sounding IMO than the 828 (the 828 captures and rejects much better). In shear build ruggedness the 828 stands among the finest and the 330c seems to have made "smart" choices to accomplish what it has. This 330c is superb component as long as you respect its output and headroom. It's very dynamic and alive at lower volumes and it isn't really a shortcoming, it's what it was designed to do. I'm listening at maybe 1-3 watts RMS (certainly not more) and occasionally have 4 ohm speakers attached. I think it's the sweet spot with the speakers I use and enjoy the 330C as a background to lower-level player with no desire to raise the volume.
I'll always keep it and know this thread will be crucial to keeping it operating reliably if I get the courage to try my own DIY so much appreciation for it!
The HK 330B brochure has a pic of the unit in the walnut case. http://wegavision.pytalhost.com/HK/harman330bp/
Always nice to be able to use the car beauty products on the hi-fi, too. Many use car wax on faceplates, too.
Love the picture and how it illustrates the 2nd version Doug posted with the thinner routed front trim.
I was kind of thinking instead of a full shell around the receiver, as a traditional case does, to only have the top and sides covered, not the underneath.
I also like it as it is without a wooden case as well. Mine sits like that now and just took the spotlight from a Pioneer SX-828 I rotated out. Neither receiver has had any service performed and they work so well I'm reluctant to touch them. I can't deny checking offset and bias is the right thing to do but aside from that, Deoxit, Faderlube and the occasional bulb should either need it, I'm too fearful to mess with a good thing when a good thing's already there. As visually understated as the 330c is its ironic that it's an entry level receiver when directly compared to the TOTL SX-828. The 828 is gorgeous IMO but the room has more of a sense of relaxation and calm when the 330c is in place as it's not as imposing. And the sound difference? Both H/K and Pioneer each had their own sound anyway but the H/K, musically speaking, is amazing me with its absolute pleasurable sound. Not for a "cheap" receiver, for any receiver. The FM's audio may not have the most selective and best capture but when it has hold of an FM station it is quiet and better sounding IMO than the 828 (the 828 captures and rejects much better). In shear build ruggedness the 828 stands among the finest and the 330c seems to have made "smart" choices to accomplish what it has. This 330c is superb component as long as you respect its output and headroom. It's very dynamic and alive at lower volumes and it isn't really a shortcoming, it's what it was designed to do. I'm listening at maybe 1-3 watts RMS (certainly not more) and occasionally have 4 ohm speakers attached. I think it's the sweet spot with the speakers I use and enjoy the 330C as a background to lower-level player with no desire to raise the volume.
I'll always keep it and know this thread will be crucial to keeping it operating reliably if I get the courage to try my own DIY so much appreciation for it!
Last edited:

buzshaws
Active Member
Very nice looking, beautiful work Doug!
I just looked at your cabinet again trying to imagine the 330C with the same. The C's front bezel seems deeper than the B but I like the way the case envelopes over the bezel especially the way the bevelled edge encapsulates it instead of sitting behind the chrome bezel. It's really a gorgeous looking case!
I just looked at your cabinet again trying to imagine the 330C with the same. The C's front bezel seems deeper than the B but I like the way the case envelopes over the bezel especially the way the bevelled edge encapsulates it instead of sitting behind the chrome bezel. It's really a gorgeous looking case!
Last edited:
buzshaws
Active Member
Doug, back to the BOM on the C, I've never ordered such parts so pardon me if the components are identified by the numbers you provided. Are these common electrolytic caps or Nichicons, Panasonics, Silmics or some other kind that some restorations use as an "upgrade" in quality over the stock components? This thread and the idea of going through the unit for another 30 years of service has me wondering about the virtues of component selection between some grades over others. In addition it has always been a dream to install pre-out/main-in jacks as the 330B has and really take the 330C from a modest little go-to into a more refined component. It's already proven it's performance is worthy and is a genuine keeper for me. Just wondering if the unit's original cost-cutting for obvious marketing reasons may have held its overall potential back and this is an opportunity to tighten up the overall performance in component changes. If going in for surgery anyway would it be more pragmatic to go the extra distance with better than stock choices for overall long-term dependability (higher "quality" better spec'd caps) and, even if marginally, better performance?

Doug, back to the BOM on the C, I've never ordered such parts so pardon me if the components are identified by the numbers you provided. Are these common electrolytic caps or Nichicons, Panasonics, Silmics or some other kind that some restorations use as an "upgrade" in quality over the stock components?
. . .
If going in for surgery anyway would it be more pragmatic to go the extra distance with better than stock choices for overall long-term dependability (higher "quality" better spec'd caps) and, even if marginally, better performance?
Great questions.
Regarding the part numbers:
The part numbers I've listed are actually the Mouser.com part numbers. The first set of those is Mouser's manufacturer's number and the second set is a manufacturer's part number (mostly). For example in
647-UKL1V220MEDANA
The 647 is what Mouser uses for Nichicon and the UKL1V220MEDANA is (mostly) Nichicon's part number.
If you drop the whole thing in Mouser's search field or drop it in their BOM Tool, it'll find the part I specified.
All that being said, it is common for the part numbers we post here on AK to get changed or, worse, stop being stocked. When that happens, at least on Mouser, the site will come up with recommendations for substitute part numbers.
Regarding a upgrade / stock replacement / more approach:
I always aim for longevity and quality without getting exotic. So, I generally follow the advice of MarkTheFixer and ConradH and similar long-time AK members. The electrolytic caps are Nichicon KL series for audio path and PW series for everything else, electrolytic caps get a slight bump up in voltage rating, below 35 V get bumped up to 35 V, ceramic caps get replaced with C0G NP0 MLCC caps, resistors get replaced with 1% metal film resistors, etc.
So, the BOM above is a slight upgrade over stock, in general, for the sake of device longevity and mild improvements where available for low or no cost difference. You certainly can use exotic caps.
The above BOM parts list is also a result of the Mouser trend away from low capacitance / low voltage stock availability and towards low capacitance / medium voltage parts. For instance, you won't find 1 uF 25 V Nichicon KL caps stocked at Mouser. The lowest voltage they stock in this size cap is 50 V. So, even if the original part was 1 uF at 25 V and my rule-of-thumb is "bump up to at least 35 V", because Mouser doesn't stock 1 uF in 35 V, I have specified the next-up-voltage device that is available and have listed the part number for 1 uF at 50 V.
buzshaws
Active Member
A great explanation, and now I understand a bit better the process of ordering parts. I'll go to Mouser to get familiar with the site and with what you explained and it will probably become much more clear. Thank you for taking the time to post the excellent and in depth reply!

Blue Shadow
Waiting for Vintage Gear from this century
the Mouser trend away from low capacitance / low voltage stock availability
This is not Mouser but Nichicon. Everything 3.3 and lower is only available at 50 and 100V in the KL line. Nichicon has been updating their product availability and showing the lowest capacitance units no longer available in all voltages, just the higher voltages, 100, specifically in some of their lines.
This is not Mouser but Nichicon. Everything 3.3 and lower is only available at 50 and 100V in the KL line. Nichicon has been updating their product availability and showing the lowest capacitance units no longer available in all voltages, just the higher voltages, 100, specifically in some of their lines.
Ahhh.... Thanks!
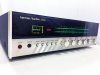
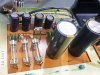
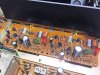

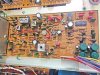
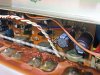
Looks great. Better than new. Like the Sil-Pads for the power devices. Great work dlucy.
Thanks!
Normally I'm a thermal grease kinda person, but the deep U shape of this particular heat sink and the very limited openings for the transistors to fit through made me think "I'm gonna get grease all over everything...." But then I remembered the silpads I bought when I was experimenting with the options we've all got and... they worked perfectly for this job!
Aavid Thermalloy THERMASIL INSULATOR 53-78-1ACG (updated 02/2025)
Last edited:
Sil-Pads work nice if not overtorqued. Use them at work for the DC controllers.
Uh oh. Did I overtorque mine? What's a good rule-of-thumb for securing the transistor and mating the surfaces but not overtorquing? I only used a Philips head screw driver and a speed wrench and did not put a great amount of force into the final turn.

NAD80
Super Member
We use the bergstrom Sil-Pads with a torque wrench set to 2 lbs/in. In our use they are easy to tear on the pems mounting. Check out http://www.ovenind.com/. I work on AC and some DC controllers. Don't think you overtorqued on your use. Just pointed out that they can be fragile if over tightened.
Last edited:
Blue Shadow
Waiting for Vintage Gear from this century
Thanks!
Normally I'm a thermal grease kinda person, but the deep U shape of this particular heat sink and the very limited openings for the transistors to fit through made me think "I'm gonna get grease all over everything...."
But that is the Factory way!! A mess of thermal grease all over the place is how it came from the factory.

if you didn't strip the screw, its probably not overly tight. Those things don't always recycle nicely though. The edge of the device is prone to digging into the pad a bit, and if you don't get it lined back up ever so perfectly you might find it tears right at the impression, then the thing shorts to the heat sink. If the heat sink isn't flat, or if you've got a device with multiple screws and you crank one side all the way tight first it can also tear the pad.
or if you pull the part off, change the sil pad for the couple cents and don't worry about it. They come off what, every 40 years or so?
or if you pull the part off, change the sil pad for the couple cents and don't worry about it. They come off what, every 40 years or so?
Blue Shadow
Waiting for Vintage Gear from this century
We need to address an issue with the service manual for the HK330c. The board layout shows that C601 and C602 are installed opposite to each other, one ground toward the left and one toward the right side of the unit.
You, @dlucy, have a pic of a recapped PS board above showing the two small caps behind the large caps with the negative side pointing the same way. I just did my power supply early this morning and mine are the same and I believe I installed them exactly as removed.
Since this is your thread, I'll let you have the credit but with that you need to update your 330c encyclopedic knowledge base and spread the word as to the correct orientation of these caps and how it relates to the board layout drawing in the manual. Based on the diagram both caps have one lead on chassis ground and per the schematic this is the positive lead.
I was noticing that my machine doesn't have a turn-on delay and was learning about it in this thread: http://audiokarma.org/forums/index....-massive-dc-offset-and-hum-at-turn-on.771864/ and after recapping the PS, EQ and most of the main amp board, I still get instant sound. I did buy the replacement transistor to put in and have the resistors to check, but I did fail to buy a couple 1000/10 caps for the main amp board so that made for a nice stopping point. I'll do the tuner and the other boards in a day or two while I compile a parts order. No big hurry the amp works with those old, tired caps in it. Another note: the board says these are 470/16 caps but the ones in my unit were 1000/10, maybe another thing to look into.
Background on this unit is that it is a multi-voltage unit. Switchable voltage (internal) 100-120-220-240 and as expected switchable FM de-emphasis to be usable in US or Europe.
You, @dlucy, have a pic of a recapped PS board above showing the two small caps behind the large caps with the negative side pointing the same way. I just did my power supply early this morning and mine are the same and I believe I installed them exactly as removed.
Since this is your thread, I'll let you have the credit but with that you need to update your 330c encyclopedic knowledge base and spread the word as to the correct orientation of these caps and how it relates to the board layout drawing in the manual. Based on the diagram both caps have one lead on chassis ground and per the schematic this is the positive lead.
I was noticing that my machine doesn't have a turn-on delay and was learning about it in this thread: http://audiokarma.org/forums/index....-massive-dc-offset-and-hum-at-turn-on.771864/ and after recapping the PS, EQ and most of the main amp board, I still get instant sound. I did buy the replacement transistor to put in and have the resistors to check, but I did fail to buy a couple 1000/10 caps for the main amp board so that made for a nice stopping point. I'll do the tuner and the other boards in a day or two while I compile a parts order. No big hurry the amp works with those old, tired caps in it. Another note: the board says these are 470/16 caps but the ones in my unit were 1000/10, maybe another thing to look into.
Background on this unit is that it is a multi-voltage unit. Switchable voltage (internal) 100-120-220-240 and as expected switchable FM de-emphasis to be usable in US or Europe.
Last edited:
Blue Shadow
Waiting for Vintage Gear from this century
This is what I did for the two big caps. The rest have a + sign on the board and I compare it to the way the original was removed. Must have matched on the actual board as I don't recall any that didn't. But the board layout diagram in the manual is wrong, apparently, as the way the caps were installed matches the schematic and the actual board markings in the unit.I always mark the orientation of the caps. Board silkscreen is sometimes wrong, or sometimes isn't marked at all. A dot with a sharpie works fine for this.