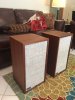
Here's some notes on things that I learned. This is based on my experience and or research with the early model KLH 6's with the sealed woofers and tweeters. I'll let the experts correct me where I'm wrong or add what they believe is missing. Note that this can apply to the later model KLH 6's, but grill replacement, speaker replacement and cross-over work is easier since you can go through the front instead.
- There's lots of help on AK. Thanks guys!
- Parts are generally available if you are patient - mostly ebay. (Still got to find the B+C jumper, but that is small stuff). I got a pair of KLH tweeters which I think are correct for later model KLH 6's and the B+C terminal jumper for one speaker. I also got the badges (new) from geekyshrink and the surround compound from Vintage AR. I picked up solder, soldering iron, flux and some misc items as well. (All of this from ebay).
- I went direct to Parts Express for the capacitors and resistors. (There is a KLH 6 manual on the site that has a diagram with the specs on the parts. It was simple and cheap to order replacements from PE. They sent along a cool catalog with the delivery.
- When soldering caps, use one of the clamp-on heat sinks between the heat and the cap. Heat is a capacitor killer (especially during soldering).
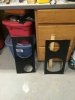
- On the early model 6's, start by leaving the grills alone if they are still in decent shape. These early models have glued-in grills and you have to cut them off to get to the speakers. If the speakers are still good, then there is nothing in the front that you can service anyway. See below about going through the back to fix the cross-overs instead. If you have to replace the grills, then go ahead and do the surgery necessary, but with the sealed speakers there isn't much more you can do from the front unless the speakers themselves are bad.
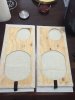
- If you do need to replace the grills, pay attention to the grill backing you select. Mine were already gone when I got the speakers. I used 1/4" plywood, but it was not straight. I will be able to live with it, but I think I would be more selective of the material if I do this again.
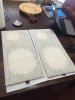
- When making the grills, I used whatever kitchen plates, bowls or pot lids I could find that were a good fit and used it to draw the circle I needed. I made sure not to cut the circle too close to the edge of the grill to ensure that the grills had enough structural strength that they would last. I had a big circle for the woofers, but I used a 1" strip to draw flat sides on the grill - that way the grills are stronger and I had something to staple the fabric to.
- I chose off-white burlap to cover the grills. Found my burlap at Wally World in their fabric dept, but noticed that Jo Ann Fabrics has an even better selection.
- Found a nice strap material at Wally world in the fabric dept. I used that to put a short handle on the bottom of the grill to make removal in the future easier. It wasn't fancy, but looked good and works good. It could be mistaken for original installation if you didn't know it.
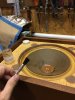
- Use the surround sealant from Vintage AR on ebay. Don't try to make your own unless you really know what you are doing. Don't use Elmer's glue on the surrounds for God's sake. The speaker police will arrest you!
- These early models are generally identifiable by the flush terminal plates on the back with A, B and C terminals. Later models have recessed terminal plates with only two terminals. There was a transition period where there was a mix of sealed speakers and such. I don't have any details, but if you think you have one of the speakers during the transition and you aren't sure what to do, go ahead and ask the community.
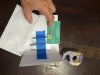
- To take off the terminal plates on the early models you need to take off all of the nuts and plastic washers on the A, B and C terminals and the tweeter switch. I put blue tape around the plate on the wood and gently used a putty kniife and small hammer to loosen the small nails holding it down. careful not to bend the plate, chip the wood or otherwise damage the speaker or terminal plate here. Once you have that loose take the plate off. Put all the washers and nuts back on to the terminals or store them in a bag and don't lose them! Assuming no one has worked on this speaker before you will see some old brittle potting material that looks like epoxy. You can chip this out with a chisel, Just try not to damage the switch, wires or terminals. The caps and resisters are going away so those can be sacrificed. When done you can use rubber gloves to gently pull out all of the fiberglass. (If you have big hands, you might have to get help from someone with small hands to help.) You will want to vacuum out the interior. You can blow some compressed air in the cabinet to loosen anything stuck in the corners. Shake out the fiberglass to get the broken potting material out. Set aside the fiberglass while you work on the cross-over. In general you can cut the wires to separate the cross-over from the speaker if necessary - just make sure that you leave enough wire with the speaker that you aren't trying to solder wires back together later inside the cabinet. You want to do your soldering outside the cabinet when it is time to put it back together.
- I didn't do any work at all on the plywood on the back or on the MDF on the front baffle other than to dust it off.
- When reassembling the speaker. Before you permanently close it up, try out the cross-over to make sure that it is working correctly. I tacked in the terminal plate with two of the small nails (halfway holding it in place and hooked them up. I was lucky. They worked on the first try. If the speakers don't work at all, make sure you re-assembled the plastic washers correctly on the terminals. If you don't they will short out and you won't get any sound. (Found in my research).
- When I set the terminal plate during installation, I used some silcon caulking in a small bead around the hole. Just wanted to make sure that I wouldn't hear the plate rattling during Rock and Roll and didn't want air wooshing in and out around it. I wasn't trying to glue it down - the original nails should do a good job of holding it in place.
- Replace all the caps and resistors in the cross-overs. The caps must be replaced on these old speakers - while you are in there just do the resistors too. I got mine from Parts Express. Their prices are reasonable and the delivery was fast. Note that the leads on the resistors I ordered were shorter than I needed which caused me to be a bit creative in the surgery. Not a big deal, but just be aware.
- If you find a set that has tweeters that aren't functioning it is most likely that the cross-overs are gone. (Not my experience, but found this in my research and it make s sense if you know about the lifespans of most kinds of capacitors). There is a chance that when the cross-over went, that it took the tweeter with it. (Failed-to-short and got killed by the low frequencies. If it failed-to-open you may be in luck). You will have to take off the back plate any way. See if you can fix the cross-over through the back and get them working. If they are still dead then trace it down and make certain that it is the tweeter. If the tweeter is bad then the choices get difficult in the early models with sealed tweeters. You may have to ask the AK community for suggestions.... (The previous owner of mine had cut them out and replaced them with aftermarket units. I searched and found reasonable vintage replacements.
- I sanded mine by hand with a HD sandpaper holder. I was careful around the edges where the veneer was thin. I had some areas where I had dings and chips that I could not sand out. I chose to fill them instead of steaming or replacing with new veneer. That has left me with a small challenge of color matching with the stain I chose. Just be aware.
- I used WATCO Danish Oil - Dark Walnut. My gosh that stuff goes on easy. I think that was the easiest part of the whole project. I bought a bag of rags at HD and have enough rags and WATCO left over to do about 100 more speakers.
- My local HD keeps rolls of heavy paper (the kind that paper grocery bags are made of) by the front door for customers to put on their car floor or trunk. I found that paper useful for covering the front baffle and speakers during most of the work. I used the blue masking tape to hold it on.
- I had plans to use velcro to hold on my grills. I found that the adhesive wasn't strong enough and it just pulled away. My grills fit tight enough that I didn't need velcro, so instead of struggling with stapling them in place on the front baffle and grills, I just took them off and went naked. They stay put for me.
Guys. Let me know if I missed anything. Hopefully, with Glenn's thread and this one we can encourage others to restore these beautiful speakers.