• Please note that Audiokarma will be offline briefly for updates early on Monday morning, September 28th.

RoeTest tube testing system

pac1085

AK Subscriber
Subscriber
Starting this thread to discuss the RoeTest tube testing system - which is currently on version 11 at the time of writing.

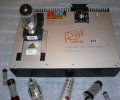
RoeTest V11_Titelbild 1.jpeg
This is supposed to be the best tube testing system on the market right now, but is only sold in partial kit form and it notoriously difficult and time consuming to construct.

I'm probably going to purchase one, but am currently waiting for some details on the software from the author. My main concern is - what happens 10 years from now if he moves on / passes away / etc? If I keep an old copy of the software around, and an old laptop, will I still be able to install / use the software? Or does it have any sort of built in expiration / time bomb / certificate expiration issues (he does mention the installer is signed with authenticode - not sure what happens when that or the certs it depends on expire?)
 
Last edited:
Register to hide this ad
He assured me that the software will continue to work years into the future and that it doesn't need internet access to function (that was another concern of mine)
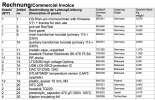
I placed the order. We'll see what happens with tariffs on import in a week or two (it's coming from Germany). He does provide an itemized list of components with their tariff number. I think the $800 de minimus exemption is still in place for Germany, so hopefully the tariff is small.

Screenshot 2025-04-19 at 2.07.23 PM.png

Very excited to get this thing going! It's going to be quite a bit of work.

Someone recently contributed a bunch of 3d printer models for the various parts you need to complete the Roetest, that was a huge factor in my decision to move forward with it. I wasn't looking forward to milling/drilling metal enclosures and whatnot:


The PayPal currency conversion from USD to Euro was kind of a pain. I noticed their fee was high. They give you an option to process it directly with your bank/credit card instead of using their overpriced service, but it's hidden in the menus. I determined my Amazon Prime Chase Visa card had no foreign exchange fees, so I added that to my account, selected the correct options and went to pay. Chase denied the transaction and sent me a text message to approve it, which I did. They then said to resubmit it. So I hit submit again on the PayPal page, but their site switched it back to their overpriced currency conversion - ended up costing me an extra $45.... not very happy.
 
Last edited:
First package showed up today.

Had to pay UPS $46.71 in tariffs. They didn’t provide any sort of breakdown. They also made me write a personal check - lol - haven’t done that in years. I read that you could pay online ahead of time, or they swipe credit card at the door but that wasn’t the case.

Seeing the pcbs in person is somewhat intimidating. Anyone wanna rent me a wave solder machine? Lol


IMG_1122.jpeg
 
Last edited:
Still waiting for Reichelt to ship my order. It’s been over a week now. I paid them last Friday and they still haven’t processed it. They also don’t reply to email. Their phone is only open 8am to 11:30am daily German time. So i signed up for a long distance plan and am going to wake up at 4am tomorrow to try and call them. Edit 5/2: Finally got the shipping notification! I would have been more comfortable if they sent me a payment confirmation e-mail after I sent the PayPal last Friday.

I would have been half way done assembling this thing if they shipped the same or next day like I’m used to getting from Digikey/mouser.

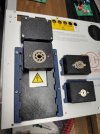
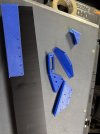
I’ve been working on all of the 3d printed pieces in the meantime. I’m very happy with how they came out. I had to customize some of them to fit the socket styles I had on hand.

IMG_1202.jpeg
 
Last edited:
First package showed up today.

Had to pay UPS $46.71 in tariffs. They didn’t provide any sort of breakdown. They also made me write a personal check - lol - haven’t done that in years. I read that you could pay online ahead of time, or they swipe credit card at the door but that wasn’t the case.

Seeing the pcbs in person is somewhat intimidating. Anyone wanna rent me a wave solder machine? Lol


View attachment 3491925

Holy crap. I don't have the resolution; is that through-hole or surface mount?

EDIT: Haha, too bad, we're thirty years too late. My company used to make the machines for Vitronics Soltec.
 
It’s almost all through hole. There are about 10 small surface mount ICs that will need to be installed though. USB, usb isolation, some hv op amps. Not too worried about it but two of them are the type that get a blob of solder under the center to heatsink it, and I haven’t done those before.

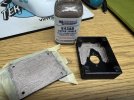
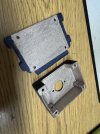
Painting the inside of the 3d printed adapters with conductive paint. Works really well actually
IMG_1255.jpegIMG_1256.jpeg
 
Damn! I foresee an expensive purchase in my future... Looks like an impressive instrument!

-Pat
 
Nah. It’ll be fine. Still waiting on the electronic components to show up from Reichelt. Looks like they finally made it into the USA and should be here Tuesday, then the soldering begins. I think I’m going to do it all lead free with SAC305 to keep things interesting

Gotta drill and tap the heatsink still, but the same guy that made the enclosure models also shared some printable templates which will make that even easier.

IMG_1291.jpeg
IMG_1293.jpeg

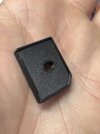
I also tried this PET-CF17 (carbon fiber reinforced) filament to print a few of the parts that need to withstand higher temps and they came out mint. For example this spacer for a bridge rectifier. IMG_1347.jpeg
 
Last edited:
When you do the drilling and tapping, I'd suggest that you don't use TiN-coated tooling, as the chips will stick or smear on the coating. Either Bright or Black Oxide is a better choice in zinc/aluminum, otherwise you risk breakage. Nice work on those templates. Are you going to transfer punch or just use them as guides?
 
Thanks for the tip good to know. It looks like the metric drill bits I bought are TiN coated. I was thinking about returning them anyways, because they aren't really the right size for the metric taps. The 2.5mm bit I needed for the m3 threads in this project is there, but not the other sizes (such as 3.3 for m4, 4.2 for m5, etc). I'm having a hard time finding those drill bits for a decent price. This is the best I've been able to find so far, and it's more than I want to spend: https://a.co/d/8I7HbkP

I already have a nice made in USA craftsman large metric tap and die set (mostly used for auto repair), but never had a proper metric drill bit set for them. So I don't want to buy a combo tap/drill set if I can help it.

I was just going to use them as guides to punch (and double check with the measurements he specifies in the instruction manual)
 
If you have a set of number drills you're good to go, if not, they're really inexpensive compared to metric sizes; M3→ #39, M4→#30, M5→#19
 
Good to know, thanks. I had a feeling that was the case and was about to start looking into it. I think I will look into buying a new set of those. I mostly have random cheap sets from Home Depot/Lowes that are on sale around the holidays... and are due for replacement.
 
The number drills are extremely close to the Metric tap-drill sizes you need. You can often get a complete index for small money, depending on sales. I like either HSS or Cobalt.
The #1 to #60 set is the most common. I have an extension set that covers the #61 to #80 sizes, but unless you do really weird stuff, most people won't need these, haha.
 
Can't wait to see the details on this whole build. I was about to buy one myself, but went with the Amplitrex AT1000. Needed something that worked now. Maybe in the future I will build one.
 
Hey! An inquiry to an AI just brought me here. I just built one of these. V11. I have been using it for a little bit now. Learning, exploring, getting a feel for it. It's A LOT different from the testers I have been using for a long time now - Hickoks: 6000A, 539C, RD1575, 752A, TV-7D/U; Heathkit TT-1; B&K 747 and 707, and some random others. I wanted to get away from testers that are going on 50-70+ years old. I looked at the contemporary offerings and decided on the RoeTest.

It was a lot of work. Doable. It's not like building an modern fighter jet or space telescope, but it's a lot of work. I don't have a 3D printer (which would be pretty darned cool)! It took several months once I got into the project.

Helmut Weigl is GREAT. He is super responsive and indefatigably helpful. Reichelt is great; really great. Prices are (were) good. They take care of all the international shipping stuff.

I had a few challenges. It's complex build. IT IS NOT A KIT. This isn't like building a Dynakit, Bottlehead kit, or the like. No step by step stuff. Outside of the parts BOM and the proprietary bits supplied by Helmut, there is a lot more stuff to be spec'ed, selected, and sourced, and careful, precision assembly, fabrication, finishing, and calibration is required. Calibration isn't especially difficult. If you build the calibration test box, which I strongly recommend, it's all done by multimeter. Importantly, keeping the tester calibrated is effectively much more doable compared with vintage testers.

I followed closely to Helmut's recipe. I didn't improvise, as cool as some of the builds I've seen have been. The "construction" manual is a guide. Helmut's tools, like the parts database, are super helpful, and there is a lot of documentation. That's good, but it's not tightly organized into something like a manual, with glosses, indices, etc. I went all metric; hardware, drillings/taps, and other miscellany. Some of the parts are hard to source in the US markets (I had to buy a few things more recently from US suppliers and those parts already had tariff mark ups), like the DIN connectors.

The Helmut-supplied bits are very high quality. The boards are excellent. The toroidal transformers are super nice. V11 looks to me to be the best sorted of all the RoeTest models.

There are LOADS of features. Extensive electrical parameters can be managed automatically or manually. Curve tracing, yes, but with curve analysis tools. Tube inventory system tools. Loads of data printout options. It's a system. It's kind of amazing. Helmut appears to be exceptionally clever and busy.

It's not an inexpensive thing to build, just even at the parts cost, but to buy something like this built would have to be quite a few multiples more pricey than that.

Working in English from the German can be a little tricky. Documentation translation, including the interfacing software, is well good.

Given what I know about most of the vintage testers, the ones that most of us this deep into this might likely have, not the full-on bench lab tube analyzers, those testers weren't especially accurate. I suspect we can do much better today with testers like this (and some of the other modern ambitious testers, like the Amplitrex).

You will likely want to check/confirm the tube test settings for whatever tubes you're testing. I have long been familiar with vacuum tube datasheets. With all the vintage testers I've used, you follow the settings provided on a sheet of paper, in a book or on a roll chart, turn some knobs and dials, and press the test button or pull the test switch. And I had some idea of what each of these vintage testers applied for various parameters, but they weren't things I could muck with. With the RoeTest you can adjust/specify operating points. The large tube reference/settings database will likely have settings for the tubes you want to test, but check/confirm the parameters. The database is open to user contribution. Super smartly, too, the interface software does some checks on the data/settings validity that will not allow a test if some parameters are missing or wrong.

I ordered all my bits and pieces as Helmut was transitioning from V10 to V11. The faceplate I got still read V10, but Helmut supplied that V11 sticker you see on the faceplate of my finished RoeTest.

If I you might want any help, I'll offer what I can.

Once all is up and running, it's super easy. It can essentially automatically run through a tube test process, outputting an EXTENSIVE report of tube condition. FAR more than any of the vintage testers did/could, and all with the click of a button in the software interface.
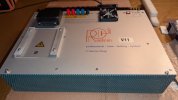
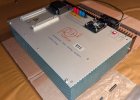
PXL_20250501_014112726.jpgPXL_20250501_014140609.jpgPXL_20250515_015715940.jpgPXL_20250428_001130642 1.jpg
 
Last edited:
Hey! An inquiry to an AI just brought me here. I just built one of these. V11. I have been using it for a little bit now. Learning, exploring, getting a feel for it. It's A LOT different from the testers I have been using for a long time now - Hickoks: 6000A, 539C, RD1575, 752A, TV-7D/U; Heathkit TT-1; B&K 747 and 707, and some random others. I wanted to get away from testers that are going on 50-70+ years old. I looked at the contemporary offerings and decided on the RoeTest.

It was a lot of work. Doable. It's not like building an modern fighter jet or space telescope, but it's a lot of work. I don't have a 3D printer (which would be pretty darned cool)! It took several months once I got into the project.

Helmut Weigl is GREAT. He is super responsive and indefatigably helpful. Reichelt is great; really great. Prices are (were) good. They take care of all the international shipping stuff.

I had a few challenges. It's complex build. IT IS NOT A KIT. This isn't like building a Dynakit, Bottlehead kit, or the like. No step by step stuff. Outside of the parts BOM and the proprietary bits supplied by Helmut, there is a lot more stuff to be spec'ed, selected, and sourced, and careful, precision assembly, fabrication, finishing, and calibration is required. Calibration isn't especially difficult. If you build the calibration test box, which I strongly recommend, it's all done by multimeter. Importantly, keeping the tester calibrated is effectively much more doable compared with vintage testers.

I followed closely to Helmut's recipe. I didn't improvise, as cool as some of the builds I've seen have been. The "construction" manual is a guide. Helmut's tools, like the parts database, are super helpful, and there is a lot of documentation. That's good, but it's not tightly organized into something like a manual, with glosses, indices, etc. I went all metric; hardware, drillings/taps, and other miscellany. Some of the parts are hard to source in the US markets (I had to buy a few things more recently from US suppliers and those parts already had tariff mark ups), like the DIN connectors.

The Helmut-supplied bits are very high quality. The boards are excellent. The toroidal transformers are super nice. V11 looks to me to be the best sorted of all the RoeTest models.

There are LOADS of features. Extensive electrical parameters can be managed automatically or manually. Curve tracing, yes, but with curve analysis tools. Tube inventory system tools. Loads of data printout options. It's a system. It's kind of amazing. Helmut appears to be exceptionally clever and busy.

It's not an inexpensive thing to build, just even at the parts cost, but to buy something like this built would have to be quite a few multiples more pricey than that.

Working in English from the German can be a little tricky. Documentation translation, including the interfacing software, is well good.

Given what I know about most of the vintage testers, the ones that most of us this deep into this might likely have, not the full-on bench lab tube analyzers, those testers weren't especially accurate. I suspect we can do much better today with testers like this (and some of the other modern ambitious testers, like the Amplitrex).

You will likely want to check/confirm the tube test settings for whatever tubes you're testing. I have long been familiar with vacuum tube datasheets. With all the vintage testers I've used, you follow the settings provided on a sheet of paper, in a book or on a roll chart, turn some knobs and dials, and press the test button or pull the test switch. And I had some idea of what each of these vintage testers applied for various parameters, but they weren't things I could muck with. With the RoeTest you can adjust/specify operating points. The large tube reference/settings database will likely have settings for the tubes you want to test, but check/confirm the parameters. The database is open to user contribution. Super smartly, too, the interface software does some checks on the data/settings validity that will not allow a test if some parameters are missing or wrong.

I ordered all my bits and pieces as Helmut was transitioning from V10 to V11. The faceplate I got still read V10, but Helmut supplied that V11 sticker you see on the faceplate of my finished RoeTest.

If I you might want any help, I'll offer what I can.

Once all is up and running, it's super easy. It can essentially automatically run through a tube test process, outputting an EXTENSIVE report of tube condition. FAR more than any of the vintage testers did/could, and all with the click of a button in the software interface.
View attachment 3504452View attachment 3504453View attachment 3504454View attachment 3504451

Awesome, thanks for the feedback!

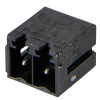
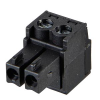
I'm ready to start building. I have all of the parts from Helmut, and the ones that were specified in the CSV file from his application from Reichelt. I did notice a few things missing so far - like the connectors for the fans, standard resistors (which I probably have in stock), etc. Did you have any surprises when assembling, with regards to parts you needed that weren't specified in his ordering instructions?
 
Good question. You mean these connectors for the fans? I did take a lot of time checking and rechecking, inventorying and reinventorying, but still ended up with a few items double ordered and I MAY have missed some. I had to chase down some things later. For most of those parts, I could get the BOM-specific parts between Mouser, Newark, or Digikey, but I did have to go back to Reichelt for some stuff.

I said I MAY have missed some parts because I ordered when when Helmut was transitioning between the last revision of version 10 - V10.4R2 - and V11, so I actually ordered off of that V10 database. I was surprised, though now very pleased, when I got the V11 version. Not a revolutionary difference from V10, but it has quite a few solid refinements.

I have some extra parts that I'd be happy to donate to your project, if you need them. As I mentioned, some of the extra parts are from having ordered from the V10 BOM, and didn't use/need these. But I have other stuff, too. I think I have a full set of power resistors, the switch, some jacks, and the Hammond enclosure for the calibration box, and some other things I don't recall all of them at the moment. I also have LOTS of metric hardware I'd be happy to supply. Pretty much everything to bolt or screw the RoeTest together, and I know what sizes go where. I attempted to take a careful inventory of this stuff when I started, but ended up just buying assortments of quality hardware from Amazon. I used stainless steel and plastic, some nylock nuts, and hex cap screws/bolts.

For me, this kind of stuff was the hardest - the fabrication and hardware. A 3D printer would have helped A LOT, but I went all analog. The heatsink has to be very precisely drilled and tapped for everything to fit correctly. The 3mm threaded studs for the heatsink fan are drilled and tapped VERY close to the heatsink edge. I considered using a smaller fan, but used the one specified by in the BOM. I made templates, measuring with a vernier, cutting, drilling, and tapping VERY carefully. It turned out well, but I had to figure some stuff out and had to redo a few things. The perforated base/enclosure I got from Helmut didn't have a ground lug, so I had to get one and solder to the steel cage. Then, that has to be finished. I use that hammertone green'ish blue'ish color. I mostly used that because I had it from building a Bottlehead S.E.X. heaphone amp where I used it for the transformer bell. Oh, and I have some mylar sheet I used to insulate the main board, per Helmut's instruction. You are welcomed to it so you don't have to buy a bunch more than you'd use.

Stuffing boards and soldering was easy, but took a lot of time - there are a lot of parts, and those 64 pin DIN connectors take some time solder. The boards are well labeled, but there are still a lot of things to get right. With the polarized electrolytic capacitors, on the boards, some positions have polarity marked with a plus, some with a minus. Not tough, but I think consistent use of the minus marking would have been easier. Also, of course, diodes (including LEDs) and ICs have to oriented correctly. I used Kester solder with no-clean flux, but I did end up cleaning the boards. Oh, SMDs. SMDs aren't hard but they can be VERY small.

I do recommend reading carefully, and maybe continue to review, Helmut's assembly instructions to understand/mental map the whole process and know what has to happen in what order. There are some things that might be easy easy to miss, like that a slightly different version of an IC is used on relay boards 9 and 10, than is used in the other eight boards. Again, this isn't step-by-step kit.

I made several marking templates in MS Powerpoint - for the socket and receiver boxes, the slide/guide, the heatsink fan, and for the calibration box. It's not CAD, but you can get very precise with the drawing tools. If those might help, you are welcomed to have them.

These fan connectors...
1747413996857.png1747413939435.png
 
I think I see what happened. I think the CSV import to Reichelt was cut off and I didn't catch it (it gave me a lot of problems, and Helmut even mentions it may not work correctly). No biggie, I have the main parts from Reichelt, including the parts that weren't readily available in the USA like the DIN connectors, and should be able to order the rest from digikey or mouser. It looks like I missed some transistors, the irfp640 mosfets, all of the trimpots (Which I probably have many of in stock anyways), and the resistors. Will have to spend some time shoring up the BOM vs what I ended up purchasing.

edit: I see it now. His parts database application cuts off the CSV at 100 items with the default settings, and into multiple files. I didn't catch that. Oops!
 
Last edited:
Making progress. Soldering and assembly of the boards is more or less wrapped up. I need to drill the heatsink, attach everything to the front panel and build the calibration fixture next.
IMG_2392.jpeg
IMG_2383.jpeg
I painted the case BMW Black Sapphire Metallic and gave it several coats of clear - had it laying around so why not!
IMG_2437.jpeg
 
Back
Top Bottom