• The move to the new server is done. There are some software and database maintenance updates in process. This has us passing the hat around to help out. We appreciate any donations. Seriously, even a dollar helps. The payment page may be found here - https://www.audiokarma.org/support.html

SA-9800 Re-Work Begins

Regarding the grill paint for the others, what brand/color did you use?

It's Rustoleum Hammered spray paint. Black. Just looked at it and I don't think it is actually heat rated, but not needed to be really. It is very durable though and looks real nice once applied. It has a relatively high gloss, which the grill paint on the 9800 now is more of a semi-gloss/matte type finish, so it will change the look a little in that regard.
 
I am. But, it has a scratch on the back portion of it about 2" long and it is bugging me. Otherwise the grill looks clean. I might strip it and prime and re-paint it first. I did that on both the SX-3900 and SA-9100 and used that automotive enamel texture heat resistant paint (EDIT: Rustoleum Hammered spray paint - Black). Came out nice.

I usually don't half-ass things and likely will re-paint this one too, as the rest of it will look pretty top-shelf when done. I sure know the amp sings nicely. Played it all evening (about 6 hours) Saturday night pushed pretty well through a pair of JBLs and it sounded great.


I know I liked the way your other box on your 9100 turned out! I am going to have to do the same on the 9100 case sitting on my bench.
 
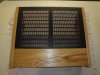
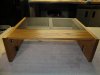
Got the case assembled and put the internal spacer blocks in place tonight. Coming along really nice. Just have to dry fit it tomorrow and then put in the wood strips in the front portion (aesthetics only for the frontal view, so you don't look right into the case/amp from the front. After that, it will be finishing time. I think I am going simple on this one too and just doing the Feed n' Wax with a couple applications. That way it will match the other 2 cabinets I made.

I decided to not mess with the metal grill. It just had a couple of smaller scratches on the rear portion and I touched them up and they look pretty decent, so it remains stock on this one.
 

Attachments

  • DSC00002.jpg
    DSC00002.jpg
    56.3 KB · Views: 140
  • DSC00005.jpg
    DSC00005.jpg
    78.1 KB · Views: 134
Nice work again, make sure to show the case with the finish on it.

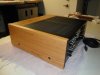
OK. Here it is, all done. Came together really nice. That Howard Feed n' Wax is nice stuff and on the bare Oak wood made for a decent finish. I am pleased. Now it's on to the faceplate, which is going to take some time, work and elbow grease.
 

Attachments

  • DSC00007.jpg
    DSC00007.jpg
    53.7 KB · Views: 129
  • DSC00016.jpg
    DSC00016.jpg
    82.1 KB · Views: 121
  • DSC00017.jpg
    DSC00017.jpg
    63.1 KB · Views: 117
  • DSC00013.jpg
    DSC00013.jpg
    57.9 KB · Views: 105
  • DSC00008.jpg
    DSC00008.jpg
    65.1 KB · Views: 102
  • DSC00002.jpg
    DSC00002.jpg
    68.9 KB · Views: 100
Last edited:
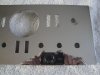
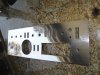
Some current photos of the faceplate. I am in the process of polishing it out to a mirror finish. I think I may keep it as a mirrored finish. Not sure yet. After all the hours of hand-polishing, it looks more and more likely that I will keep it polished out. There is a LOT more work that needs to be done on it to get it where I want it (mirrored smooth and even). These are just progress photos.
 

Attachments

  • DSC00001.jpg
    DSC00001.jpg
    85.3 KB · Views: 136
  • DSC00004.jpg
    DSC00004.jpg
    66.2 KB · Views: 130
  • DSC00005.jpg
    DSC00005.jpg
    94.8 KB · Views: 140
Got a couple more hours in today of polishing. Going to take at least 8-10 more solid hours of hand polishing to get it where it needs to be. In hindsight, I should have used a really super fine sandpaper to get the deeper grooves out, like well over 1500 grit.
 

Attachments

  • DSC00001.jpg
    DSC00001.jpg
    92.6 KB · Views: 126
  • DSC00006.jpg
    DSC00006.jpg
    94 KB · Views: 133
Last edited:
OK. Here it is, all done. Came together really nice. That Howard Feed n' Wax is nice stuff and on the bare Oak wood made for a decent finish. I am pleased. Now it's on to the faceplate, which is going to take some time, work and elbow grease.

I'm having one built in walnut. Cant wait!!!
 
Recommended procedure for the shotgun approach?

Parts in from Mouser. Started with the Power Supply board. Pretty much shotgun. Replaced all electrolytics and all transistors. 12 caps, 12 transistors and 2 diodes in total on that board. What a biatch to get to some of those without disconnecting any wires... Was able to tilt the board out only about 45 degrees or so (after removing the 6 screws). All the other boards will be significantly easier no doubt.

Used 2SK30A-Y transistors in place of the two SK34's (Q5 & Q6)

Had some solder pad issues/trace lifts on the two transistors with the heat-sinks (Q11 & Q12). Excessive heat/cooldowns I presume... Was able to doctor them up and get them in place with new thermal paste and snug mounting.

Went ahead and powered it up afterward and everything functions well (still).:yes:

ON A SIDE NOTE: Been working with the faceplate too. Have a COMPLETE design layout of all cutouts and markings in the Front Panel Design software (took about 7 hours total over 3 nights). Everything lined up to within 0.5mm. Took off all the plastic pieces around the switch slots and flouroscan meter window and I am going to sand it down completely (has some significant scratches). Then I'm going to send it away to the Front Panel Express guys for etching. Should turn out real nice. I might polish the face, or possibly do the brushed finish like I did on my SA-9100.

Just wanted to update the thread for those that are following it.

Slowly but surely:boink:

You guys have experience doing this before, so I will ask for wisdom.
Do you completely strip the board and then replace all the transistors, capacitors and diodes. OR do you take one component out and then replace that one component, then move on to the next component. I assume it would be faster with the first approach, and less confusing with the second approach. Also, how do you clean the old dingy brittle board before mounting the parts, with a no residue cleaner initially?
 
ALWAYS one component at a time, being extremely careful to ensure the + and - sides of caps are correct and the BCE of all transistors is correct, as some replacement transistors have reversed or otherwise lead patterns.

As far as cleaning... you can use alcohol of a high percentage and or board cleaner (any electronics shop). Some people use a solution of warm water and mild detergent (soap), but I am leery of this approach, as it can damage things if not VERY careful.
 
The case is and has been done for a long time... the faceplate is still midway. I just haven't devoted the time to the faceplate polishing, but will soon. The case pictures are in this thread...

Hi Brent,

Any update on your faceplate? I'm interested to see if I can apply your process to my own SA-9800.
 
No new updates. Other projects took over. The faceplate still sits on my workbench wrapped in a towel. I will get to it soon though I hope.
 
Back
Top Bottom