• The move to the new server is done. There are some software and database maintenance updates in process. This has us passing the hat around to help out. We appreciate any donations. Seriously, even a dollar helps. The payment page may be found here - https://www.audiokarma.org/support.html

Sansui AU-717 Restoration and Upgrade

Hear, hear!

Currently working on my own 717. Last night, I removed the source selector switch and cleaned the switch poles. No amount of DeOxit will keep these from getting noisy again, unless you have it on an IV drip going into the switch. The corrosion/tarnish will always keep advancing after cleaning, so the cure is to remove as much of it as you can, and for that you need to open the switch up. Tonight I may do the record out switch, or perhaps over the weekend.

Cut and pasted from another thread I replied on. On the power supply boards, there is usually a resistor or two that have the glue contamination. Most people would replace just these. But we're dealing with a whole system here, now you have a modern metal film resistor sitting in with a bunch of old carbon resistors? Doesn't seem good to me. I replaced all the resistors in that regulated supply section with 1% metal films.

Not removing output transistors and re-greasing them is my pet peeve. And not replacing the old trimmers is another one.

Why not replace all of the carbon resistors on all boards?

Do you replace all of the silicon devices as well?

What about ceramic and mylar caps? I know that there are modern replacements with better specs.
 
Last edited:
@Connor G: Very nice work!

If I may, a quick comment regarding the replacements for C27/C29 and C28/C30 on the phono board (F-2723): these 10uF capacitor pairs are arranged in series and can be replaced by a single film capacitor (~5uF), installed in place of the original film by-passes at C35 and C36.

View attachment 2844016

View attachment 2844030
F-2723 picture from this AK post
Thanks for the kind words and for the heads up! I must have had a brain fart there. I will yank them out and install one where the old bypass capacitors were. I won't even have to remove the PCB for this. Thanks again!
 
Why not replace all of the carbon resistors on all boards?

Do you replace all of the silicon devices as well?

What about ceramic and mylar caps? I know that there are modern replacements with better specs.

Sure, we could replace all the resistors with metal film. I've done the same thing on a NAD 3020, plus some other modifications, and it remains my reference to which all other amplifiers will be judged, for everything except absolute power output. But the 3020 is a much simpler beast than a 717, or something like a Pioneer SA-9800. The upright circuit boards make things harder to get to, you have to take everything apart to get really good access. It wouldn't be worthwhile for someone to pay me to do this kind of work, as they would never get their money back.

All silicon devices get replaced. These Sansuis are notorious for small signal transistors going bad. I usually keep the original output transistors, but everything further back gets changed. And this included the rectifier diodes for the main supply capacitors. Why not change these? They've had years being submitted to the current pulse of charging those 15000uF caps.

Ceramic and mylar film caps in key area get changed. Look at @Leestereo 's thread, or my own thread of a previous amp which has more pictures than descriptions.
 
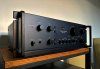
@conner G I don't usually call gear beautiful but yesterday when I saw this at Frankenfest I just
stared at it for a while and thought that is beautiful. Just completely beautiful.
 
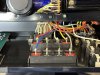
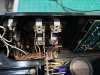
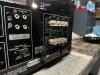
After a few weeks of waiting, the binding posts finally showed up. They shipped from EU, so the wait is understandable.

The retrofit job was a piece of cake, as no adapter plate or modification was needed. They are truly drop-in replacements.

IMG_5801.jpeg IMG_5802.jpeg IMG_5803.jpeg
IMG_5805.jpeg

After getting the binding posts installed, I noticed a loud arcing / humming that was originating from the transformer area. This scared me, as an arcing transformer is usually caused by delamination or other transformer damage. As it turns out, it ended up being a faulty power switch causing the issue. The contacts of the power switch were carbonized from years of use, making the resistance across the contacts very high. I disassembled the switch, cleaned the contacts, and also swapped the latching contacts around to an unused set. After that was done, I treated the contacts and reassembled the switch.

IMG_5974.jpeg IMG_5975.jpeg IMG_5976.jpeg IMG_5981.jpeg

I got the switch reinstalled and the issue went away. There is now a suitable milliohm connection when the contacts are closed. No more noise to be heard!
 
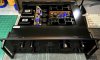
After getting the binding posts installed, the AU-717 is finally complete and is now ready to go back to its anxious owner. I forgot to include pictures of the unit with its rack handles installed, I think they really complete the look of the 717 - transforming it into a beast!

d0df9108269eb2e2dcc1bd081d9a6bad.jpeg a89089cfff0e45998b485f7c18744e2a.jpeg

As mentioned previously in this thread, I have made a YouTube video on the AU-717’s restoration. I finally have it uploaded, and it can be found here:


Thanks again for viewing!
 
removing all of the electrolytic signal coupling capacitors and replacing with film capacitors with much better characteristics for use in the signal path...
Great job! Can you explain please which capacitors you prefer to use in this case?
 
Great Job! Fantastic documentation and very clean work. I wish all the technicians mimic what you have demonstrated over here.
BTW, what solution do you use to remove the corrosive glue? I see your boards are so clean and shiny.
 
Great Job! Fantastic documentation and very clean work. I wish all the technicians mimic what you have demonstrated over here.
BTW, what solution do you use to remove the corrosive glue? I see your boards are so clean and shiny.
Thank you! - I use 99% isopropyl alcohol and a stiff brush to remove all flux residue from circuit boards. Sorry for the late reply.
 
After a few weeks of waiting, the binding posts finally showed up. They shipped from EU, so the wait is understandable.

The retrofit job was a piece of cake, as no adapter plate or modification was needed. They are truly drop-in replacements.

View attachment 2874828 View attachment 2874829 View attachment 2874830
View attachment 2874832

After getting the binding posts installed, I noticed a loud arcing / humming that was originating from the transformer area. This scared me, as an arcing transformer is usually caused by delamination or other transformer damage. As it turns out, it ended up being a faulty power switch causing the issue. The contacts of the power switch were carbonized from years of use, making the resistance across the contacts very high. I disassembled the switch, cleaned the contacts, and also swapped the latching contacts around to an unused set. After that was done, I treated the contacts and reassembled the switch.

View attachment 2874834 View attachment 2874835 View attachment 2874836 View attachment 2874837

I got the switch reinstalled and the issue went away. There is now a suitable milliohm connection when the contacts are closed. No more noise to be heard!
Did you happen to have the web site for the new binding posts?
 
Back
Top Bottom