• The move to the new server is done. There are some software and database maintenance updates in process. This has us passing the hat around to help out. We appreciate any donations. Seriously, even a dollar helps. The payment page may be found here - https://www.audiokarma.org/support.html

Sansui AU-999 recap and mod journey

I’ve hit a wall and my head hurts :confused: …where should I go from here?
Oh, I didn't realise you'd done the pre-amp mod.
I thought you'd only done the main caps.
I think if the main caps were in backwards, you'd have more serious issues.
If you are getting your + and - 42(ish) VDC then that is all good don't worry about it.

I'd say you have made an error with the pre-amp mod, You'll need to check your work there.
I haven't done one for a while now so I would have to go back and familiarise myself with it......
But double and triple check that mod, I would say this is your issue.
 
Oh, I didn't realise you'd done the pre-amp mod.
I thought you'd only done the main caps.
I think if the main caps were in backwards, you'd have more serious issues.
If you are getting your + and - 42(ish) VDC then that is all good don't worry about it.

I'd say you have made an error with the pre-amp mod, You'll need to check your work there.
I haven't done one for a while now so I would have to go back and familiarise myself with it......
But double and triple check that mod, I would say this is your issue.
I’m sort of at my wits end… everything looks right… How would I check this?
 
I’m sort of at my wits end… everything looks right… How would I check this?
One thing you could do is reverse the mod and put it back to normal and see if this resolves the issue.
If it does, then you have missed something doing the mod.
Try that and let us know the outcome.
 
One thing you could do is reverse the mod and put it back to normal and see if this resolves the issue.
If it does, then you have missed something doing the mod.
Try that and let us know the outcome.
Well, I reversed the mod and so far working as intended with the new Super Through caps. I can’t figure out what happened. I measured each resistor as I took it out and it was at the value it should be. Well, I guess I’m gonna try again soon. I wish I had a couple extra 1209’s, that would be cool to swap out. Has this mod been tried on such a late model?
 
I did it to my ‘72 (which is what yours is as well) w/great results. It did not have the crowbar speaker protection, so I’m going to “assume” it was one of the later production models like yours.
 
Well, I reversed the mod and so far working as intended with the new Super Through caps. I can’t figure out what happened. I measured each resistor as I took it out and it was at the value it should be. Well, I guess I’m gonna try again soon. I wish I had a couple extra 1209’s, that would be cool to swap out. Has this mod been tried on such a late model?
Circuit is the same across the 999 range, doesn't matter what year it is....
You might need to just step through it carefully and make sure you are making the right connections...
 
Well, I’ve been inundated with other things that didn’t give me much free time, until this afternoon when I tried the preamp mod again, and I believe the last time I didn’t have a good contact somewhere on the preamp boards. This time worked great! I also replaced the trimmer pots on the driver boards. So far with the Super Through main caps and the preamp mod, the sound has more heft, open soundstage, plenty of headroom. I am quite pleased! Thanks to Kevzep, and everyone else that chimed in to help. I’m going to enjoy some tunes on it a bit before I recap.

Edit: I was on a roll, and went ahead with the bass eq mod, and…..yes, it was just what this amp needed! The bass control seems to work like one would think it should! Wonderful!
 

Attachments

  • EE7A1D05-DC29-48C1-8858-1F80C7C6BE96.jpeg
    EE7A1D05-DC29-48C1-8858-1F80C7C6BE96.jpeg
    99.5 KB · Views: 39
Last edited:
Well, I’ve been inundated with other things that didn’t give me much free time, until this afternoon when I tried the preamp mod again, and I believe the last time I didn’t have a good contact somewhere on the preamp boards. This time worked great! I also replaced the trimmer pots on the driver boards. So far with the Super Through main caps and the preamp mod, the sound has more heft, open soundstage, plenty of headroom. I am quite pleased! Thanks to Kevzep, and everyone else that chimed in to help. I’m going to enjoy some tunes on it a bit before I recap.

Edit: I was on a roll, and went ahead with the bass eq mod, and…..yes, it was just what this amp needed! The bass control seems to work like one would think it should! Wonderful!
Nice one!!
Great news indeed. Yep those mods take the amp to the next level for sure.....
I'm really pleased you were able to make some headway, a great learning experience....
Now for the re-cap of the rest of the amp...:thumbsup:
 
Last edited:
Still waiting on some last minute caps to arrive…I was wondering what some of y’all have done to fix up the board shield as the old foam disintegrated…

EC3955F7-D382-4249-99C8-B16DB54FF954.jpeg

As you can see, before it there is some foam I could use the same way….or should I do nothing, or repurpose in another way? Thanks in advance and Merry Christmas
 
Here in the US I went to HomeDepot and got a foam strip of door/windows sealer. I think the thickness was 5/8" and the width 1/2" They come in round spools for a few bucks.
 
Last edited:
So I started the recap using some parts from a list I found on this forum, and I noticed how some of these replacements have a higher or different value than the original. Could someone explain how these choices are being made for this? As I started, I realized that there was a capacitor missing from the list and with different values on some of these caps I’m replacing, how do I make a good choice of this one missing cap to compliment the rest?
 
I was using a list of parts to recap… so on the 1209 tone control block, I have:
C719 10uf 25v (original) 10uf 35v (replacement)
C723 47uf 10v (original) 47uf 16v (replacement)
C729 33uf 25v (original) 33uf 35v (replacement)
C733 47uf 10v (original) 47uf 16v (replacement)
C735 10uf 25v (original) 10uf 35v (replacement)
The list left out C755 3.3uf 50v what is the best replacement for this?
I noticed that the uf is the same as the original, but the voltage on the replacements are sometimes 10v higher and I was wondering about this??
And I was also wondering about the main filter cap replacements being at a higher uf and how that would affect the choices of the other caps down the line as a result?? After I did the tone control and bass eq mod,I recapped the head amp block and the tone control blocks except C755 which I left the original and its sounding good.. I learned a great deal so far! Still to go are the Driver blocks,Filter block, ripple blocks.Thanks in advance!
 
My AU-999 isn't nearly as clean as yours! It's a bit older, Oct 1971... and only partially restored at this point. One channel was blown, repaired with modern transistors, the other is original except for caps. I believe it did have the crowbar, which I removed, and I recapped almost everything else. Did the preamp mod, which helped headroom in driving the output sections and overall resolution in the sound (in my opinion).
As for caps, the reason most of us use replacement ones of higher voltage than the originals, is for a little more insurance in longevity; in some cases, the originals are a little close to actual operation conditions in the voltage specs. And when you add in the slightly higher line voltages we have to day, compared with 50 years ago, some of the voltage on the originals could be within 10% of their operational design. Another thing, which is mostly aesthetic, is the current ones are much smaller now (for the same specs as original ones) and a voltage increase usually gets them closer to the original sizes.
You might also consider using low-impedance (low ESR) caps in the power supply sections; Nichicon UFW or Panasonic FM, FC types are good replacements; they're also 105-deg C rated, which tends to add to their longevity. And some believe they tend to "tighten" or "quicken" the power supply response for a more stable current supply. Some caps in the audio signal circuits could also be specified as "low leakage"; I don't recall if my 999 had any in the pre-amp or driver sections, but if they did, usual replacements I've found in the Nichicon UKL and UFE series work well. Also, small value polarized electrolytic caps in the range of .47uf up to about 10uf can sometimes be replaced with polyester or polyethylene film ones...but not always! Study the circuit and refer to other users recommendations in these cases. There is a lot of excellent information on this board, by experienced members, who can steer you in the right direction. Take your time and do one section at a time, testing as you go...if there is an issue, it'll likely be in the last area you worked in!

AU-999 rear panel.jpg
 
The list left out C755 3.3uf 50v what is the best replacement for this?
I noticed that the uf is the same as the original, but the voltage on the replacements are sometimes 10v higher and I was wondering about this??
And I was also wondering about the main filter cap replacements being at a higher uf and how that would affect the choices of the other caps down the line as a result?? ......

The best replacement for C755 is whatever specs you actually find in the amp. In 95'ish % of the time a recap list will be accurate, but for the remainder you will notice your amp having slightly different spec"d components due to revisions. So when using an already curated recap list, do check it against what you actually have installed and revise list accordingly.

As for the 10v or "next step up" voltage increases.....that's ok. I even recall that one of our member EE's @ConradH did some testing, finding that on the lower voltage caps it would be beneficial to bump up voltage a step, say from 10 to 16v.

As for the supply cap, they are serving a very different purpose than say a coupling cap. In short if you bump them up, which I certainly recommend on the 999, you don't have to worry about other caps "needing" to also change. With the supply caps the caveat is that you don't overload your rectifier by too much inrush current. For instance if you increase to 6800 uF you'd be fine keeping the original rectifier. But increasing to 10k or 12k (as I use) you would need to install a beefier rectifier.
 
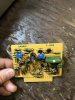
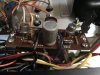
So…. I think I have one last item to ponder over before I finish this thing. I noticed the infamous “crowbar” AKA F-1334. It has a 220uf 10v cap, and since the rest is gonna get replaced, should I replace the cap, leave the one in there, or should I get rid of it altogether?:dunno: If searched the site on the 1334 and there are mixed feelings about it. I’d figured I would ask y’all here to help me make up my mind. Here are pics for your enjoyment.
 

Attachments

  • 66DCFFF9-817C-4C33-9407-CBFE61AABB63.jpeg
    66DCFFF9-817C-4C33-9407-CBFE61AABB63.jpeg
    88.7 KB · Views: 51
  • 0A99AA41-B513-4394-A680-C8C645ECF2CE.jpeg
    0A99AA41-B513-4394-A680-C8C645ECF2CE.jpeg
    90.4 KB · Views: 49
  • 08A459EF-5F07-495F-ADED-B64A4FC83CBB.jpeg
    08A459EF-5F07-495F-ADED-B64A4FC83CBB.jpeg
    92.5 KB · Views: 43
  • 39CDC7E9-A406-4532-9540-03DDC64882B3.jpeg
    39CDC7E9-A406-4532-9540-03DDC64882B3.jpeg
    87 KB · Views: 43
  • 34858569-E511-4826-ADDB-E492BCFD3420.jpeg
    34858569-E511-4826-ADDB-E492BCFD3420.jpeg
    126 KB · Views: 49
Last edited:
I had some time today and finished the recap, except that one cap on the crowbar I’m my last post….

EC92669B-4A74-43D2-9F28-EA23BE0EBB73.jpeg F2D0CD56-E60D-43CD-BA01-42E745232ACE.jpeg 1E65FFB3-3692-4B28-B072-43EB8F470D4D.jpeg 59EBC58C-18F6-43B1-8BC6-729111BCFC2F.jpeg

The sound so far is exquisite with the mods and recap! And I didn’t blow up anything!! Is it true that the sound might improve a bit as it warms up or “burns in”?

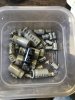
Here are all these Elna’s and one lone Nippon that was on one of the minus ripple blocks. I sure learned a lot and enjoyed this project!! Thanks to all here at AK!
C832C596-3A12-406B-803A-912924A9CFD2.jpeg
 

Attachments

  • 47930B55-1F7B-4853-BC17-7CC09F2D23FC.jpeg
    47930B55-1F7B-4853-BC17-7CC09F2D23FC.jpeg
    130.3 KB · Views: 51
Last edited:
Back
Top Bottom