• The move to the new server is done. There are some software and database maintenance updates in process. This has us passing the hat around to help out. We appreciate any donations. Seriously, even a dollar helps. The payment page may be found here - https://www.audiokarma.org/support.html

Servicing a Thorens TD160 super

ehoove

Old & New - Carpe Diem
Staff member
Admin
Super Mod
Moderator
Subscriber
Servicing a Thorens TD160 super w/pics

I picked up a Thorens TD160 Super from the original owner that had been sitting for around 20 years unused, and it arrived yesterday.(pic 5) That is a story all by itself and can be checked out here:

http://www.audiokarma.org/forums/showthread.php?t=362767

So today I went about serving the table and bringing it back to it previous glory, and thought I would go through the process step by step since many here have TD160's

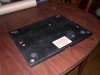
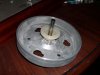
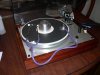
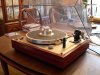
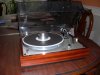
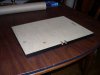
Lets start with the differences in the TD160 Super from a standard one. As you can see the bottom plate is very heavy compared to the Masonite one on the Std TD160.(pic 1 and 2) Also the plinth is more substantial, and the bottom of the top plate and bearing/arm board plate are dampened on the super. (Pic 3)There is no foam in the springs, and the arm board is made of a heavier material as well. The bearings seem to be the same, however the outer platter is a bit different and this one had the guard in place to prevent the inner platter from being removed. (pic 4) Also as with most of these tables the bearing had hardly any oil left in it. Continued....

Jim
 

Attachments
  • DSCN3198.jpg
    DSCN3198.jpg
    59.9 KB · Views: 261
  • DSCN3199.jpg
    DSCN3199.jpg
    85.4 KB · Views: 252
  • DSCN3200.jpg
    DSCN3200.jpg
    78.8 KB · Views: 328
  • DSCN3201.jpg
    DSCN3201.jpg
    132.5 KB · Views: 261
  • TD160 Super.jpg
    TD160 Super.jpg
    72.1 KB · Views: 318
Last edited:
Register to hide this ad
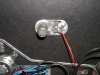
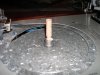
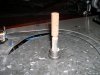
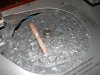
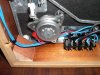
First order of business is inspecting the bearing spindle, and polish if needed. To remove it you must remove the screw that the ground wire is attached to and remove the retainer clip located under the table next to the bearing well. Thank god I didn't just start playing vinyl on it with the bearing well dry! All looks good, so I will just clean it real good with 91% isopropyl alcohol and a microfiber cloth. (Pic 1) Next we need to flush the bearing well with alcohol and q-tips to get it good and clean. Keep using q-tips dipped in alcohol till they come out clean (pic 2) Once the well is clean it is time to polish the sintered bearing in the bearing well. There is and upper and lower part of this bearing and you need to make sure you have cleaned out the area in between the two before polishing. You want no dirt of grit in the bearing when polishing. I got the maintenance kit I use from Joel Boutruex who used to work at the Thorens factory. It runs about $30 USD and will do at least 6 tables. Using the small wooden dowel provided apply some polish to the flat edge and insert it into the bearing (Pic 3,4,5) moving it up and down as you rotate it back and forth adding more polish as you go. I usually remove it and clean it every 2 minutes and do 3 cycles. Do not use a drill as you can burnish the bearing if you polish to fast and build up heat!! Note: I have a polishing tool I made out of 3/8" dowel that I have used with a fine metal polish if you want to go that route, and I have used sewing machine oil in the bearing as well. Just make sure it has no paraffin in it.Now repeat the earlier process of flushing the bearing well and get all traces of the polish out of the well ALL TRACES! Before we lube the bearing we need to apply a drop of oil to the top and bottom bearings of the motor. I use a needle and put a drop of oil on the tip and insert it under the pulley above the gasket with the motor running so it draws the oil down into the top bearing. Then put drop on the lower part of the motor where the shaft is visible and let the running motor pull the oil into the lower bearing. (Pic 6) Remember there are hot AC wires under the table so take care when performing this part. Unplug the table and apply a drop of oil to the mechanical parts of the cue and speed change/on off switch. Now put approximately 1ml of oil in the bearing well, and coat the spindle of the inner platter. Insert the spindle carefully into the bearing and spin it as it eases down into the bearing. Too much oil is better than too little, but too much will make it difficult for the bearing to seat itself. If you put too much in just remove the inner platter and remove some oil with a q-tip, and wipe up the excess oil from around the bearing. Next reinsert the retainer clip and replace the ground strap and screw. (make sure the retaining clip is not rubbing the collar of the white retainer disc of the inner plater. (pic 1) It's time to button up the bottom plate, as we are done under the hood. Continued.....

Jim
 

Attachments

  • DSCN3206.jpg
    DSCN3206.jpg
    91.7 KB · Views: 231
  • DSCN3205.jpg
    DSCN3205.jpg
    67.6 KB · Views: 250
  • DSCN3202.jpg
    DSCN3202.jpg
    81.4 KB · Views: 251
  • DSCN3203.jpg
    DSCN3203.jpg
    75.2 KB · Views: 218
  • DSCN3204.jpg
    DSCN3204.jpg
    92.9 KB · Views: 250
  • DSCN3208.jpg
    DSCN3208.jpg
    124.2 KB · Views: 240
Last edited:
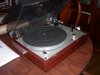
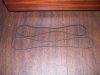
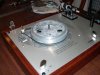
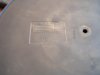
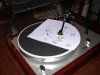
Next take a rag or papertowel and clean the outside surface of the inner platter in case you got some oil on it, and clean the motor pully as well and the mechanism that moves the belt up and down the pully, clean up the top plate and plinth with warm mild soapy water using a damp not wet rag then wipe down with a damp clean rag to remove any residual soap. Time to install the belt with clean hands. Some recommend a bit of talc on the belt, but I have never used it. If you don't think belts stretch over time in (pic 2) is the original belt in front and the new belt behind! Turn the table on to make sure it runs properly (pic 1), and reinstall the outer platter to make sure it is level and you are satisfied with the height, bounce etc. You can use Brasso to clean up the outer rim of the platter, or polish it as pictured (pic 3) There are many threads on how to do this, as well as polishing the dust cover so I will not beat a dead horse. I always use a stethoscope to gauge the decrease in noise level and polishing the bearing will make a huge difference in the noise floor of these tables which vastly improves their performance. Of course you will still need to adjust the VTA and alignment of the cartridge etc. Interesting is the fact that the TD160 Super mat has an alignment grid on the back, and is the only table I have ever seen this on! (pic 4) Feel free to PM me with any questions.

I hope this has been helpful, and allows you to fully enjoy your Thorens table.:thmbsp:
Keep em Spinning,
Jim
 

Attachments

  • DSCN3213.jpg
    DSCN3213.jpg
    69.7 KB · Views: 248
  • DSCN3209.jpg
    DSCN3209.jpg
    145 KB · Views: 192
  • DSCN3210.jpg
    DSCN3210.jpg
    78.7 KB · Views: 197
  • DSCN3212.jpg
    DSCN3212.jpg
    32.9 KB · Views: 238
That alignment grid is a neat touch. Thanks for the detailed article. I've always been curious what makes the TD160 Super so super. Now I know. Looks like much of this could easily be applied to a standard 160 too.
 
That alignment grid is a neat touch. Thanks for the detailed article. I've always been curious what makes the TD160 Super so super. Now I know. Looks like much of this could easily be applied to a standard 160 too.

It can, and I have done it to my modified TD160 and it made a big difference!
Regards,
Jim
 
Finished TD160 Pics

Here are some pics of the refurbed table. Needs a better cartridge, but sounds very good.:music:
Regards,
Jim
 

Attachments

  • DSCN3218.jpg
    DSCN3218.jpg
    94.8 KB · Views: 231
  • DSCN3217.jpg
    DSCN3217.jpg
    86.2 KB · Views: 151
  • DSCN3216.jpg
    DSCN3216.jpg
    97.5 KB · Views: 164
  • DSCN3215.jpg
    DSCN3215.jpg
    74.4 KB · Views: 177
  • DSCN3214.jpg
    DSCN3214.jpg
    59.9 KB · Views: 198
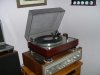
In action in the Vintage rig!
Regards,
Jim
 

Attachments

  • DSCN3219.jpg
    DSCN3219.jpg
    52.8 KB · Views: 107
  • DSCN3220.jpg
    DSCN3220.jpg
    55.2 KB · Views: 96
  • DSCN3221.jpg
    DSCN3221.jpg
    60.2 KB · Views: 111
Last edited:
That was quick Jim. Nice work!

I'm sure you will go with some high compliance MC. I'll be keeping an eye out to see what cart you decide to go with.

Thanks for the pics.
 
Great looking table:yes::thmbsp:, nice write-up also. I'm sure it is very nice sounding...maybe not as nice as your other rigs...but nice.

I'm hoping that you will post about your process of adjusting the springs. I've been reading on Analog Dept. and just don't quite have a feel for it through those directions...seems like there is something missing. I've not attempted it and have two tables, a 165 and 166, that might benefit from it...if done correctly:yes:. Preston
 
Beautiful work Jim. I have a td145 that I plan to put back into rotation and will definitely be following your regimen as a guide. I'd like to add the dampening like your deck has while I'm at it.

Does anyone know what it would take to remove the autolift board from this unit? I am planning on installing a deckplate from a TD160B MKII (no cueing switch hole) and a Linn Basik Plus as part of my refurbishment. I am not sure if I have to connect the leads that go from the speed switch in some way in order to bypass the autolift/auto shutoff board. Must any of the components be retained from this board for proper function?

Here is link showing the inside configuration of the TD145:
http://www.theanalogdept.com/td145.htm

Thanks for any advice,
Brian
 
That was quick Jim. Nice work!

I'm sure you will go with some high compliance MC. I'll be keeping an eye out to see what cart you decide to go with.

Thanks for the pics.

I had thought about the Denon DL301 MkIIor DL304, but I'm not sure of the compliance being high enough.
Regards,
Jim
 
Excellent work! :thmbsp:

Timely for me; I'm considering buying one of these, mostly for the SME tonearm someone put on it, and would plan to refurbish it, even if mostly in anticipation of selling it. This post would help with the restoration. Thanks!
 
Great write up Jim, and a fine looking table! I would like to hear your thoughts on the arm, The MkII and MkIII arms are some of my favorites.
 
Great write up Jim, and a fine looking table! I would like to hear your thoughts on the arm, The MkII and MkIII arms are some of my favorites.

How about some cartridge recommendations? I was drawn to this table due to some experiance with another members TD160 Super, and I always thought the TP16 MkI was underated as well.
Regards,
Jim
 
I used an AT 440 Mla with some success, I now have an AT 14 Sa (with the burgundy stylus), and it absolutely sings with the MkII space cadet arm.
 
That alignment grid is a neat touch. Thanks for the detailed article. I've always been curious what makes the TD160 Super so super. Now I know. Looks like much of this could easily be applied to a standard 160 too.

this is actually the story of the TD-160 Super. The TD-160 was getting modified by the owners and these mods were discussed in the magazines and Thorens decided they could make these changes to the TD-160 and produce a better table. The result was the Super using mods most anyone could add to their 160 in most cases.

Jim did a nice job tuning my Super last spring when he was sorta between tonearms and I'm happy with the results. Thanks, Jim. Seeing my table got him busy modifying his table and searching ebay. He got a nice deal on this one. Hopefully he will find a cartridge that matches well with the arm that has great sound.
 
It just occurred to me, we used a Sumiko Blue Point Evo on Sparksaflyin’s TD-126 with a Mk III arm just like yours, the results were amazing, this seemed to be a match made in Thorens heaven. :thmbsp:
 
It just occurred to me, we used a Sumiko Blue Point Evo on Sparksaflyin’s TD-126 with a Mk III arm just like yours, the results were amazing, this seemed to be a match made in Thorens heaven. :thmbsp:

If that's the case, It might be worth the effort to mount my BlackBird in the TP16 MKIII arm to get a feel for what a Sumiko would do.
Regards,
Jim
 
Back
Top Bottom