• The move to the new server is done. There are some software and database maintenance updates in process. This has us passing the hat around to help out. We appreciate any donations. Seriously, even a dollar helps. The payment page may be found here - https://www.audiokarma.org/support.html

Sibilance and counterweight/tonearm decoupling

I'm not surprised. The mid could come in handy with some carts. But I don't quite see it as better damped than the 309 from the waterfalls.
Overall, no, but the prominent one is still ringing @ 40ms whereas the modified 220 is done by then. I'm not suggesting it's a better sounding arm, not by a long shot. I never judge quality on numbers alone.
 
The important thing to understand about damping is it converts motion into heat. Damping materials are lossy; "pump" them and the temperature increases. Admittedly for our purposes the temperature rise would be undetectable using normal instruments, but it's still there. That's why the Sorbothane works in the "penny" damper system. The arm works against the inertia of the penny, pumping the Sorbothane and turning the unwanted energy into heat. If the support were only a spring, it would be worse than useless.
 
The important thing to understand about damping is it converts motion into heat. Damping materials are lossy; "pump" them and the temperature increases. Admittedly for our purposes the temperature rise would be undetectable using normal instruments, but it's still there. That's why the Sorbothane works in the "penny" damper system. The arm works against the inertia of the penny, pumping the Sorbothane and turning the unwanted energy into heat. If the support were only a spring, it would be worse than useless.
The Rega headshell damper i linked to in post 16 could be rigged with a sorbothane washer. Although it's bolted down, the soft washer still has an audible effect though I don't believe in exactly the same way you describe, mainly because of the bolt short circuiting the washer's damping effect. Still, trials led me to prefer the metal washer against the shell, with the soft washer in between it and another metal washer, what I call a 'cookie' (two crispy wafers with a gooey center lol).

The damper was so effective on the Rega I've been tempted to try it with the Sol...the only thing holding me back is the lack of a hole in a convenient location. If only there was a way to reverse a hole after its drilled lol.
 
Tonearm resonance plots:

Stock RB220 as fit on the latest Planar 2

View attachment 3257772

Modified RB220 as on the Acoustic solid wood

View attachment 3257773

The current RB220 uses polymer bearings. That is, bearings where the steel balls are held by a polymer assembly. Thus the balls contact a self-lubricating polymer compound.

Maybe this gives an extra damping that would explain the very diminished resonances at the middle freqs. It is possible that the "modded RB220" tested above has not just a different counterweight stub, but uses the old metal-on-metal bearings.

So, disclosure: Encouraged by the small reported differences between the resonant profile of the RB330 and RB220, I just bought a Rega Planar 2 today, which has the current (antiskating-equipped) RB220 tonearm, which has the polymer bearings.

I picked the planar from the store and going home I saw the bearings were too stiff, i couldn't zero the tonearm. So I returned the TT to the dealer and picked another brand new, in box, Planar 2. Bearings less stiff but still a little bit stiff (if you zero'd the tonearm and then blew slightly, no deflection was achieved).

I tested at the dealers with some records looking for sibilance or audible problems and there were none, so I brought my brand new Planar 2 home.

Sound, at home, with the silly Rega Carbon cartridge, was pretty good.

Later I loosened the bearings a little bit (The bearings for vertical movement). I could easily achieve 20mg friction (or less) without any play, so I'm happy.

Now, these are IGUS "Xiros" bearings. They use metal balls on a polymer holder. This is a special plastic formulated for the best results. The bearing requires no lubrication, it is self lubricating.

Read all about it:
https://blog.igus.co.uk/turning-tables-with-igus-and-rega/

"The resulting arm features a total of four igus® xiros® bearings, two on its vertical axis and a further two on its horizontal axis; this is perfectly balanced and has no drag. The igus® bearings are low friction, silent, low vibration and is made more prominent when comparing the igus® bearing with its metal counterpart."

And also here:

https://www.eurekamagazine.co.uk/content/technology/in-pursuit-of-perfect-balance

"Because the bearing is softer it has an acceptable friction level – it is not enough to restrict the movement of the arm. Gandy said: “We set the limits of friction as 20mg at the end of the arm and on the lower cost arms we set the limit at 40mg. To put that into context, most arms we examine from other manufacturers at much higher prices are more like 50 – 80mg, and up to 150mg.”"

"The xiros bearings are currently used in Rega’s top two selling turntables the Planar 1 and 2, and are also now being evaluated for use in other tonearms and turntables in the range, although Gandy commented: “Because the material has higher compressibility there is still more potential movement at very microscopic level and at varying frequencies – so we are in that trade off area.”

And also here:

https://www.industrialtechnology.co.uk/polymer-bearings-in-the-groove-of-the-vinyl-revival

"“The plastic bearing doesn’t actually have quite the accuracy of the original bearings, but with plastic there is much more scope for compression,” says Gandy. “Indeed, there is almost ten times the amount of tolerance in the fit. It’s also easier and faster to assemble into the tonearm, so there are lots of advantages.”

"In many other areas, the xiros bearings compare favourably with the original metal ball bearings, particularly in terms of noise, vibration and acoustics, as well as delivering improved precision and better lead times. Gandy also comments that some people have said, subjectively, that the tonearms sound better."
 
Overall, no, but the prominent one is still ringing @ 40ms whereas the modified 220 is done by then. I'm not suggesting it's a better sounding arm, not by a long shot. I never judge quality on numbers alone.

Now I own a RB220 and a RB303 so perhaps some day I can do the test using the exact same cartridge and exact same turntable. But... that would take quite a bit of my time...
 
Thanks for the links! They were an interesting reading with a bit more about the mechanics instead of the common audiophile fluff.

At first glance, this seems like a reasonable alternative compromise on bearings for budget arms; instead of cost cutting in the precision in the parts of the bearing and in the work required for their adjustment, make the bearings with precision cast plastic traces. Cheaper production, easier assembly, and not necessarily worse than sloppily adjusted imprecise steel bearings. For their intended audience, this might well be a better compromise. (Although not a "Rega fan", I fully agree on the idea of everything in turntables being about balancing a myriad of mechanical compromises).

Some questions not touched in the links do stand out, if considering this design for more ambitious use. In no particular order:

I'd love to know which polymer the traces are cast in. "Tribopolymer" looks mostly like a Xiros trademark, seemingly about combining three functions in a bearing, customised for its intended use: "Base-polymers, solid lubricants and reinforcements". https://www.igusab.se/info/linear-guides-dry-tech-tribopolymer. So the particular polymer in the Rega bearings would not be the important factor, but the specific combination of at least three factors.

Replacing steel with plastic traces will necessarily increase the mechanical impedance (with a higher frequency dependence), keeping more of the stylus vibrations with in the arm tube. Alternatively, this could be formulated as: the new bearings will add more of damping to the arm, lessening the requirements for transmission of the vibrations int the plinth. Managing this will require some interesting design choises in the other parts of the arm.

One of my pet themes when discussing tonearms is that a low friction in the bearings is not enough. Another crucial factor is the starting friction ("stiction") in the bearings. This is why we don't oil arm bearings, since the function of oils is to reduce the friction in rotation, which most arms seldom are doing. What arms do is standing still, with small movements back and forth - a situation where most oils instead increase the starting friction. I would guess that a plastic bearing trace would improve the rotation friction, but by allowing for more compression might worsen the start friction. This would be less than ideal with non-flat records, since the inertia in the arm bearings will hamper the movement of the stylus.

The fact that @flavio81 met inconsistent bearings in the arms he tested doesn't fit the the description of the quality of the bearings. The oldest of the links was to a text from 2017 - one could have expected most of the wrinkles to be ironed out by now. How did you adjust the bearings? I thought they were of the closed type that can't be adjusted?

A question to @flavio81, which you don't need to answer if don't want to: how do you measure the bearing friction? When I adjust arm bearings, I use my own variety of a "Linn bearing test": I've made a set of test weights between 0.001 and 0.03 grams. I drop them on the headshell from about 1 cm height, and adjust the bearings for a movement from the lightest possible weight. I've been pretty happy with the results of this method - the fact that the measurements are only relative to the specific situation is no problem for the adjustment job. But it could be nice to also be able to add some sort of absolute friction measurements to my toolbox.
 
Last edited:
The fact that @flavio81 met inconsistent bearings in the arms he tested doesn't fit the the description of the quality of the bearings. The oldest of the links was to a text from 2017 - one could have expected most of the wrinkles to be ironed out by now. How did you adjust the bearings? I thought they were of the closed type that can't be adjusted?

Good questions! The bearings are adjusted because the load that compresses the bearing housing can be adjusted (and should be adjusted at the factory).

You remove the plastic end-side caps by just pulling, this cap:

1721913642141.png

It reveals a big brass screw that can be adjusted with a wide flathead driver.

So, why it wasn't correctly adjusted? The answer is, this is a Soviet Union product made by comrades that need to produce high volume fast.

The difference between "straight from factory" and "perfectly adjusted for Flavio" was about 1/16 of correction (i had to loosen the screw about 1/16 of a turn). So, calibration is very narrow, this is something that needs to be done with time and care. "Time and care" goes against high-volume production.

Now, if you carefully read Roy Gandy's comments on the new polymer bearings, he says something interesting, more or less that they can be compressed more with no problems, and that there's about "10 times" the margin (of compressing just a little more vs destroying the bearing) compared to the conventional bearings. So he's basically acknowledging that this bearing gives more safetly margin for faster assembly.

On the other hand, a bearing that can be compressed a little bit more and still can work right is IMO a Good Thing, because for me, play in the tonearm bearings is worse than a little friction.
A question to @flavio81, which you don't need to answer if don't want to: how do you measure the bearing friction? When I adjust arm bearings, I use my own variety of a "Linn bearing test": I've made a set of test weights between 0.001 and 0.03 grams. I drop them on the headshell from about 1 cm height, and adjust the bearings for a movement from the lightest possible weight. I've been pretty happy with the results of this method - the fact that the measurements are only relative to the specific situation is no problem for the adjustment job. But it could be nice to also be able to add some sort of absolute friction measurements to my toolbox.

Of course I want to answer dear friend.

Me, an unashamed Sony fanboy, I use the Sony method, as detailed for the PUA-7 tonearm:

1721914107462.png

So i cut a paper sheet that weights about 20mg (i have a precision scale and can measure it, too), and follow the above procedure.

It is similar to your method.

And if i'm not mistaken, we're measuring stiction, not just friction (!)
 
Now, if you carefully read Roy Gandy's comments on the new polymer bearings, he says something interesting, more or less that they can be compressed more with no problems, and that there's about "10 times" the margin (of compressing just a little more vs destroying the bearing) compared to the conventional bearings. So he's basically acknowledging that this bearing gives more safetly margin for faster assembly.
Yes, that is how I read it too. Naive as I am, I thought he meant these bearings would be faster to adjust to a reasonable quality, not that they would be installed without any adjustments at all...

Thanks for the PUA-7 reference, didn't know the Linn test had such ancestry. For anybody wondering: Linn resellers at least previously had some plastic reference weights for evaluating whether an arm should be sent to Linn for adjustment of the vertical bearings. A sort of "bearing test for dummies"; if the arm didn't move with one of them it was considered bad. If it did, good. I figured the idea could be put to better use. Their "swing test" was a parallel to this, for the horizontal bearings. Now, that one is just absurd. If possible I prefer the Dual way, of using the anti skating setting for observing the movement of the arm. I'm trying to figure out a method for these tests without any anti skating, possibly using similar test weights, a thin nylon string, and a measuring stand.

And yes, this method at least gives a hint about the stiction in the bearings, since it works by an impact against the arm resting in balance.

I agree with the aversion of play in the bearings. Of course they should be adjusted for the lightest possible test weights without any play. On the other hand, that usually happens by it self while one is at it, since bearings with a play also tend to be less sensitive than when set correctly.
 
Oh, and one correction: Wikipedia has a brief entry for "tribochemical" as "Relating to lubrication by chemical means". So "tribopolymer" would be hip term for the old idea of self-lubricating plastics.
 
I'm just finishing the restoration of the TD124 with an early SME 3012 series 2 with the long rubber back coupling rubber (isolator) i mentioned earlier in this thread

Testing the isolator turned out to be even more interesting than I had expected. I learned that I was half way wrong before.

sme_long_coupling_rubber_pu.jpeg
This is one of mine: a rubber part, with a brass tube insert for added stability, pretty much a copy of the original, apart from the fact that the original was made in some sort of industrial rubber of a kind that can't be produced without having a proper rubber factory.

I was previously thinking aloud about possibly making these isolators in two different hardnesses; one regular, about as what I expect new original ones would have been, and one slightly stiffer, primarily for folks wanting an over all stiffer arm with less damping, and also possibly for arms with extra heavy carts and counterweights.

Me and me wife have just finished a couple of days auditing the three final candidates for these parts. Of the dozen or so variations I started out with, we finally had two in the minimum stiffness to carry the counterweights without sagging, and one a bit harder.

Of the two softer ones, one was in silicone and one in polyurethane, both in nominally the same Shore A hardnesses. The PU part does feel a bit harder and more "plasticky" than the silicone one. The third, hardest, part was cast in a step harder PU than the others, just about as as much as is meaningful with normal tolerances. Not by far as hard as nylon, but a flexible, slightly stiffer kind of rubber.

Perhaps I should also add that when auditing gear, we are not very interested in the standard audiophile stuff. What we listen for is what the musicians are doing; timing, nuances, phrasing, quality of tone, the interplay between the musicians, and such. In our experience any relevant other variables, like linearity, staging, room ambience and such tend to fall in place anyhow if the musical performance is where we want it. We do not care one bit for fluff like warmth, unspecified "musicality" and such. This has the effect that we prefer what that some might consider a "forward" sound. If you prefer a "warm vintage sound", you may not agree with our evaluation.

The first, surprising, result is that I won't be making any harder isolators. The audible result was very disappointing, primarily in a loss of dynamics, most obviously in the smaller details. While losing the attack parts of the dynamics perhaps wasn't much of a surprise, what also happened was that the decay of mostly every tone and percussive beat became considerably faster. Timing was slightly worsened, and together with the micro dynamics we also lost the sense of the room acoustics, and most importantly, got more of a staccato feeling in what every instrument was playing, with less of continuity in the phrasing. These impressions were consistent between the listenings - never was there any doubt on which part was the best or the worst.

With both of the softer isolators everything sounded so much better that there just ain't no point in pursuing the idea of harder ones any further.

With the softer isolators the PU part was audibly better on every record we tested. Most importantly, every instrument was more articulated. I don't know if this is due to the silicone feeling softer, or to some other damping property in the materials.

I had thought out some methods for measuring the damping effect of different isolators, but that also turned out to be pointless; the differences between the parts was too obvious.

We did our tests using an Ortofon OM40 (with a modern Geiger stylus on an old "gold" body) as the modern highish compliance cart, and an Ortofon Kontrapunkt A as the stiffer MC one. The Kontrapunkt isn't ideal on a td124, combining its very strong magnets with a cast iron under platter, but with a bit of tweaking it worked good enough for what is relevant for this test. I wouldn't use that combo permanently, though. Contrary to what some would expect, the OM40 behaved perfectly in this high mass arm.

Although we finally graded the three isolators in the same order with both carts, we think there was an interesting difference between them: With the higher compliance OM40 the difference between two softer parts felt less obvious than the difference against the hardest part. With the Kontrapunkt, the difference between the two softer parts seemed to be larger, but with the harder one still the worst. Possibly the softer silicone was a worse match for the stronger vibrations from the low compliance Kontrapunkt. Since the point of the tests only was to find out the best version there wasn't any point in going deeper into this.

To summarise the results: Nothing surprising to see here. Basically, the SME folks knew what they were doing when choosing the rubber hardness for the original isolators for this particular design. What we of course never will know is how a new original part would compare to the ones I can make, but after hearing the differences between my prototypes we are happy enough with what I've got.

As to other previous themes in this thread: The effect of the isolators in the SME 30xx arms of course doesn't imply any general superiority of a damped back stub design. It only shows that arms in this design are very sensitive for even small differences in the properties of the isolators, with major effects on the sonics of the arm. The difference is large enough to make this fully restored TD-124 with a fully restored 3012 go from "very good" to actually stunning, and I don't think I've ever used that word before on any audio forum. This is a pretty interesting result from a piece of rubber at the wrong end of the arm.

As I've often asked before: Does anybody hereabouts know which SME models or generations did use these long rubber isolators? The one I've worked on is an early series 2, but I've seen other series 1 and 2 ones using the two smaller isolators, which of course are not interchangeable in any way. Even for a British 50-60's design it would seem very strange if the choise of designs would have been totally random. But I've never come across any logical system for these parts.

 
Last edited:
Does anybody hereabouts know which SME models or generations did use these long rubber isolators? The one I've worked on is an early series 2, but I've seen other series 1 and 2 ones using the two smaller isolators,
Firstly thanks for posting your findings with trying various compounds in isolating rear stubs interesting.
Regarding what was used and when my early SME series 1 3012 had what I call a long [subjective] rubber isolator with metal rod.
Ortofons I've worked with including early long mono's and later stereo models varied quite a bit when talking about stub isolation. The later forgoing earlier designs.
The very early long Ortofon is quite similar to the SME series 1 in length and having an internal metal rod approximately the same length and OD.
 
Regarding what was used and when my early SME series 1 3012 had what I call a long [subjective] rubber isolator with metal rod.
Ortofons I've worked with including early long mono's and later stereo models varied quite a bit when talking about stub isolation. The later forgoing earlier designs.
The very early long Ortofon is quite similar to the SME series 1 in length and having an internal metal rod approximately the same length and OD.
My hunch is that the isolator design combining rubber and a brass tube in both SME and Ortofon arms mainly was an inheritance from the heavy 50's cartridges, requiring counterweights in a matching weight. The inner metal tube would have been necessary to carry the weight of those counterweights without sagging.

Chronologically, this would place the design at the series 1 and early series 2, after which the more modern and lighter carts would have allowed for other isolator designs. But I think I've read about some series I arms having the 2-part smaller isolators too. Also, these metal enforced isolators perhaps weren't as necessary in the shorter 3009 arms? I haven't found any SME documentation covering these parts.
 
SME and Ortofon arms mainly was an inheritance from the heavy 50's cartridges, requiring counterweights in a matching weight.

On the topic of large counter weights the above thread shows the Empire 98p 12" arm I came across with a 7.9 oz rear weight might just hold the
record?
 
On the topic of large counter weights the above thread shows the Empire 98p 12" arm I came across with a 7.9 oz rear weight might just hold the
record?
Of course I had to look at it. Neat, and an unexpectedly slick design for a US design from that era. No wonder the idea of damped arm stubs didn't appear until in a later generations of arms
 
Well, this is what I've started making:

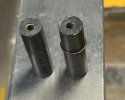
sme_s1_isolator_original-1.0_a.jpeg

The orginal part I've been copying at left, mine at right.

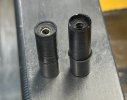
Front end view:
sme_s1_isolator_original-1.0_front.jpeg

And back end:
sme_s1_isolator_original-1.0_back.jpeg

Some observations on the design of these:

The new parts are ca 1 mm longer than the old original. This is intended as a compensation for deformation through the compression I expect the old rubber has gone through, squeezed between the arm tube and the screw for about 60 years. The inner tube length is the same, 24.65 mm (I'll probably make them within 26.6-26.7 mm tolerances in the future). The added lenght is only in the pu rubber, which will be sqeezed in place with the screw.

I could not source a brass tube in the exact dimensions as the originals: It should have had an o.d of 4 mm, and an i.d. of 2.8 mm, but all I could find was in an i.d. of 3.0 mm. This together with the pu being lighter than the original rubber makes the new part 0.4 grams lighter than the original, but since it is placed so close to the bearings this difference shouldn't have much of an effect.

The flange seen at the back end is for isolating the sides of the spacer under the screw from the walls of the stub tube. The length of it is not critical; I'll leave it about as long as the spacer is thick, a bit longer than on the original

I was wrong in an other thread here at AK about one aspect of the original part: the brass insert is actually vulcanised to the rubber, but not along the entire length. This is what it looks like once dissected:

sme_s1_isolator_original_dissected.jpeg

What you see is not a piece of sloppy work, but an intentional design, keeping the insert in place, while still allowing the rubber to glide over the insert when screwed in place, thus expanding radially over a larger area than what would be possible if they were vulcanised over the entire length. This expansion is necessary for preventing the weight of the rider weight from turning the back end downwards. I will not vulcanise or glue the parts together; I think it is more important to allow the rubber to move over the insert than taking the risk of glueing too much of it stuck in place.

This also explains some of the problems with various attempts to make replacement parts in different kinds of plastics: apart from the damping, with a hard material only held in place with a screw at the end it is very difficult to keep the weight of the rider weight in check. That would require very tight tolerances for the diameter, unless you want to take a hammer to your tonearm.

The expansion thing is interesting from another perspective too. In contrast to the later isolator design, with two parts glued in place with cyanoacrylate, this design requires / allows for a bit of tuning by adjusting the tension of the screw. There are easily audible effects to be had from finding the sweet spot.

[Edit]: The rubber of the old part is slightly harder than the new pu; more akin to the harder ones I previously made and dismissed. I can't know how much of this difference is original, or due to different materials, or just old age. All I can do is to make them in the quality sounding the best today.

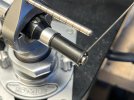
This is how it looks half mounted:
sme_s1_isolator_1.0_halfway.jpeg

And all in place:
sme_s1_isolator_1.0_in_situ.jpeg
 
Last edited:
Back
Top Bottom