• The move to the new server is done. There are some software and database maintenance updates in process. This has us passing the hat around to help out. We appreciate any donations. Seriously, even a dollar helps. The payment page may be found here - https://www.audiokarma.org/support.html

Soundcraftsmen PM860 / PCR800 power-amp restoration

I had a pair of PCR-800s teamed with a Carver C-4000 back in the mid nineties with a pair of Ohm Walsh 2's, and then put them on a set of Infinity RS-IIIa's, that to me in this setup, were loud but this setup was fatiguing, I replaced it with a big silver JVC amp that was a bruiser but much more refined sounding through the Infinities...until one of my dogs got sick and puked in the amp and blew that thing up...soon supplanted by GFA-555II's in mono with Maggie MG-1's I rebuilt, and then to BEL1001's on ML Aerius-i's...it's been onward and upward ever since...

Good to see, though, that these amps are still around, nice to see someone resurrecting them.
 
Haha, dog puked in amp. Haven't heard that one before. That's like the electrical engineering student's version of the dog ate my homework.
 
I've got a PCR-800 that's almost in the redo queue. I like what I'm seeing. Nice work and attention to detail on your posts.
 
I've got a PCR-800 that's almost in the redo queue. I like what I'm seeing. Nice work and attention to detail on your posts.
Thanks. I will keep it coming. I've done a lot of these amps, I should have started this thread sooner.

I would also like to say thanks to AudioKarma. Since the site and server upgrade, it saves me a lot of work not having to reduce size and quality of the photos to fit the old 1MB limit.
 
Last edited:
Haha, dog puked in amp. Haven't heard that one before. That's like the electrical engineering student's version of the dog ate my homework.
Yeah, whattaya gonna do?

According to the local JVC service agent it was a pretty rare amp, I've never seen another one, it was large, silver, and had two big meters on the front, a huge toroid transformer inside,...I just do not recall the model number 30 years later
 
Yeah, whattaya gonna do?

According to the local JVC service agent it was a pretty rare amp, I've never seen another one, it was large, silver, and had two big meters on the front, a huge toroid transformer inside,...I just do not recall the model number 30 years later
Doesn't ring a bell for me, but I'm not real familiar with the JVC line. Big meters always look nice.
 
It may have been an M-7050
Edit:
Just looked at service manual, yep that was the beast.
 
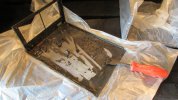
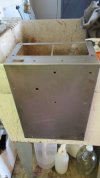
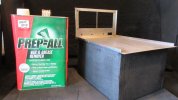
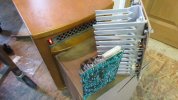
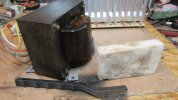
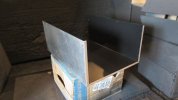
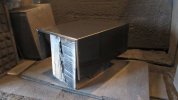
I scraped the paint and then rinsed and sanded the chassis. Degreased it, then tack-cloth was used to remove dust before painting.

IMG_1293.JPGIMG_1294.JPGIMG_1295.JPGIMG_1298.JPGIMG_1312.JPGIMG_1313.JPG
 
Last edited:
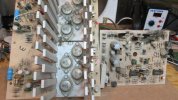
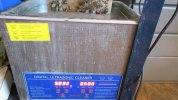
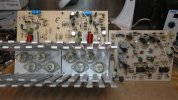
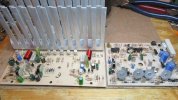
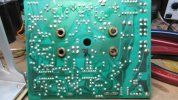
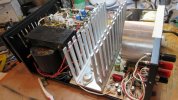
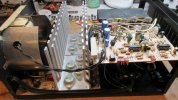
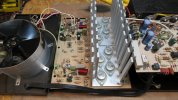
I ultrasonically cleaned the boards and heat-sink. Then dried them with a space heater and lubed the pots. Then replaced all of the SCRs. One was burned, and the others had high gate-cathode voltage of .23-.553V. the new ones are all .07V. I also replaced the burned resistor and all electrolytic capacitors. Also added the copper washers to the power board to space the power caps like was done on the PM860. I still plan to replace the differential transistors and current sources.
IMG_1301.JPGIMG_1304.JPGIMG_1302.JPGIMG_1305.JPGIMG_1306.JPGIMG_1316.JPGIMG_1314.JPG
 
Last edited:
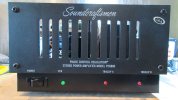
Assembled the amp today and set bias, PCR, and temp voltages. Started it on a 60W dim-bulb across the power switch. Then ran it at full power after it was ok. These early MOSFET amps ran a higher bias than the later amps. These are actually more than double the voltage. And it shows it uses about 10W more line power than the later ones.

I also cleaned and touched up the face-plate and screws.
IMG_1344.JPGIMG_1353.JPGIMG_1352.JPGIMG_1351.JPG
IMG_1341.JPGIMG_1368.JPG
 
Last edited:
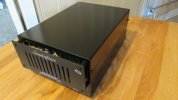
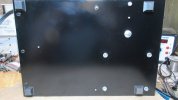
I bought this amp in rough shape as a project to match my other PM860 beater amp. I should have taken before pictures. The inside was coated in heavy dust that was also oily. And all of the black sheet metal parts had the paint pealing off. I opted to fully disassemble the amp. Ultrasonic cleaned everything and stripped the metal parts down and repainted. I installed a handle and additional rubber feet to match the other PM860 I have. Makes them real handy for mobile use.

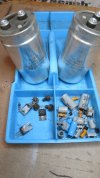
I replaced all electrolytic capacitors and all small signal TO92 transistors throughout. I also installed one of my own input boards that makes it bridgeable and switchable low-pass filter with bass boost for a subwoofer, and a turn-on muting delay. It also got gold RCA inputs to replace the 1/4" phone plugs

After everything was assembled and settings were all adjusted, it was tested on the distortion analyzer. It seemed fine until I approached high power and distortion rose before the rated power. After connecting the oscilloscope to the high voltage transformer connection to the power board, I could see it was only charging the caps on every other phase. I traced this back to a bad solder joint at a diode used to sense that phase. This is why the previous owner installed a 15A fuse instead of the 10A stock. Because these amps have to charge at twice the amperage when it happens half as often, and they blow the fuse. It now has a maximum of .0113% THD at 205W 8 ohm. I also tried bridging to 8 ohm, tests .006% THD up to the 300W my loads could handle. IMD is even lower at .0033%.

Another thing I did on this amp was install a C13 power cord socket. This makes it much easier to work on and gives cord options. This is the second time I have installed a heavier awg power cord. Stock is only 18 awg. The last amp I tried had increased 1% THD clipping limit with a heavier cord. But I didn't test before to verify that was the reason. On this amp I was able to switch between a 10' 14 awg cord and a 6' 18 awg cord. I have 6' 14 awg ordered.

The 14 awg cord powered the 1%THD RMS clipping level all the way to 260W per channel 8 ohm, both driven at 1khz. The 18 awg cord brought it down to 220W per channel. (rated 205W) The cord alone was worth 40W per channel increase in RMS power!

View attachment 2893803
View attachment 2893869
View attachment 2893960

I can't quite make out what you used to replace the big 11,000 ufd capacitors - I see Kemet and 100 volt. I'm having trouble sourcing caps for a PM unit that will fit. Many suppliers list possible capacitors of correct size and lead spacing, but no one has stock and lead times are insane. Thanks
 
Sorry, those will have to remain a trade secret. They are often out of stock and it's no advantage to my business to list those numbers publicly.
 
Very nicely done!! Can you provide the source for the board at the back that you added on and the value on the Kemet main power caps. I have been putting Nichicon 15,000uf /100v in the ones I have recapped. Love these amps. So quiet, warm, powerful and accurate. I use two of them bridged on a set of L200s with an added 2405 tweeter and they sing like angels.
 
Last edited:
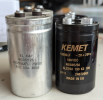
I recapped a PM860 a few months ago. I used Kemet ALS70A series rated for 18k hours at 85C

1733702839179.png

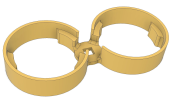
I had to 3D print a spacer to lift the new caps up a bit otherwise the power supply PCB would not clear the transformer windings, and then added a few copper washers to the cap terminals to ensure clearance on the power supply PCB.


1733702956746.png
 
Very nicely done!! Can you provide the source for the board at the back that you added on and the value on the Kemet main power caps. I have been putting Nichicon 15,000uf /100v in the ones I have recapped. Love these amps. So quite, warm, powerful and accurate. I use two of them bridged on a set of L200s with an added 2405 tweeter and they sing like angels.
They Are Great Amplifiers, Currently Starting A Project. It Will Entail A Complete Ground Up Restoration.
All Case Metal Will Be, Sanded To The Metal And Painted In A Custom Color. The Electronics Will Be Carefully Inspected And Service As Needed.
Below Is A Great Video On A Soundcraftsmen 860 Restoration. Tony Is A Great Tech And Passionate About Circuits. Lots Of Great Information.

 
I recapped a PM860 a few months ago. I used Kemet ALS70A series rated for 18k hours at 85C

View attachment 3366170

I had to 3D print a spacer to lift the new caps up a bit otherwise the power supply PCB would not clear the transformer windings, and then added a few copper washers to the cap terminals to ensure clearance on the power supply PCB.


View attachment 3366172
Awesome, Very Creative. Many Of The Restored Amps In My Collection Have 3D Printed Spacers And Support Boards.
 
Awesome, Very Creative. Many Of The Restored Amps In My Collection Have 3D Printed Spacers And Support Boards.
Thanks! I recapped a DX4000 preamp that had missing and cracked pushbuttons. I printed replacements for those, too. I went with colors that were a little more visible than the original black button caps.

dx4000.jpg
 
Back
Top Bottom