• The move to the new server is done. There are some software and database maintenance updates in process. This has us passing the hat around to help out. We appreciate any donations. Seriously, even a dollar helps. The payment page may be found here - https://www.audiokarma.org/support.html

SX-727 No power, keeps blowing fuse

Test it 1st on DBT, WITHOUT THE OUTPUT's. If everything's kosher install the output's, and RE-TEST ON THE DBT. If it goes dim and NO SMOKE then go to wall voltage, recheck offset and bias.

Bias and or offset can drift slightly. Your offset drift is fine, and may even stop with the new trimmers.
 
SHE'S ALIIIIVE!!!!

Before installing the 4 new outputs, I tested on the DBT test first, the bulb went bright and then immediately dim. I did the 6 way test for all four new output transistors and they all passed. Installed 863-MJ21194G in Q14, and Q13,and the MJ21193G in Q16 and in Q15. Bought some acetone and removed the old grease, applied the new grease as advised, there was nothing squeezed out when installing the transistor to the heat sink. I also replaced the burnt resistor for R39 along with R41, R38, and R40 with 279-CFR50J100R 100Ohm 1/2W 1200PPM.

Next I installed the four new trimmers, turned each counterclockwise all the way, 652-3386F-1-222LF 2.3k trimmer installed for VR4 and VR3, and 652-3386F-1-502LF 5k trimmer for VR2 and VR1. Powered up while connecting to the dbt, bulb stayed dim, relay clicked almost immediately, but it didn't go into protection. I tested all four of the old trimmers, and the VR2 was actually shorted.

Connected the receiver to the wall, said a prayer, and fired it up, relay clicked almost immediately it seemed, but lights stayed on, no smoke!

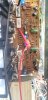
Below are the DC offset and the bias readings that I received, I want to note that the values did not change when adjusting VR2, also for the bias reading, both VR4 and VR3 will not adjust higher than -0.215v for VR4, and 0.086v for VR3, so there is still something wrong, maybe a transistor? I have replacements for all of the transistors on this board.

DMM set to DC Voltage

DC offset
Negative to ground Positive to Pin 1 = Adjusted VR1 to zero, bounces between 0.0v and 0.5v
Negative to ground Positive to Pin 3 = -25.15v, Does not change with adjustment of VR2

Bias
Negative to R43 and positive to R45 = -0.014v Adjusted VR4 to zero as close as possible
Negative to R42 and Positive to R44 = 0.001v Adjusted VR3 to zero as close as possible

So from here, should I replace all of the transistors? I also have a replacement for the diodes on the board as well. I was reading from Markthefixer that it's best to replace all the transistors and diodes when something smokes or gets fried for other threads, thoughts?

Thank you! Even though the receiver isn't fixed yet, it's major progress!!

 

Attachments

  • 20220814_075425.jpg
    20220814_075425.jpg
    77 KB · Views: 10
  • 20220814_075521.jpg
    20220814_075521.jpg
    97.1 KB · Views: 9
  • 20220814_075551.jpg
    20220814_075551.jpg
    77.4 KB · Views: 10
Last edited:
What is unclear for me right now, what parts have you changed on the Power Amp after your post #17?

But most important from my point of view, if you want that someone else reads and understands your post in the future, one needs to know what you are talking about.

So please be more precise and name at least the parts with the correct position from the service manual.
Like if you talk about the trim pots for bias are 2.2k pots (VR3 and VR4). So everyone can find it easier on the SM.

Where did you measure that and what did you measure? At least I have proplems following you.
DC offset
Pin 1 = -0.203
Pin 3 = -25.15

Bias
Left emitter resistor = 0.203
Right emitter resistor = -0.105
 
Last edited:
What is unclear for me right now, what parts have you changed on the Power Amp after your post #17?

But most important from my point of view, if you want that someone else reads and understands your post in the future, one needs to know what you are talking about.

So please be more precise and name at least the parts with the correct position from the service manual.
Like if you talk about the trim pots for bias are 2.2k pots (VR3 and VR4). So everyone can find it easier on the SM.

Where did you measure that and what did you measure? At least I have proplems following you.

You're right my apologies, I edited my post to include the part and it's location on the board, also I re-did my bias and dc offset reading, I was using the wrong trimmer to adjust, and was able to adjust the DC offset and Bias, but not to were they need to be yet.

The only parts that I have changed are now the 4 output transistors, Q16, Q15, Q14, Q13, the four trimmers, VR1, VR2, VR3, and VR4, and the resistors R39, R41, R38, and R40.
 
Last edited:
Where did you get the information from for the DC Offset points?
DC offset
Negative to ground Positive to Pin 1 = Adjusted VR1 to zero, bounces between 0.0v and 0.5v
Negative to ground Positive to Pin 3
 
Where did you get the information from for the DC Offset points?

I was going by this video


But I looked up the post you made

https://audiokarma.org/forums/index...-bias-filter-caps-relay.899681/#post-13426114

And below are the test results.

DMM set to DC Voltage

DC offset
Negative to ground Positive to PIN 5 = -0.001v to -0.003v
Negative to ground Positive to PIN 6 = -26.70v

Bias

Pins 11 and 13 on the left channel = -0.511v
Pins 12 and 14 on the right channel = -0.002v
 
What I have learned from merlynski (R.I.P)

Quote from merlynski.

"Every time you work on the Power Amp and/or the trimmer pots, start first on DBT without the output transistors.
See if the DC offset is adjustable. It should adjust even without the output transistors connected.
Then, make sure the bias pots are set to minimum (0Ω), connect the output transistors and power up on the DBT.
Recheck and set dc offset.
Then, still on the DBT, see if the bias adjustment for one channel causes the bias to increase close to its spec. It may not go that high while on the DBT. You are just checking circuit function adjustability here. You may see the DBT bulb brighten as the bias adjustment test is made, that is normal. Turn it back to minimum."

It personal would always test the bias and DC offset function before installing new outputs.

Let’s wait for @larryderouin reply before you continue.
 
I think I found my culprit or at least progress. I wanted to double check the transistors and the orientation and I discovered that 2SC1124 for Q9 collector PIN was barely hanging on and eventually broke off altogether. I replaced Q9 and Q5 with SC2690AYS, verified the orientation was correct, powered on the receiver connected to the DBT, the bulb went dim and then off, I'm using a 60w bulb btw.

Positive to PIN 6 and negative to ground, set the DMM to dc voltage and set the range to millivolts, which I wasn't doing before, I'm now getting a reading -134mV, and using VR2 I was able to adjust it to zero, which will bounce between 0mV and 4mV. Before installed the SC2690AYS on Q9, PIN 6 was showing -26.70V and I was unable to adjust it, now I can adjust it to zero. I checked the bias and now they VR3 and VR4 can be set to 20mV and they are staying solid, but I turned them back down to 0mV because I haven't tried connecting to the wall to then set the dc offset and bias, it's been a long day and my arms are shot from stripping paint from my mothers living room walls so this will have to be done later this week.

Major progress compared to when I first made this post, I still want to check the rest of the transistors, make sure the orientation is correct and if things are looking good replace the Q4, Q2, Q1, and Q3 with matched KSA992 transistors, because what is in there now is 2sa726.

I learned a lot and I'm very thankful for pa_200 and Larry for taking the time to help out!
 
That’s really some progress :beerchug: and as you should have learned for now, you are the only one sitting in front of the unit and see what’s going on. Everyone else reading your reply has only the information you post here. :idea:

So let’s make a short summary for the last steps.
  • Your replaced only Q9 and Q5 with new SC2690AYS transistors.
  • Checked bias and DC offset with your DMM set to mVolt DC and now you can adjust both channels to the 0mVDC for the bias and 20mVDC for the DC Offset.
  • Is it on DBT or full wall power?

One next point you should think about. The SX-727 is over 45 years old and you work already on the open board, why not replacing the bad old parts with the new and better replacements in pairs.

What about the transistors Q5-Q6 and Q9 to Q12? Since you had 3 bad outputs, these may also have got a hit and I would replaced the rest.

My biggest worry is the SV-3As for D4/D5 - hopefully they haven't been affected.
 
Last edited:
Can you recheck one more point, regarding the replaced transistor you call Q9. If you look on the part side of the AWM-011 with the pins facing to you, which side was the transistor on, left or right?

The reason for my question is, you used pin 6 and VR2 for the adjustment.

The DC offset is adjusted to 0 millivolt with pin 5 to ground for the left side (with VR1 4.7 kOhm Poti), and for the right side pin 6 to ground (with VR2 4.7 kOhm Poti). Both trim potis sit in the middle of the board.

BUT, pin 6 and VR2 are connected to Q10 for the RIGHT side, while pin 5 and VR1 are connected to Q9 for the LEFT side.

Always remember, the AWM-011 board layout show the solder side and not the part side!!
All Pioneer board layouts show only the solder side!
 
You guys are doing fine. Couple of points.
1.) Concur on Q1 thru 4.

2.) Concur on Q5-Q6 and Q9 thru Q12. Do it Right, Do it ONCE!

3.) DC OFFSET! It'll bounce a few mv either way (+ or- ). It's normal. If it bounces 20mv or more, that's not normal.

4.) "Tickling the Dragon". Outputs in on DBT. Adjust BIAS. let it cook for about 5 minutes with meters connected. If it's STABLE, turn the bias down to ZERO. Shut down, disconnect DBT. Fire it back up and adjust the BIAS to Specification, both channels. Let it cook for a couple hours (leave meters connected and monitor them).

5.) on the SV-3A's. DO NOT BEND THE LEADS within 1/4" of the cases!!!!!!! VERY CAREFULLY Unsolder one lead and test as a DIODE. If ok -ReSolder. Extremely fragile. They can be fixed. if you break one contact MARKTHEFIXER (AK member). He can repair it. Otherwise leave them alone.

If everything STABLE, turn it off, disconnect meters, put the cover on and hook it up to your kit.
 
Good Morning!

Just wanted to give an update. I'm not skilled enough to lift the diode of D4 & D5 to test it without breaking it, and since there isn't a replacement of this diode I felt it was best to leave it alone for now. After replacing Q9 and Q5 with SC2690AYS transistor the receiver was able to power on, I was able to set the bias to 20mv and the DC offset to 0.0mV but it kept bouncing from 0.11mV to .05mV to .01mV, etc. I replaced all transistors on the power amplifier AWH-011 with approved replacements as found in Markthefixer BOM list except for Q7 & Q8 2SC984 which are the transistors mounted to the heatsink, and replaced D1, D2 and D3.

Fired up the receiver after replacements connected to the DBT and DC offset is much more solid now, after warm up of 10mins, was able to set the DC offset and it's only bouncing between 0.00mV to 0.05mV! Bias was steady at 20mV while connected to the DBT. Connected straight to the wall and was able to set the DC offset and Bias to the same settings, still has a little bounce in the dc offset but otherwise it's very close to zero. Connected some speakers and I have music! Very excited!

Now that the receiver is back up and running again I resumed my restore, at this point the power supply and protection board capacitors, transistors, and diodes have been replaced with approved replacements. Next I was able to replace all of the capacitors and transistors on the AF Unit AWK 010 and replaced the capacitors and transistors on the head amp unit W21-002. I took my time, I didn't just replaced a bunch of parts and then turned on the received, for each transistor I replaced one, turned on the unit to make sure nothing is broken, double and tripled check orientation of the transistors and polarity of the capacitors. For the blue egg caps they were replaced with WIMA film capacitors. The AF unit AK010 was challenging because it is double soldered but with patience I was able to get each part out with a solder braid, but I will be looking into getting a de-soldering gun.

Put all the boards back and the bottom back onto the receiver, connecting to the dbt, let the receiver warm up for 10 mins, the dc offset slightly drifts off of 0.0mV to 0.01mV but then back to 0.0mV for both channels! Its extremely stable, I took my time in this step as well, and just let it sit as long as an hour for each channel before making adjustments or moving onto the next channel. Next up the bias, and again, rock sold on 20mV! Connected to the wall and same results with the dc offset and bias.

Its now playing music through some crappy speakers I have in the garage and it'll stay out there for a couple of weeks just to make sure that everything is running smoothly and nothing else pops and damages my good speakers inside the house.

pa_200 and larry, your patience and detailed explanations have taught me a lot, I now have a better understanding of how this receiver works and if it breaks a plan of attack to troubleshoot. Even through the crappy speakers outside the SX 727 sounds amazing, Thank you!
 
That’s good news. Many thanks for posting all your the final steps. Will be a big help for everyone having a similar issue.

Don’t worry about your slight dc offset drift, actually it’s a good indication, that both of your SV-3A varistor are working according to the temperature change on the big heat sink.

Before you order one of the desoldering guns, I would advise you to try a heated desoldering pump first.
I have a desoldering gun and burned or lifted to many of the old traces. Now the pump needs a small spare part and I had to use my desoldering pump, big surprise, it worked as good as the pump, sometimes even better and no broken traces like before. Just give the pump sufficient time to heat up and everything is fine.

Look out for one of these first.
https://www.ebay.de/itm/394039792139?hash=item5bbe9a120b:g:Ob4AAOSw261hqNdg&amdata=enc:AQAHAAAA4KPUwMYwFtnNhryXK6gaKXTYd2Nfm1OzPun1MYMWyC8sTJzlgaaWckU342JI7WLRsmbHcTQRD+Q0Q/+VioNumoyj21hbNKOIhPYUuVT8tl3Sg3zbSqhptMqYQUfEwmfIjCOJYaLnA/RZU1KGA+d8c6EKyoaFZ8YQayeiWidYY1GY1rITqcUuuOAZ2U80FMvFEc1WhHaVPwqiHi+/kLACCeKBUEnHEfz5+bx6YUtwbak2VlLtba42hFPoCbiatyIgnJR3PBbTGGZwNq1DRWx4gNVdlKPJ+gStEqnq/eeRAdmQ|tkp:BFBMlsCOkNhg
 
Last edited:
You're welcome! it was quite the journey and it was a lot of fun. I'm very happy with the dc offset, when I was setting it I just kept thinking, I've never seen it this stable!

I will look into desolder pump, thank you!
 
Back
Top Bottom