

You are using an out of date browser. It may not display this or other websites correctly.
You should upgrade or use an alternative browser.
You should upgrade or use an alternative browser.
Taking on the big dog - Recapping my new SX-1980
- Thread starter w1jim
- Start date


The styrene (as well as the various types of ceramic and mylar) caps don't need to be replaced - they generally age well....I also wondered why you chose not to replace the styrene caps with metal film?
We replace the electrolytic caps because they have a fluid in them that dries up over time, generally from heat but also just due to age.
We replace the tantalums because they're crap.
The others don't need to be replaced unless they have a specific problem.
:yes:

That IS the pertinent quote, for sure...
I would add another, less famous but equally relevant quote: "There is no right way to do something stupid..."
John
I would add another, less famous but equally relevant quote: "There is no right way to do something stupid..."
John
I was afraid of this.....
Well, it's his 1980 to wreck.
Like Dirty Harry Callahan said: "A man's got to know his limitations"
Go ahead, replace ALL the TO-3's in the 1980 - THAT's safe enough.....
(there ain't any...)
Advance warning, I charge a HELL of a lot more to UNSCRAMBLE MESSES. Because it TAKES a hell of a lot longer. And it AIN'T a labor of love like a restoration where I end up undervaluing my time, but rather a horror show as I try figure out what's wrong and how to set things right


EPI-Center
Super Member
great work as usual Jim. I'm dying to come over and A/B this with your recapped 1250 or 22000
Installed the LEDs today.
I replaced the speaker and function indicator bulbs with various colored LEDs.
(edit)
At first I didn't realize that these lights were run off of a regulated DC source and I put in a diode - that was in error and I later removed those as unnecessary. All that was required was a 330 ohm resistor to limit the current on each.
Thanks to MTF for pointing out this error in a later post (below).
(end edit)
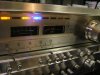
I took each LED and put it on the wire wheel to scuff up the lens to give them a wider dispersion. I simply pressed them in place just like the originals. I was fortunate that the one-piece rubber bulb holder wasn't heat damaged.
Now I have brighter and more colorful indicators.
Pictured is the white LED I used for Phono 2 before completing the heatshrink over the resistor and the blue used for the FM function.


I replaced the speaker and function indicator bulbs with various colored LEDs.
(edit)
At first I didn't realize that these lights were run off of a regulated DC source and I put in a diode - that was in error and I later removed those as unnecessary. All that was required was a 330 ohm resistor to limit the current on each.
Thanks to MTF for pointing out this error in a later post (below).
(end edit)
I took each LED and put it on the wire wheel to scuff up the lens to give them a wider dispersion. I simply pressed them in place just like the originals. I was fortunate that the one-piece rubber bulb holder wasn't heat damaged.
Now I have brighter and more colorful indicators.
Pictured is the white LED I used for Phono 2 before completing the heatshrink over the resistor and the blue used for the FM function.
Attachments

Last edited:
Reassembly. Time to put this bad boy back together.
I took the skinny wooden trim pieces on either side of the front fascia and flipped them over so that the front edge which had some wear is now facing rearward leaving the unmolested surface facing forward.
All knobs were soaked in hot soapy water then cleaned with a toothbrush (don't tell my wife :nono .
.
Next I soaked the entire faceplate in the sink, sprayed with some soap and then used some "soft-scrub" with my fingers to clean off any grime.
Reassembly, as they say, was the reverse of disassembly. And surprise, no extra parts!
Finally, I adjusted the amplifier DC bias and idle current. In retrospect i should have replaced the trim pots with multi turn parts - some things I'll just never learn!
Pictures are of the bottom view, top view and all of the replaced caps. (Except one that rolled under the workshop debris; can you tell which it is?)


I took the skinny wooden trim pieces on either side of the front fascia and flipped them over so that the front edge which had some wear is now facing rearward leaving the unmolested surface facing forward.
All knobs were soaked in hot soapy water then cleaned with a toothbrush (don't tell my wife :nono
.Next I soaked the entire faceplate in the sink, sprayed with some soap and then used some "soft-scrub" with my fingers to clean off any grime.
Reassembly, as they say, was the reverse of disassembly. And surprise, no extra parts!
Finally, I adjusted the amplifier DC bias and idle current. In retrospect i should have replaced the trim pots with multi turn parts - some things I'll just never learn!
Pictures are of the bottom view, top view and all of the replaced caps. (Except one that rolled under the workshop debris; can you tell which it is?)
Attachments


Out of curiosity, what method of solder removal do you use? As solder sucker (what type?) AND OR copper braid?[/QUOTE
I use the $10 one from radio shack and it works very well.

All knobs were soaked in hot soapy water then cleaned with a toothbrush (don't tell my wife ).
You used her toothbrush?

The main illumination lamps (4 x 300mA) are the ONLY lamps run off of AC on the SX-1980.
Your diode and capacitor for the function lamps are hung off the end of a regulated DC voltage, 8V. They accomplish almost nothing other than a current varying voltage drop - somewhat defeating the purpose of the regulator.
You were making modifications and you didn't even CHECK if you were working with an AC or a DC voltage? I cringed when I read that.
:sigh:
I wonder just how many people will blindly copy you?. :tears:
Your diode and capacitor for the function lamps are hung off the end of a regulated DC voltage, 8V. They accomplish almost nothing other than a current varying voltage drop - somewhat defeating the purpose of the regulator.
You were making modifications and you didn't even CHECK if you were working with an AC or a DC voltage? I cringed when I read that.
:sigh:
I wonder just how many people will blindly copy you?.
:tears:
beemer
Vintage Graduate
All I know is it worked when I sold it.  :scratch2:
I'm hoping it works again, however now it's not my doorstop if it doesn't.
Interesting read Jim, I'm waiting for the checkered flag to drop!
There's an old saying: "All electronic components contain smoke, and when you let the smoke out, they don't work anymore".
Best,
Paul
:scratch2:I'm hoping it works again, however now it's not my doorstop if it doesn't.
Interesting read Jim, I'm waiting for the checkered flag to drop!
There's an old saying: "All electronic components contain smoke, and when you let the smoke out, they don't work anymore".
Best,
Paul
Out of curiosity, what method of solder removal do you use? As solder sucker (what type?) AND OR copper braid?
I use a standard solder sucker (with a spring loaded vacuum) and I also have a fancy soldering iron with a built in electric vacuum pump that I'll use in some situations. I never use the braid - it just doesn't work for me.
You're absolutely correct - I spaced on that one.The main illumination lamps (4 x 300mA) are the ONLY lamps run off of AC on the SX-1980.
Your diode and capacitor for the function lamps are hung off the end of a regulated DC voltage, 8V. They accomplish almost nothing other than a current varying voltage drop - somewhat defeating the purpose of the regulator.
You were making modifications and you didn't even CHECK if you were working with an AC or a DC voltage? I cringed when I read that.
I'll remove those components and edit my above text so as to not mislead anyone in the future.
Yes it did, and now it works just as well - maybe even better - and one hopes it will for many years to come. Thanks for hooking me up with this beautiful rig - a pleasure to work with you as always, Paul.All I know is it worked when I sold it.
JimB
Last edited:

That's a fantastic job Jim. Obviously it was the 1980's lucky day when it ended up at your workshop.
Ok now after all that hard work how's it compare to your other monsters?
Ok now after all that hard work how's it compare to your other monsters?
Frenchkris
New Member
Hi there,
Can anyone help me?
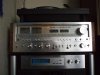
I'm the very very lucky owner of a Pioneer SX 1980 unused for the last 27 years.
It was kept in a relatively dry place. The wood is mint. The top metal cover shows a bit of grim but no rust. I've vacuumed the inside to remove most of the thick fluff mainly on top of the Power trans + caps.
I've cleaned the front plate + knobs. And now it SHINES!...
Because it was unused for so long, should it have some major work done to it?
All circuit boards look new! It's incredible...
Finding this SX 1980 in Europe (England) is very rare, and unused for almost 30 years is unheard of... must be the only one in world.
My god the sound it delivers to my Kef reference Model Three is scary! What a peice of engineering!...
Thank you for any help guys.
Can anyone help me?
I'm the very very lucky owner of a Pioneer SX 1980 unused for the last 27 years.
It was kept in a relatively dry place. The wood is mint. The top metal cover shows a bit of grim but no rust. I've vacuumed the inside to remove most of the thick fluff mainly on top of the Power trans + caps.
I've cleaned the front plate + knobs. And now it SHINES!...
Because it was unused for so long, should it have some major work done to it?
All circuit boards look new! It's incredible...
Finding this SX 1980 in Europe (England) is very rare, and unused for almost 30 years is unheard of... must be the only one in world.
My god the sound it delivers to my Kef reference Model Three is scary! What a peice of engineering!...
Thank you for any help guys.
Attachments


I'd consider confirming that the amplifier idle current and offset are set properly but other then that just use and enjoy it.Can anyone help me?
...should it have some major work done to it?
You can download a service manual from hifiengine.com for the details. If that isn't sufficient for your skill set then I suggest you start up a new thread asking for assistance.
And don't try lifting this by yourself!
JimB
Frenchkris
New Member
Thanx w1jim
Thanx for the reply Mr.
I mean it just sounds amazing the way it is. My ears are trained on Genelec 1025a monitors ($25,000/pair) which are mine so I understand what good sound is, and I'm also a DJ.
This is the most powerful receiver I've own so far, and one of best looking. It looks stunning! It's so imposing... I've been looking at it everyday so far for the last 3 days since I got it...it's almost hypnotizing... especially since it's so rare here and unheard of in this condition. I always wanted one like everyone else but this dream is much further away for Europeans as they never show up for sale except in scams.
The tuner is fantastic. Quartz lock is brilliant. I understand why everyone wants one SX 1980 and everybody should own one!
Lifting it was easier on the first day due to the excitement but my Marantz 2385 + wood case is heavier. I just can't believe it is now under the bed... until I got a proper rack to fit those precious babies. It's proving very tricky to find a rack able to take on the sheer size of my Monsters collection.
Anyway, the first thing I'll look into is : How to clean up knobs + switches to remove the crackles AND the FMstereo imaging disappearing from time to time??
Thanx for the reply Mr.
I mean it just sounds amazing the way it is. My ears are trained on Genelec 1025a monitors ($25,000/pair) which are mine so I understand what good sound is, and I'm also a DJ.
This is the most powerful receiver I've own so far, and one of best looking. It looks stunning! It's so imposing... I've been looking at it everyday so far for the last 3 days since I got it...it's almost hypnotizing... especially since it's so rare here and unheard of in this condition. I always wanted one like everyone else but this dream is much further away for Europeans as they never show up for sale except in scams.
The tuner is fantastic. Quartz lock is brilliant. I understand why everyone wants one SX 1980 and everybody should own one!
Lifting it was easier on the first day due to the excitement but my Marantz 2385 + wood case is heavier. I just can't believe it is now under the bed... until I got a proper rack to fit those precious babies. It's proving very tricky to find a rack able to take on the sheer size of my Monsters collection.
Anyway, the first thing I'll look into is : How to clean up knobs + switches to remove the crackles AND the FMstereo imaging disappearing from time to time??
Frenchkris
New Member
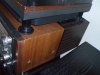

Those side covers look interesting - I've never seen those on units in the states.
To alleviate the noise in the switches and knobs you'll need to use some deoxit to remove the corrosion and then use some faderlube on the pots to keep them from wearing out.
The rocker switches can be sprayed from the front however the pushbuttons and pots will require some disassembly; you'll need to remove the top, face and bottom and then remove the PCBs to access the parts.
First I would just try cycling each of the switches a few hundred times to see if that will clear them up. Hold one of the selectors down while pressing the others (this will keep them from latching).
You want heavy? Try lifting my Sansui G-22000 at 93 pounds.
To alleviate the noise in the switches and knobs you'll need to use some deoxit to remove the corrosion and then use some faderlube on the pots to keep them from wearing out.
The rocker switches can be sprayed from the front however the pushbuttons and pots will require some disassembly; you'll need to remove the top, face and bottom and then remove the PCBs to access the parts.
First I would just try cycling each of the switches a few hundred times to see if that will clear them up. Hold one of the selectors down while pressing the others (this will keep them from latching).
You want heavy? Try lifting my Sansui G-22000 at 93 pounds.