• The move to the new server is done. There are some software and database maintenance updates in process. This has us passing the hat around to help out. We appreciate any donations. Seriously, even a dollar helps. The payment page may be found here - https://www.audiokarma.org/support.html

Technics SU-8077 Rebuild

Wageningen is better than Veendam for me :) Would be nice to meet you!

I think all Japanese trimmer pots from those eras are not particularly good quality wise, but indeed some Technics ones are even a bit more crappy.
Well, they are not expensive to replace, only sourcing them can take some time sometimes.
 
Good, then be prepared! ;)

The problem with the trimpots in my A4 is their position:


You'd want to have them oriented so that you can adjust them with the riser cards in place. If you want to replace them with something better (e.g., Bourns trimming potentiometers), then you'd have to install some nasty jumper wiring.
It seems as if there's no way around this, so I'll do this some time in the near future.
 
Those can't be too hard to replace? Or are they very special in a way I can't see from the picture?
 
No, I guess it should be doable; it's just the pin position which may cause a headache. I'll take the unit apart (for the billionth time) this weekend and replace them altogether. And once I'm at it, I'll also have to replace the meter relay for the SE-A3.
 
Cooll guys, would be nice to meet you here. Although, Canada might be closer by for me...

That depends on where you land in Canada. I googled the drive to Toronto, otherwise known as "The Centre of The Universe." From here Google says it takes 41 hours of driving! 2.5 hours seems like a nice drive. :)

what about Wageningen? I'll have to move there in summer for the PhD

PhD? Wow. I am impressed. Now I feel inadequate with my M.A.Ed. :)
 
Last edited:
The volume potmeter is a pita. It can't be accessed and it can't be taken apart properly.

Everything you mentioned in that list of to-do's for the 8600 seems about right to me, and what I would have expected. But, you say the volume potmeter cannot be accessed. Can it not be replaced at all? I would rather do that if I can. But, I will have a closer look once the amp arrives.
 
I think it will be very difficult or impossible to replace volume pots of the vintage stuff with new. That is because the old pots have a loudness tab, something new pots do not have anymore.

If you deoxit it like I mentioned I think it will be trouble free for a long time and if the treatment needs to be repeated, the holes are already there.

It can be taken apart (not sure though about putting it together again), but I wouldn't advise it, since if something goes wrong with it you'd really be on the lookout for a replacement pot.
 
Jeromach, I have another question for you, unrelated to the Technics amps. While I am waiting for my 8600 to arrive, I thought I would have a look at my Energy EPS-12 Subwoofer in my system. I also purchased it used a couple of years ago, and found that the auto-off function was not working. I have been using it on a power bar in the meantime, but now that I have a little bit of experience, I think I might give it a whirl.

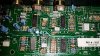
I have looked everywhere for a service manual and could not find one, so I am kind of just going by what I see inside. Good news is that there is not that much in there being a subwoofer. When I opened it up, the first thing I noticed was some hazing on what I think is a semiconductor chip. You can see it in the photo below. The number is LMT324N. It is the bottom left of the four chips.

20170331_184609.jpg

Does this hazing mean this chip is toast? If so, do you recommend a preferred place to purchase these, or does DigiKey and Mouser also stock them?

If I replace one chip, I will do them all, I guess. Also, I will do the caps while I am at it. What about what I think is a film cap in the upper right corner? It is a little blue box. Probably okay to leave? There are also some transistors in the far upper left corner. Should these be done? Thanks!
 
The number is LMT324N.

Correction: It cannot be the same part as the LMT324N. The chip with the hazing has 8 pins on each side instead of 7 that the others have. I assumed (I know, I know...) that since the two chips above were the same that the lower two would also be the same. They are not. I do not know the number and do not have a service manual with a parts list. Any advice here?
 
Well, I'm afraid I can not be of a real help here, since I generally refuse to work on anything newer than 1990. But I can give you some general answers that at least will help you a little bit further.

The haze on the IC is most likely not because it is broken, but because the manufacturer removed the prints on purpose. In that way competition had a lot more trouble copying the design.
IC's rarely brake down, I would not search it in this direction at first instance.

The little blue box I think is indeed a film cap, but since the picture is a little bit small it is hard to tell for sure. The little white boxes are film caps for sure.

As for the auto-off not working, I guess it would be a transistor driven function, so indeed you might check the transistor. But also here goes, transistors do not die easily when not abused, unless it is one of infamous ones that dies all the time.
Does the auto-off also not work when nothing is connected to it?

And then, yes, capacitors are the more usual suspect here, but also - at least for Japanese brands from the mid 80's and up - bad solder connections.
 
The haze on the IC is most likely not because it is broken, but because the manufacturer removed the prints on purpose. In that way competition had a lot more trouble copying the design.

Huh... interesting. I figure you are probably right, because I have another subwoofer that is an exact copy, and functions properly. I opened it up after I asked that question, and that same IC has the same hazing on the top.

The auto off function (on the malfunctioning sub) does not work if there is a cheap signal cable connected to it. Then it seems to recognize RF interference as a "signal" and stays on. When I put on a very high quality cable that is well shielded, it performs better. But, it is still not doing the auto-off function all of the time, but most of the time. I am not sure what happens if I have no cable at all attached.

I think I will try replacing all of the electrolytic caps first, and then see if it functions better. Also look for bad solders, but at first glance they looked pretty good.
 
I am still waiting on the last two capacitors to arrive for my Energy EPS-12 sub. Then I can re-assemble and check to see if the auto-off works better. I am also still waiting on my new-to-me Technics SU-8600 amp to arrive. That should be any day now.

In the meantime, I discovered what a gem of an amp my daughter has! I gave it to her a few years back when I was just beginning all of this fun stuff. I did not know the name well, and gave her a beauty of an amp in the Optonica SM4646, which was Sharp's top of the line amp for 1976/77. (Optonica was to Sharp like Technics was to Panasonic). It is running fine like my Technics SU-8088 was before I restored it, but I am sure nothing has been done to the 4646 over the years, and it is probably ready for a rebuild too. Like my technics amp, the Optonica would surely sound quite a lot better after a re-build.

So, I offered to her that I would rebuild it for her at no cost (fathers do that for their kids). Is there anything that I should look out for on that amp. I have the service manual for it now, and it seems to be pretty straight forward like the work I have already done on the Technics. I see caps to be re-done, and I see double transistors that should be re-done. I will re-do the relay at the same time, and clean all the switches too. Any specific concerns about the internals on the Optonica SM4646?
 
Perhaps you'd better start a new topic on the Optonica. I never worked on one of these and others here on the forum might give you a much better advise on it than I can. Although all those points you mention seem logical to take a look at.
 
My daughter did not bring over the Optonica SM4242 today, so I am starting on the Technics SU8600 rebuild at this time instead. I have created a new forum for this topic here:

http://audiokarma.org/forums/index.php?threads/technics-su-8600-rebuild.766822/

Feel free to come over and check it out!

Ed, it would be great to see your parts list for the 8077 and 8088. I have an 8088 that needs a rebuild. I'd really like to know exactly which parts you used for the main filter caps and also the Bourns replacement VRs. Thanks!
 
Ed, it would be great to see your parts list for the 8077 and 8088. I have an 8088 that needs a rebuild. I'd really like to know exactly which parts you used for the main filter caps and also the Bourns replacement VRs. Thanks!

I am sorry for the late reply, and all reports of my demise are premature! I spent pretty much the entire month of April on the couch nursing a very bad back. Then along came concert season (I am a music teacher) and my May and June were pretty much filled up. Then July hit, and the good weather pushed me outside for a month of gardening (so far). When the rains come again, I will be pushed back inside to continue my electronics hobby! :)

Anyway, I am happy to give you my parts list. First, do you have the owners manuals for those two units? I can give you copies if you need them. I would like to send you my Excel files that I used to keep track of the parts. That way, the links that I put in them will be available for you to copy and paste into your browser. But, this site does not seem to let me upload an Excel file. Can I email them to you directly? I think you will find them very helpful that way.

Ed
 
I'll PM you with my email -- yes, I would like the Excel file.

However, I think it'd be good to post the list here too for anyone else who runs across this thread. You could also share a public Google Sheet if that would be easier.

Thanks Ed!
 
Jeremach, thank you for that excellent info! I appreciate that you have spent some time on this...

I just picked up the SU-8077 today, and it is very clean, and in good working order, albeit original. The man that sold it to me is actually a professional serviceman, and he spent the time to clean it and de-ox the switches and pots, so that is nice. I will hook it up tomorrow, but by the looks of it, it is a clean machine and I did not hear any scratchy noises on dials and things when he played it for me. I will check that out closer, anyway, though.

That is an awesome list above. When I get down to doing those mods, should I go with what is listed in the service manual or what was originally used? From what I have learned elsewhere, raising the voltage of the caps should create no new problems, but could rather avoid problems later on. Is that your take? Thanks.
What current trimmers would be good replacement?
 
Does the amp still work? And if so, is it ok (or having some minor glitches, which mostly is no real issue to fix)?

There are some things that need to be replaced/done without any question;

To start with, a word of warning; be very very careful with the thermal diodes mounted on the two rear power transistors. Do not bend the leads, they tend to break and the part is nearly impossible to replace (the same goes for the SU-8088, but there they are mounted to the heat sink)

The trimmers right in front of the large filter caps need to be replaced (do NOT - I repeat NOT - try to adjust the old ones, this might blow up the power transistors).
The double transistors 2SA798 and 2SC2291 need to be replaced (Q301, 2, 3 and 4) - you need to use two normal transisors per double transistor and match the new ones (when you're there I can explain how to construct them)
Check all solder connections for bad ones, remove the old solder and apply new.
All switches need to be treated with de-oxit. This does not always work satisfactorily, they then need to be taken apart, cleaned and greased (ask for instructions before dismounting them).
The contacts of the relay need to be cleaned or the relay just replaced

As for the electrolytics, using Nichicon gold for all of them, except the large filter caps, will be ok. Panasonic FM will also do the job nicely.
The large filter caps is optionial if they still measure ok, but if you do not have the tools to do so, it is better to just replace them. Panasonic will be fine, but stocks run out or have done so already, since they stopped producing them. Cornell Dubilier also has nice large filter caps. The diameter is important to fit them in the existing brackets, new caps are smaller, but by just taking a cap with a higher voltage it must be possible to get the correct diameter.

Here's a cap list;

znImchC.png


Column 3 and 4 is what is stated in the service manual, column 5 and 6 is what actually came out.

I can't find any info on the value of those trim pots. Not sure what modern Bourns value and type would work there.
 
Back
Top Bottom