

You are using an out of date browser. It may not display this or other websites correctly.
You should upgrade or use an alternative browser.
You should upgrade or use an alternative browser.
Technics SU-V4X, first time restoration
- Thread starter Haverholm
- Start date


Haverholm
Well-Known Member
The answer to both, in all honesty, is none. I'm going into this blank, but willing to learn. (Edit: and to buy the equipment needed, of course)What is your skill level and what test equipment do you have?
I do have the number to a local repairman, and (hopefully) the good sense to realise when I'm in over my head...
Haverholm
Well-Known Member
So front panel switches, back panel ports, or both to be on the safe side?I'd clean the controls. Like the aux/phono/FM switch. Tape monitor too. It might clean up the bad channel.

You can certainly do the simple things like switch and control cleaning which may bring things alive.The answer to both, in all honesty, is none. I'm going into this blank, but willing to learn. (Edit: and to buy the equipment needed, of course)
I do have the number to a local repairman, and (hopefully) the good sense to realise when I'm in over my head...
Good place to start: https://audiokarma.org/forums/index.php?threads/the-idiots-guide-to-using-deoxit-revisited.207005

ElectTech
Active Member
@Haverholm Dumb question ... but I have to ask: Do you have a Dim Bulb Tester (DBT)? Like this one here (this is one that I made a long time ago; it is hideous, but it gets the job done). I know you've already turned on the equipment, but it is for the next time you suspect it may have a short circuit, whether in this project or a future one.
Dim Bulb Tester
Dim Bulb Tester
Haverholm
Well-Known Member
@ElectTech I do not, but I've seen them mentioned several times. You don't primarily make those for their aesthetics, do you? 
I'm hardly turning on the equipment, more like still gathering a list of tools I'll need to do this — so your advice is appreciated!
I'm hardly turning on the equipment, more like still gathering a list of tools I'll need to do this — so your advice is appreciated!

ElectTech
Active Member
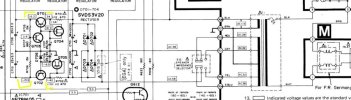
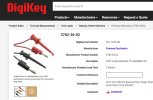
I suggest you obtain the Service Manual and test main voltages, such as the power supply, if not already done. I also suggest you obtain a more than basic multimeter, if not done. It will be a personal preference, but for example a Klein Tools MM325, or similar, should be enough to start with. It is sold here for USD 30.00 at homedepot for reference. Then later buy a 'Banana to Grabber, Hook' as shown below, if needed.
Haverholm
Well-Known Member
Status update
Seems every time I hook this amp up to my source and speakers, something new happens. Since yesterday, frustrated that I'm limited in skills as well as equipment, I set about cleaning the RCA ports with a bit of IPA.
Then I connected my turntable and speakers, with the top off the amp to follow @SVI2004A's advice. But before I could even search for a dry joint, both speakers started playing.
For the past hour I've been trying to assess the sound on each channel. I think there's still a lower signal through the right speaker, with room for improvement but strong enough that I'll count it as basically working.
The right channel seems to drop every now and then, but comes back if I jog the RCAs and/or the loudness button? I'm relieved that at least part of the issue was down to dirty connectors, but also a little disappointed I didn't get to solder anything
Thanks all for your advice, I'm sure we haven't seen the end of this thread yet!
Seems every time I hook this amp up to my source and speakers, something new happens. Since yesterday, frustrated that I'm limited in skills as well as equipment, I set about cleaning the RCA ports with a bit of IPA.
Then I connected my turntable and speakers, with the top off the amp to follow @SVI2004A's advice. But before I could even search for a dry joint, both speakers started playing.
For the past hour I've been trying to assess the sound on each channel. I think there's still a lower signal through the right speaker, with room for improvement but strong enough that I'll count it as basically working.
The right channel seems to drop every now and then, but comes back if I jog the RCAs and/or the loudness button? I'm relieved that at least part of the issue was down to dirty connectors, but also a little disappointed I didn't get to solder anything
Thanks all for your advice, I'm sure we haven't seen the end of this thread yet!
Haverholm
Well-Known Member
My son came out of his room while I was testing, and I explained about the racket.
— HUH?
— I SAID, I'M JUST TESTING THE NEW AMP.
— YEAH, I FIGURED WHEN THE APARTMENT STARTED SHAKING.
I never raised the volume to the 10 o'clock setting. Even coming out of hibernation, this 40 y-o has a kick
— HUH?
— I SAID, I'M JUST TESTING THE NEW AMP.
— YEAH, I FIGURED WHEN THE APARTMENT STARTED SHAKING.
I never raised the volume to the 10 o'clock setting. Even coming out of hibernation, this 40 y-o has a kick

ElectTech
Active Member
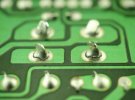
You will probably find, with a magnifying lens, a few cracked solder joints, especially in components that normally work hot. Use a soldering iron at 350C and redo the solder joints. You may have to remove the old solder if needed. If so, you may use solder wick with flux. This guy in this video explains well, in my opinion. I am still not good at soldering and desoldering, but I am still learning too and getting better.
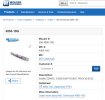
This is a solder that I generally use in this kind of equipment:
Life Changing Tips for Wicking Solder
This is a solder that I generally use in this kind of equipment:
Life Changing Tips for Wicking Solder
Last edited:
ElectTech
Active Member
You're welcome. I hope you enjoy this hobby. I had to slow down mine after a few decades, because I was hoarding too much stuff already, and eventually had to downsize my collection and select the items that I really wanted to keep (not easy). Currently, I do mostly maintenance, repairs and upgrades.
About power amplifier restoration, for this one, and the next ones you will buy ... , you will need dummy loads to connect to the speakers' output to adjust the bias of the output power transistors. This is for Class A and Class AB amplifiers. You should buy two 8 Ohm, 100 W, resistive dummy loads. I suggest you put each in a ceramic mug during the bias adjustment, as they will become very hot. ( Please see the link below from @mrk229 ) Good sources of original/legitimate components are Mouser and DigiKey, as you might already be aware.
Your amplifier uses a 'Power Pack' (integrated circuit) in the output, so this bias process might not be needed, but it is a good idea to have those dummy loads for future projects.
dummy loads
About power amplifier restoration, for this one, and the next ones you will buy ... , you will need dummy loads to connect to the speakers' output to adjust the bias of the output power transistors. This is for Class A and Class AB amplifiers. You should buy two 8 Ohm, 100 W, resistive dummy loads. I suggest you put each in a ceramic mug during the bias adjustment, as they will become very hot. ( Please see the link below from @mrk229 ) Good sources of original/legitimate components are Mouser and DigiKey, as you might already be aware.
Your amplifier uses a 'Power Pack' (integrated circuit) in the output, so this bias process might not be needed, but it is a good idea to have those dummy loads for future projects.
dummy loads

SVI2004A
Synchro Bias
On main board, check for dry joints on pre drive transistors (2 red sections) and current stabilisers (orange area)
Before removing bottom panel, remove screws in green circles.
ElectTech yes, bias in this set is set within power IC… but also influenced by current stabilisers that are controlled by the ICQ controller IC (MN1404STE)
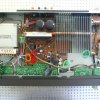
Before removing bottom panel, remove screws in green circles.
ElectTech yes, bias in this set is set within power IC… but also influenced by current stabilisers that are controlled by the ICQ controller IC (MN1404STE)