• The move to the new server is done. There are some software and database maintenance updates in process. This has us passing the hat around to help out. We appreciate any donations. Seriously, even a dollar helps. The payment page may be found here - https://www.audiokarma.org/support.html

The Advent Loudspeaker project

Sorry Old school. :-(

I didn't see that you answered. As for the glue type. I believe it means that it is moister resistant.. not sure though.. you would have to ask Mike. I looked through Threads in German forums and checked what they used/recommended and bought the best, It was not the color of the elmars (light beige) but it worked good for me. But please, ask Mike. I'm sure he will tell you.

I have to send a link that I found from a guy who did his speakers "OUTRAGIOUS" (just for good nature)
 
Visiman,
I did a little research and found this: PVA Glues. Plain old white glue. PVA (Polyvinyl acetates) are probably the most common adhesive on the market.

The speakers this guy created are not something I would have in my home, but you have to admire the craftsmenship.
 
Progress is being made......lol

Well, as many have mentioned, it is not difficult to replace your foams. First time for me and it was a simple operation. As long as you take your time and follow the kit's instructions. I would suggest reading all of the instructions before beginning. If anything, that was the hardest part for me. You want to get started because you are anxious to see the finished product, but you've got to slow yourself down. You may only get one crack at this.

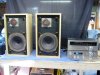
I ordered and received my walnut veneer. Anxious to begin that part of the refurb. The cabinets are all filled where needed and sanded. Ready for the veneer. Yesterday I realized that I hadn't yet heard the speakers. So I mounted the speakers back into the cabinets, hooked up a Pioneer SA-708 I just picked up and made some music. Even without the speaker stuffing, they sounded pretty good. I am quite pleased with my purchase.
 

Attachments

  • 1st_testsmall.JPG
    1st_testsmall.JPG
    125.3 KB · Views: 42
  • glue_foamssmall.JPG
    glue_foamssmall.JPG
    144.7 KB · Views: 43
Howdy Old School!

Looks great! I checked earlier today if you posted. The walnut should look perfect. Also a nice hard veneer. Your two wheeler hasn't made it to my garage? :D I am listening my Advents now. I am satisfied. Tomorrow at work I will look for some new caps. I have sort of slowed down. It must be the lack of SUNLIGHT. Please keep me posted! Or maybe start a New post. You may get more out of it. Without the AK'ers cheering me on It would not have turned out so good.
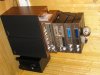
 
Thought that it was time for an update....
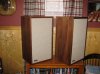
Now that the holidays are over, I was able to break the Advent project out again and begin laying down the veneer. I am very pleased with the result so far. I had never performed this sort of work, so I had no idea what to expect. I stocked up on some Elmer's yellow wood glue, applied it and rolled it out with a small foam roller. Works even better if you add a little water to the glue as recommended to me by the veneer supplier.

Two coats on the speaker cabinet and one on the veneer. Hardest part was waiting for the coats of glue to dry. My veneer is paper-backed so it did not curl up at all. I tore up an old bed sheet, laid the first piece of veneer down on the cabinet, covered it over with the piece of cotton sheet and with the iron set to its highest setting, I began to apply heat slowly. Starting from the center, I worked my way towards the edges. I began by applying light pressure. Then after having gone over the entire surface a few times, I began to increase the pressure. Get the edges real good.

Below are the results so far. I've got both sides veneered and tonight I'll begin the tops and bottoms.

Also picked up some cloth from Ebay. Little pricey, but very high quality and new! I recovered the black material and reused to recover the grills although I have no idea what the need for this layer is. Oh well....If its good enough for Kloss, its good enough for me.
 

Attachments

  • speakers1.JPG
    speakers1.JPG
    104.9 KB · Views: 54
  • vintage2.JPG
    vintage2.JPG
    60.3 KB · Views: 42
Advent speaker project complete

Finished! Very pleased with the results of my first veneer job. They sound so good too!
 

Attachments

  • almost done.jpg
    almost done.jpg
    75.9 KB · Views: 42
  • finished1.jpg
    finished1.jpg
    62.8 KB · Views: 51
Hey Old School!!

Haven't heard from you in a while!!! :yes:

They look great! I can bet you are happy. They look 1000 % better.
What type of veneer did you use? and how did you stain it?

It looks to me like cherry
 
Well, as many have mentioned, it is not difficult to replace your foams. First time for me and it was a simple operation. As long as you take your time and follow the kit's instructions. I would suggest reading all of the instructions before beginning. If anything, that was the hardest part for me. You want to get started because you are anxious to see the finished product, but you've got to slow yourself down. You may only get one crack at this.....
QUOTE]

Is it an optical illusion or do I see the foam installed with the roll positioned convex instead of concave?
 
Hey Visiman,
Happy New Year!
Thanks. I am very pleased with the results. The veneer is a walnut veneer I bought from a company in the mid-west. It is paper-backed and it went on very easily. I was so impressed with the ironing method. I had never heard of that before. Works like a charm.
For a finish I used Watco natural oil finish. Three coats. Then after waiting the required amount of time, I applied two coats of minwax satin polyurethane finish. Sanding lightly between the first and second coat.
I found the material for the grills on Ebay. Cost me about $50.00, but it looks and feels like the original stuff.
Got a bunch of the veneer left over, so I'm looking for another project maybe.
 

Attachments

  • from this.jpg
    from this.jpg
    62.9 KB · Views: 17
  • to this.jpg
    to this.jpg
    60.4 KB · Views: 37
Well, as many have mentioned, it is not difficult to replace your foams. First time for me and it was a simple operation. As long as you take your time and follow the kit's instructions. I would suggest reading all of the instructions before beginning. If anything, that was the hardest part for me. You want to get started because you are anxious to see the finished product, but you've got to slow yourself down. You may only get one crack at this.....
QUOTE]

Is it an optical illusion or do I see the foam installed with the roll positioned convex instead of concave?

You are absolutely right! Man, how did I miss that one? Oh well, they sound great. Guess I'll order me another set of foams.....LOL
Guess if you're gonna make a mistake, better make it a good one, but one you can remedy rather easily eh? Like this hasn't happened to anyone before......right? LOL. Live and learn.
 
Again, great to hear from you Old School, and keep in touch. And let us know about your next project!

The bicycle in your garage? I havn't recieved it yet in the mail!!!! :D
 
Park this in the "For What It's Worth" or "Nice to Know" folder.
Just got off the telephone with tech support at Simply Speakers. Explained my dilemma about having placed the foams, upside down, if you will. Gentleman there informed me that the Advents with the masonite rings are one of the very few speakers which have the foam loop facing down into the speaker cabinet. A one in a thousand he remarked. He added that if the foams are not being compressed or misshapen in any way by the grill, the cabinet or anything else, then they will present no problems to the sound quality or the life expectancy of the new foams. As part of my project, I did want the grills to come up flush with the cabinet face, so I added about 1/8" spacers under the velcro, which I also replaced. Guess I lucked out, but even without the spacers I think there was enough room between the speaker and the grill. Those little blocks of wood with velcro on them are what? about an inch high?
Whew!
 
Park this in the "For What It's Worth" or "Nice to Know" folder.
Just got off the telephone with tech support at Simply Speakers. Explained my dilemma about having placed the foams, upside down, if you will. Gentleman there informed me that the Advents with the masonite rings are one of the very few speakers which have the foam loop facing down into the speaker cabinet. A one in a thousand he remarked. He added that if the foams are not being compressed or misshapen in any way by the grill, the cabinet or anything else, then they will present no problems to the sound quality or the life expectancy of the new foams. As part of my project, I did want the grills to come up flush with the cabinet face, so I added about 1/8" spacers under the velcro, which I also replaced. Guess I lucked out, but even without the spacers I think there was enough room between the speaker and the grill. Those little blocks of wood with velcro on them are what? about an inch high?
Whew!

Beautiful job, Old School!! My W-60 Wharfedales have the rubber surround loop facing inward as well..

I "did" the veneer on my Advents the easy was....found a great looking pair of 5012/W's on E-bay :thmbsp:
 
I'm thinking of reveneering my Klipsch Forte's. What prep work do you do with old surface? And how did you make all your cut edges look soo good?
 
I'm thinking of reveneering my Klipsch Forte's. What prep work do you do with old surface? And how did you make all your cut edges look soo good?

Shacky,
My Advents had a vinyl veneer which was in terrible shape when I first purchased these. Using an old iron made removing this material so much easier. Your Klipsch do not have this type of material, so no worries there.
Guess your prep work will depend upon the condition of the current surface. Will you have to remove or repair the existing veneer before applying the new? Or, will simply sanding the old veneer be sufficient? You will have to decide.
Bottom line is you want a good clean surface for the glue to adhere to.

Once I had all of the vinyl veneer off, I sanded (using an electric sander to make it easier and faster) using 100 grit. Any chips or gouges I filled with a good carpentry filler and sanded. Then I wiped it all down with lacquer thinner.

I used a paper-backed walnut veneer which was very easy to work with and to cut using a carpenter's utility knife. The knife that uses razor blades. Cut all your pieces slightly over sized so you have some wiggle room and then once glued, trim the edges flush. I didn't trim right to the surface edge choosing instead to finishing the edge by sanding with 200 grit sandpaper.

Print yourself out a copy of the instructions for applying the veneer from the thread
http://www.audiokarma.org/forums/showthread.php?t=190371

Good luck. Take your time and you will find this a very rewarding project.
 
Back
Top Bottom