

You are using an out of date browser. It may not display this or other websites correctly.
You should upgrade or use an alternative browser.
You should upgrade or use an alternative browser.
The Advent Loudspeaker project
- Thread starter visiman
- Start date

Machineghost
Ghost in the machine
Bravo - great restoration you are doing there!!!

Old School
New Member
Visiman,
You had mentioned in an earlier post that you were going to rebuild or replace your cross over network. Is this a mandatory step in the refurbishing process? I haven't yet taken the drivers out of the cabinets so I have no idea what will greet me when I do. I have received my new refoam kit and would like to try and get one speaker done this weekend.
To all.....
Is there a test one can perform to check the crossover curcuitry? Is it even necessarry? Speakers played fine before being placed in storage.....a number of years ago.


visiman
Avatar under construction
You had mentioned in an earlier post that you were going to rebuild or replace your cross over network.
No I havn't changed the cross over and it may be a while till I do. My vacation is over an I have to go back to work on monday uke: And good luck on your refoam!!
@saltwater
The Rings are just glued zo the chassis wich is a pretty good glue at that!
No I havn't changed the cross over and it may be a while till I do. My vacation is over an I have to go back to work on monday
uke: And good luck on your refoam!!@saltwater
The Rings are just glued zo the chassis wich is a pretty good glue at that!
visiman
Avatar under construction
I've been checking into "waveguiding" the advents over here in Germany.
Really s*cks! I can't do it for under 400€ (about 500$)
unless I take some "off the wall" brands. I think I am going to sit and waite on this untill the right time comes (or the speakers are at the home of the original owner)
Really s*cks! I can't do it for under 400€ (about 500$)
unless I take some "off the wall" brands. I think I am going to sit and waite on this untill the right time comes (or the speakers are at the home of the original owner)

Harvey/ Ga
Super Member
Visiman,
You had mentioned in an earlier post that you were going to rebuild or replace your cross over network. Is this a mandatory step in the refurbishing process? I haven't yet taken the drivers out of the cabinets so I have no idea what will greet me when I do. I have received my new refoam kit and would like to try and get one speaker done this weekend.
To all.....
Is there a test one can perform to check the crossover curcuitry? Is it even necessarry? Speakers played fine before being placed in storage.....a number of years ago.
Depends on the age of your Advents. My 5012's ( 1981 vintage) came re-foamed and re-capped...they sound GREAT!! I re-capped my W-60E's, (1960's) and that made a great difference. Both have inexpensive Dayton 5% poly caps.
Re-foam the speakers, then do the caps one at a time. Let them break in for 24-48 hrs, and I'll bet you'll notice a difference.
Old School
New Member
Thanks Harvey/Ga,
I may do just that. Fortunately there is a shop in town owned by a real vintage sound system guru guy. He repairs all manner of equipment. He's in the process of going through one of my cassette decks as we speak. Pioneer CT F750. When I told him what I paid for the Advents, he immediately made me an offer for them. Anyway, point is that I'm comfortable in knowing that I'd have a good source for parts as well as knowledge and expertise at my disposal should I need it. Always love to come here and read what others are doing though. I'm a very much prefer to do it myself type of guy....but, I know my limits too. That's the hardest lesson to learn......lol
I may do just that. Fortunately there is a shop in town owned by a real vintage sound system guru guy. He repairs all manner of equipment. He's in the process of going through one of my cassette decks as we speak. Pioneer CT F750. When I told him what I paid for the Advents, he immediately made me an offer for them. Anyway, point is that I'm comfortable in knowing that I'd have a good source for parts as well as knowledge and expertise at my disposal should I need it. Always love to come here and read what others are doing though. I'm a very much prefer to do it myself type of guy....but, I know my limits too. That's the hardest lesson to learn......lol

legalalien
Well-Known Member
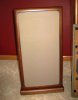
Visiman definitely get them off the floor but not too high, here's a pic of my setup. My babies sit on Mapleshade platforms and the speakers are coupled to the platforms with Blu-Tak (I didn't want to drill holes in my gorgeous Advents). The platforms are spiked to the floor with the front spikes about 3/8" taller for a slight tilt back. This setup REALLY improved the sound of the Advents, the bass tightened considerably and the imaging also improved and I think the overall clarity improved too.
Attachments
visiman
Avatar under construction
@legalalien
I am waiting, and the spikes should have came buy now. Maybe today! After I get them and check them out I'll send the latest pics. But I am working on the grill cover holders.
The spikes I ordered are with an adhesive. Are ones that screw on better? I also read that in some cases (because of spike quality) using three a better isolation is obtained?

shacky
Addicted Member
@legalalien
The spikes I ordered are with an adhesive. Are ones that screw on better? I also read that in some cases (because of spike quality) using three a better isolation is obtained?
My theory is that 3 do the following:
- Dividing total weight by 3 makes it effectively "heavier" that divided by 4.
- A tripod is stable even with floor irregularities. While 4 need more leveling.
Old School
New Member
Visiman,
What did you use for cloth for your speaker grills? I've been looking around for some coarse weave material, similar to the original, but no luck thus far. I haven't made a trip to Joanne's fabric shop as mentioned in a previous post, but will soon. The black fabric that you used, coupled with the lite finish, look very nice.
What did you use for cloth for your speaker grills? I've been looking around for some coarse weave material, similar to the original, but no luck thus far. I haven't made a trip to Joanne's fabric shop as mentioned in a previous post, but will soon. The black fabric that you used, coupled with the lite finish, look very nice.
visiman
Avatar under construction
@Old school
Nice to hear from you. Actually my second (middle/sandwich) son bought the fabrik for his speakers, and I used what I needed and hope that I will have enough left over for his I don't know wherre he bought it, I do know that he paid too much!! (good for me) I have to get a few pictures together and I willl post them within an hour.
Nice to hear from you. Actually my second (middle/sandwich) son bought the fabrik for his speakers, and I used what I needed and hope that I will have enough left over for his
I don't know wherre he bought it, I do know that he paid too much!! (good for me) I have to get a few pictures together and I willl post them within an hour.
visiman
Avatar under construction
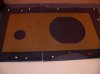
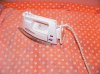
I didn't take as many pictures as I thought but,.. I had new fronts cut out with 4mm pressedwood (same thickness as the orig.) Glued the front side and let it dry set and placed a fabrik net (for the first layer) and ironed it on to re-actuate the glue. and then reglued the edges. and the final cover is fastened with a double sided band ( super stuff I just don't know who the maker is (sort of got it from w***K) It should hold for many years to come. If I try to remove the fabrik it tears (so I am sure of the hold)
Two weeks of vacation for the complete refurb on the speakers and I was finished (except for the speaker grill holders) I will take pictures and post them. I have quite a few more pictures that I did not post because of space, but if you are interested just ask!
To all AK'ers....... I have the chance of having the same alluminum rings made in a somewhat larger quantity (maybe 20...10pairs) so if anyone is interested let me know. Cost is just the shipping from Germany. Or maybe I can send them all to an AK administrator and let him do the rest? It would be nice to hear what others think of the chassis mod.
Attachments


Old School
New Member
Visiman,
This past weekend I was able to remove the vinyl on one speaker quite easily. Took some time of course, but the material came off okay. I started the second speaker last night and found this one to be quite stubborn. This one will take some time and patience I think.
I went back to look at all of your posts on pages 1,2 & 3 and did not find any mention of how you accomplished this task. Can you offer any advice on how to simplify this process? Heat perhaps? (that was my wife's suggestions)
Anyway, appreciate any pointers you might share. Gruss.
UPDATE 11/11/2009
My wife suggested I try using some heat. So, I plugged in the iron, same one I use for my shirts. Grabbed an old piece of cotton cloth. Laid the cloth between the vinyl material and the iron and heated a small section. This process made the removal of the vinyl a whole lot easier. I knocked out the second speaker tonight in half the time. Now to sand and select my veneer. Incidently, If anyone is interested in a great place to buy veneer, try this place: http://www.oakwoodveneer.com/
Last edited:
visiman
Avatar under construction
@Old School
I missed posting a few pictures and text. But yes, with a cloths iron and a cotten cloth heating it up makes a worl of difference. I'm sure that is what you noticed. it also leaves the surface smoother. Got any pictures. I am still waiting on parts to finish mine.!
I missed posting a few pictures and text. But yes, with a cloths iron and a cotten cloth heating it up makes a worl of difference. I'm sure that is what you noticed. it also leaves the surface smoother. Got any pictures. I am still waiting on parts to finish mine.!
Old School
New Member
Let the Project Begin.....
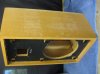
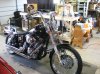
Here are a few pix. Please forgive the clutter in my workshop.....lol
I now have both cabinets stripped and will probably do a bit of sanding and patching on them this weekend. At minimum, I hope to refoam the speakers this weekend and order my veneer. I'm thinking walnut or oak.
One thing I could use some help with is I would like to re-create the documents one would normally find stapled on the backs of these speakers. One is a warranty card with serial number, which I've got. The other is an information sheet. One is completely missing and the other was torn in half. I'd like to recreate these documents as part of my refurbish project. Anal I know......
Also, one of my speakers has a brownish finish on the back of one of the cabinets. The other is stained particle board. Its original, but appears to have left the factory without it's brownish finish. Almost looks like a flat brown paint. What do you folks who have these speakers have on the backs of your speakers?
Thank you and I'll post more pictures as the job progresses. Hope I can do as nice a job on mine as Visiman did on his. Just awesome! I keep going back and looking at the pix.......lol
Attachments

visiman
Avatar under construction
Hi, Old school
I'f I lived closer I would love to come over and help!
Looks great so far, and what do you mean about the clutter? If you want to clean up I'll take the O'l two wheeler and you'll have more room! Keep up the good work!
I just posted a "thank you" to Mike where I got all the info from (Also was noted in the thread earlier on) ; http://www.audiokarma.org/forums/showthread.php?t=190371
wich guided me through the whole job.

MikeCh
Super Member
And I shown the speakers to the veneer supplier today (to save face) And after I pulled one out of the cardboard box and , well.... A few seconds of pause..... and then " It really did work" (the ironing on of the veneer)
Another in the office ran his fingers over the corners and looked them over front and back. And then a third walked into the office, seen the speaker that the other two wher looking at, looked at it too, and then the boss said
"He did that with a cloths iron!"..
Great workmanship here visiman!
Shocking that the fellows at the veneer shop didn't know about the old-school method of veneering with PVA glue and heat....
Mike
Old School
New Member
Visiman,
I know what you mean. I printed out Mike's instructions and will follow them.
This past weekend, I was able to refoam the woofers. My first time ever doing this sort of thing. Went very nicely. Just took my time and continually tested to make sure the voice coils remained centered. I also spent some time patching and sanding the boxes. I'm now ready for the arrival of the veneer I ordered last week.